
手把手實作微信風格小視頻:錄製、裁剪與流暢預覽
前言
專案需要在聊天模組裡加入類似微信的短視頻功能。這個需求表面簡單,實際做下去會遇到兩個硬骨頭:視頻裁剪與滾動預覽的卡頓。本文記錄當時的實作思路與踩過的坑。
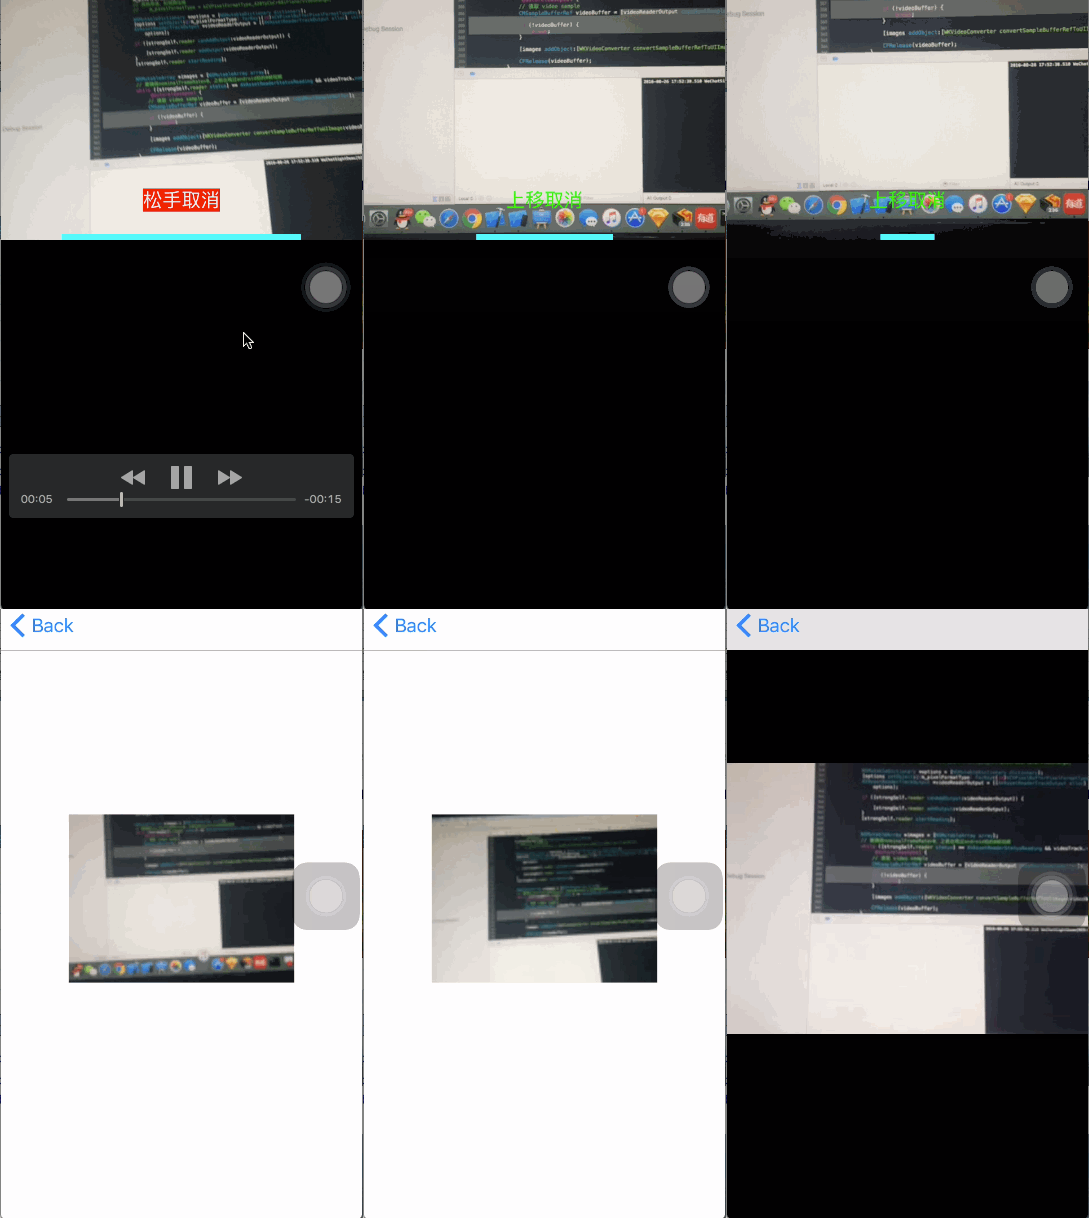
問題清單
- 視頻裁剪:微信的小視頻只取攝像頭畫面的一部分,需要自訂輸出尺寸。
- 滾動卡頓:用 AVPlayer 播放時,在列表滾動過程中會明顯掉幀。
Part 1:視頻錄製
1. 錄製類 WKMovieRecorder
把錄製職責獨立成一個類,並定義好回呼 block:
@interface WKMovieRecorder : NSObject

+ (WKMovieRecorder *)sharedRecorder;
- (instancetype)initWithMaxDuration:(NSTimeInterval)duration;

/** 錄製結束 */
typedef void (^FinishRecordingBlock)(NSDictionary *info, WKRecorderFinishedReason finishReason);
/** 焦點改變 */
typedef void (^FocusAreaDidChanged)();
/** 權限驗證結果 */
typedef void (^AuthorizationResult)(BOOL success);

@property (nonatomic, copy) FinishRecordingBlock finishBlock;
@property (nonatomic, copy) FocusAreaDidChanged focusAreaDidChangedBlock;
@property (nonatomic, copy) AuthorizationResult authorizationResultBlock;

/** 輸出路徑的裁剪尺寸 */
@property (nonatomic, assign) CGSize cropSize;
@end
2. 內部屬性與初始設定
@interface WKMovieRecorder () <
    AVCaptureVideoDataOutputSampleBufferDelegate,
    AVCaptureAudioDataOutputSampleBufferDelegate,
    WKMovieWriterDelegate>
{
    AVCaptureSession *_session;
    AVCaptureVideoPreviewLayer *_preview;
    WKMovieWriter *_writer;
    BOOL _isCapturing;
    BOOL _isPaused;
    BOOL _discont;
    int _currentFile;
    CMTime _timeOffset;
    CMTime _lastVideo;
    CMTime _lastAudio;
    NSTimeInterval _maxDuration;
}

@property (nonatomic, strong) dispatch_queue_t sessionQueue;
@property (nonatomic, strong) dispatch_queue_t videoDataOutputQueue;
@property (nonatomic, strong) AVCaptureSession *session;
@property (nonatomic, strong) AVCaptureDevice *captureDevice;
@property (nonatomic, strong) AVCaptureDeviceInput *videoDeviceInput;
@property (nonatomic, strong) AVCaptureStillImageOutput *stillImageOutput;
@property (nonatomic, strong) AVCaptureConnection *videoConnection;
@property (nonatomic, strong) AVCaptureConnection *audioConnection;
@property (nonatomic, strong) NSDictionary *videoCompressionSettings;
@property (nonatomic, strong) NSDictionary *audioCompressionSettings;
@property (nonatomic, strong) AVAssetWriterInputPixelBufferAdaptor *adaptor;
@property (nonatomic, strong) AVCaptureVideoDataOutput *videoDataOutput;
@property (nonatomic, strong) NSMutableArray *frames;
@property (nonatomic, assign) CaptureAVSetupResult result;
@property (atomic, readwrite) BOOL isCapturing;
@property (atomic, readwrite) BOOL isPaused;
@property (nonatomic, strong) NSTimer *durationTimer;
@property (nonatomic, assign) WKRecorderFinishedReason finishReason;
@end
+ (WKMovieRecorder *)sharedRecorder {
    static WKMovieRecorder *recorder;
    static dispatch_once_t onceToken;
    dispatch_once(&onceToken, ^{
        recorder = [[WKMovieRecorder alloc] initWithMaxDuration:CGFLOAT_MAX];
    });
    return recorder;
}

- (instancetype)initWithMaxDuration:(NSTimeInterval)duration {
    if (self = [self init]) {
        _maxDuration = duration;
        _duration = 0.f;
    }
    return self;
}

- (instancetype)init {
    self = [super init];
    if (self) {
        _maxDuration = CGFLOAT_MAX;
        _duration = 0.f;
        _sessionQueue = dispatch_queue_create("wukong.movieRecorder.queue", DISPATCH_QUEUE_SERIAL);
        _videoDataOutputQueue = dispatch_queue_create("wukong.movieRecorder.video", DISPATCH_QUEUE_SERIAL);
        dispatch_set_target_queue(_videoDataOutputQueue,
            dispatch_get_global_queue(DISPATCH_QUEUE_PRIORITY_HIGH, 0));
    }
    return self;
}
3. 初始化流程
(1)建立 session。
self.session = [[AVCaptureSession alloc] init];
self.result = CaptureAVSetupResultSuccess;
(2)權限檢查。
switch ([AVCaptureDevice authorizationStatusForMediaType:AVMediaTypeVideo]) {
    case AVAuthorizationStatusNotDetermined: {
        [AVCaptureDevice requestAccessForMediaType:AVMediaTypeVideo
                                 completionHandler:^(BOOL granted) {
            if (granted) self.result = CaptureAVSetupResultSuccess;
        }];
        break;
    }
    case AVAuthorizationStatusAuthorized:
        break;
    default:
        self.result = CaptureAVSetupResultCameraNotAuthorized;
}

if (self.result != CaptureAVSetupResultSuccess) {
    if (self.authorizationResultBlock) self.authorizationResultBlock(NO);
    return;
}
(3)session 配置。這裡有個關鍵:AVCaptureSession 的 begin/commit 配置不可在主線程執行,必須放到自己建立的串行佇列上,官方文件對此有明確警告。
輸入裝置與輸入流:
AVCaptureDevice *captureDevice = [[self class] deviceWithMediaType:AVMediaTypeVideo
                                               preferringPosition:AVCaptureDevicePositionBack];
_captureDevice = captureDevice;
NSError *error = nil;
_videoDeviceInput = [[AVCaptureDeviceInput alloc] initWithDevice:captureDevice error:&error];
if (!_videoDeviceInput) NSLog(@"未找到設備");
幀率設定(兼顧舊機型的效能):
int frameRate;
if ([NSProcessInfo processInfo].processorCount == 1) {
    // 單核設備(如 iPhone 4)降規
    if ([self.session canSetSessionPreset:AVCaptureSessionPresetLow])
        [self.session setSessionPreset:AVCaptureSessionPresetLow];
    frameRate = 10;
} else {
    if ([self.session canSetSessionPreset:AVCaptureSessionPreset640x480])
        [self.session setSessionPreset:AVCaptureSessionPreset640x480];
    frameRate = 30;
}
CMTime frameDuration = CMTimeMake(1, frameRate);
if ([_captureDevice lockForConfiguration:&error]) {
    _captureDevice.activeVideoMaxFrameDuration = frameDuration;
    _captureDevice.activeVideoMinFrameDuration = frameDuration;
    [_captureDevice unlockForConfiguration];
} else {
    NSLog(@"videoDevice lockForConfiguration returned error %@", error);
}
視頻輸出(務必設定 connection 方向,裝置旋轉時畫面才會正確):
if ([self.session canAddInput:_videoDeviceInput]) {
    [self.session addInput:_videoDeviceInput];
    self.videoDeviceInput = _videoDeviceInput;

    [self.session removeOutput:_videoDataOutput];
    AVCaptureVideoDataOutput *videoOutput = [[AVCaptureVideoDataOutput alloc] init];
    _videoDataOutput = videoOutput;
    videoOutput.videoSettings = @{ (id)kCVPixelBufferPixelFormatTypeKey : @(kCVPixelFormatType_32BGRA) };
    [videoOutput setSampleBufferDelegate:self queue:_videoDataOutputQueue];
    videoOutput.alwaysDiscardsLateVideoFrames = NO;

    if ([_session canAddOutput:videoOutput]) {
        [_session addOutput:videoOutput];
        [_captureDevice addObserver:self forKeyPath:@"adjustingFocus"
                            options:NSKeyValueObservingOptionNew context:FocusAreaChangedContext];
        _videoConnection = [videoOutput connectionWithMediaType:AVMediaTypeVideo];
        if (_videoConnection.isVideoStabilizationSupported)
            _videoConnection.preferredVideoStabilizationMode = AVCaptureVideoStabilizationModeAuto;

        UIInterfaceOrientation statusBarOrientation =
            [UIApplication sharedApplication].statusBarOrientation;
        AVCaptureVideoOrientation initialVideoOrientation = AVCaptureVideoOrientationPortrait;
        if (statusBarOrientation != UIInterfaceOrientationUnknown)
            initialVideoOrientation = (AVCaptureVideoOrientation)statusBarOrientation;
        _videoConnection.videoOrientation = initialVideoOrientation;
    }
} else {
    NSLog(@"無法添加視頻輸入到會話");
}
音頻輸出(回呼佇列必須是串行,否則會掉幀):
AVCaptureDevice *audioDevice = [AVCaptureDevice defaultDeviceWithMediaType:AVMediaTypeAudio];
AVCaptureDeviceInput *audioDeviceInput =
    [AVCaptureDeviceInput deviceInputWithDevice:audioDevice error:&error];
if (!audioDeviceInput) NSLog(@"Could not create audio device input: %@", error);
if ([self.session canAddInput:audioDeviceInput]) [self.session addInput:audioDeviceInput];

AVCaptureAudioDataOutput *audioOut = [[AVCaptureAudioDataOutput alloc] init];
// 音頻放在獨立佇列,避免視頻處理造成音頻延遲
dispatch_queue_t audioCaptureQueue =
    dispatch_queue_create("wukong.movieRecorder.audio", DISPATCH_QUEUE_SERIAL);
[audioOut setSampleBufferDelegate:self queue:audioCaptureQueue];
if ([self.session canAddOutput:audioOut]) [self.session addOutput:audioOut];
_audioConnection = [audioOut connectionWithMediaType:AVMediaTypeAudio];
最後,session 的配置必須包在這對方法之間:
[self.session beginConfiguration];
// ... 所有 addInput / addOutput 設定
[self.session commitConfiguration];
4. 視頻寫入沙盒
在視頻與音頻的 sample buffer 回呼中,把資料交給 WKMovieWriter 寫入檔案。實作上有兩個細節:session 剛啟動時的第一幀是全黑的,必須丟棄;時間戳的偏移要正確累加,否則暫停續錄後的音畫會不同步。
5. 視頻裁剪:綠邊的由來
裁剪由 AVAssetWriter 的輸出設定控制:
NSDictionary *videoSettings;
if (_cropSize.height == 0 || _cropSize.width == 0)
    _cropSize = [UIScreen mainScreen].bounds.size;

videoSettings = [NSDictionary dictionaryWithObjectsAndKeys:
    AVVideoCodecH264, AVVideoCodecKey,
    [NSNumber numberWithInt:_cropSize.width],  AVVideoWidthKey,
    [NSNumber numberWithInt:_cropSize.height], AVVideoHeightKey,
    AVVideoScalingModeResizeAspectFill, AVVideoScalingModeKey, nil];
這裡是最容易中招的一點:cropSize.width 最好是 16(實測 320)的整數倍。H.264 使用 4:2:0 的色度子採樣,寬度若未對齊區塊邊界,編碼器會用贅字填補,解碼後右側就出現一條綠線。實務上直接把寬度對齊到 16 的倍數即可徹底避開。
Part 2:解決預覽卡頓
1. 把視頻轉成 GIF 播放
查資料時發現有人提到微信團隊是用「播放 GIF」來解決列表滾動卡頓的。原本的思路是用 Core Animation 逐幀播放,但那會導致記憶體暴漲而崩潰。換個角度想:既然啟動頁能流暢播放 GIF,那麼把視頻轉成 GIF 來播,問題不就解了?
轉換程式碼如下:
static void makeAnimatedGif(NSArray *images, NSURL *gifURL, NSTimeInterval duration) {
    NSTimeInterval perSecond = duration / images.count;

    NSDictionary *fileProperties = @{
        (__bridge id)kCGImagePropertyGIFDictionary: @{
            (__bridge id)kCGImagePropertyGIFLoopCount: @0   // 0 表示無限循環
        }
    };
    NSDictionary *frameProperties = @{
        (__bridge id)kCGImagePropertyGIFDictionary: @{
            (__bridge id)kCGImagePropertyGIFDelayTime: @(perSecond)
        }
    };

    CGImageDestinationRef destination =
        CGImageDestinationCreateWithURL((__bridge CFURLRef)gifURL, kUTTypeGIF, images.count, NULL);
    CGImageDestinationSetProperties(destination, (__bridge CFDictionaryRef)fileProperties);

    for (UIImage *image in images) {
        @autoreleasepool {
            CGImageDestinationAddImage(destination, image.CGImage,
                                       (__bridge CFDictionaryRef)frameProperties);
        }
    }

    if (!CGImageDestinationFinalize(destination)) NSLog(@"failed to finalize image destination");
    CFRelease(destination);
}
轉換成功,但衍生了新問題:用 ImageIO 生成 GIF 時記憶體會瞬間衝到 100MB 以上,多個視頻同時轉換一樣會崩潰。解法是把生成任務放進單一串行佇列,讓它們排隊執行。
2. 視頻轉 UIImage 陣列
主要透過 AVAssetReader、AVAssetTrack 與 AVAssetReaderTrackOutput 完成:
- (void)convertVideoUIImagesWithURL:(NSURL *)url
                        finishBlock:(void (^)(id images, NSTimeInterval duration))finishBlock {
    AVAsset *asset = [AVAsset assetWithURL:url];
    NSError *error = nil;
    self.reader = [[AVAssetReader alloc] initWithAsset:asset error:&error];
    NSTimeInterval duration = CMTimeGetSeconds(asset.duration);

    __weak typeof(self) weakSelf = self;
    dispatch_queue_t backgroundQueue =
        dispatch_get_global_queue(DISPATCH_QUEUE_PRIORITY_HIGH, 0);

    dispatch_async(backgroundQueue, ^{
        __strong typeof(weakSelf) strongSelf = weakSelf;
        if (error) NSLog(@"%@", [error localizedDescription]);

        NSArray *videoTracks = [asset tracksWithMediaType:AVMediaTypeVideo];
        AVAssetTrack *videoTrack = [videoTracks firstObject];
        if (!videoTrack) return;

        int m_pixelFormatType;
        // 播放用途用 BGRA;若要做壓縮則改用 420YpCbCr8BiPlanarVideoRange
        m_pixelFormatType = kCVPixelFormatType_32BGRA;

        NSMutableDictionary *options = [NSMutableDictionary dictionary];
        [options setObject:@(m_pixelFormatType) forKey:(id)kCVPixelBufferPixelFormatTypeKey];

        AVAssetReaderTrackOutput *videoReaderOutput =
            [[AVAssetReaderTrackOutput alloc] initWithTrack:videoTrack outputSettings:options];
        if ([strongSelf.reader canAddOutput:videoReaderOutput])
            [strongSelf.reader addOutput:videoReaderOutput];

        [strongSelf.reader startReading];

        NSMutableArray *images = [NSMutableArray array];
        // nominalFrameRate 為 0 時(部分 Android 拍的影片)必須跳過,否則會死迴圈
        while ([strongSelf.reader status] == AVAssetReaderStatusReading
               && videoTrack.nominalFrameRate > 0) {
            @autoreleasepool {
                CMSampleBufferRef videoBuffer = [videoReaderOutput copyNextSampleBuffer];
                if (!videoBuffer) break;
                [images addObject:[WKVideoConverter convertSampleBufferRefToUIImage:videoBuffer]];
                CFRelease(videoBuffer);
            }
        }

        if (finishBlock) {
            dispatch_async(dispatch_get_main_queue(), ^{
                finishBlock(images, duration);
            });
        }
    });
}
為什麼一定要 @autoreleasepool:轉換速度很快,短時間內大量 CMSampleBufferRef 若未及時釋放,多個視頻並行轉換時記憶體會迅速堆高。用 autoreleasepool 把每一輪的暫存物件在迭代結束時回收,是這裡能否穩定的關鍵。
小結:三個最容易被忽略的細節
- 裁剪寬度對齊 16 的倍數,否則右側出現綠邊。
- nominalFrameRate 為 0 的影片要跳過,不然轉換迴圈永遠不會結束。
- GIF 生成必須串行化,並在轉幀迴圈內包 @autoreleasepool,記憶體才不會失控。
把這三點處理好,小視頻的錄製與預覽體驗就能對齊主流產品的水平。有疑問歡迎留言討論。
- 上一篇文章: iOS 實現類百度外賣的頭像波浪動畫
- 下一篇文章: iOS 直播類 App 開發全流程解析