
iOS 動態開屏廣告實作:啟動圖無縫轉場與動畫時序
編輯:iOS 開發綜合
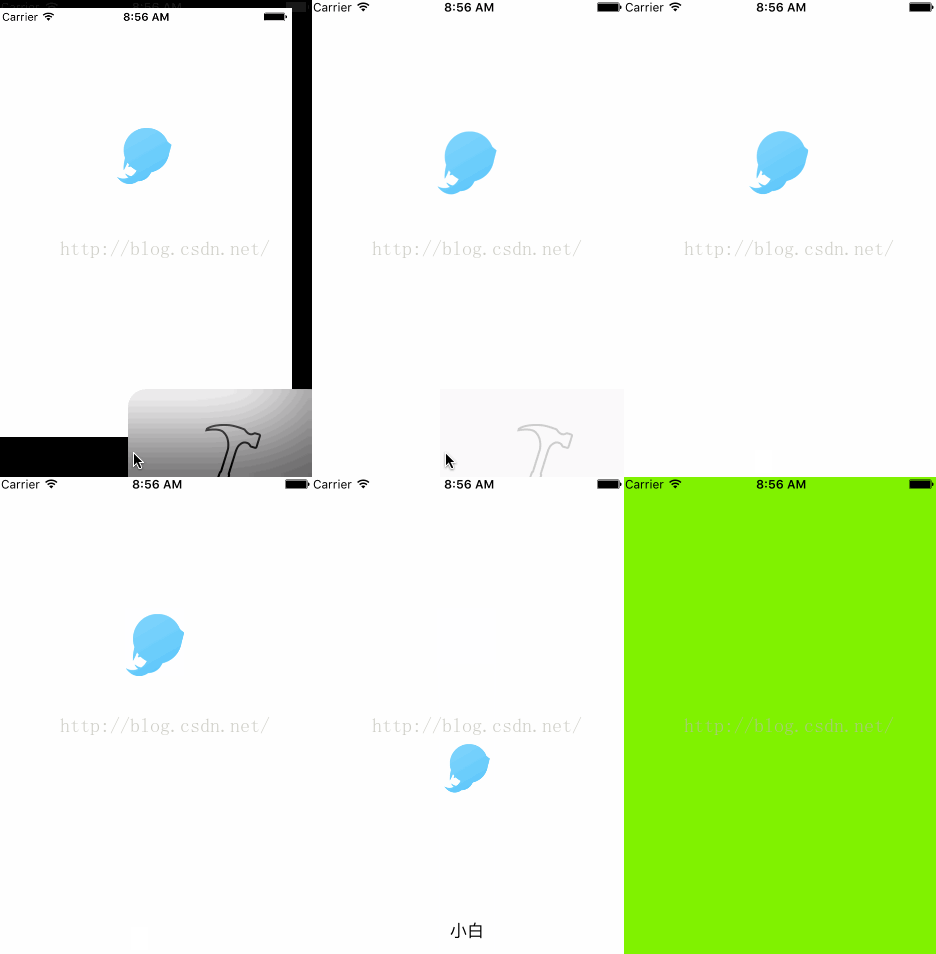
實作思路
核心手法是「用一張固定的 png 當作啟動圖,並讓它的視覺位置與廣告畫面中動畫的起始位置一致」。這樣當系統的啟動圖消失、廣告視圖接著出現時,使用者看到的是同一個畫面,過渡毫無破綻。
過程中踩到一個坑:因為廣告圖是網路請求回來後才載入的,我一開始把廣告視圖的 addSubview 寫在請求成功的 callback 裡,結果廣告出現時會明顯閃一下。把 addSubview 移到 callback 外面,畫面就穩定了。
這個細節值得記住:只要視圖的建立與加入階層,和資料請求的時序綁在一起,畫面就容易出現閃跳。正確做法是先把視圖放上去(此時可以是空的或透明的),資料回來後只更新內容。
一、頭文件
 // XBAdvertView.h
#import <UIKit/UIKit.h>

@protocol XBAdvertViewDelegate <NSObject>
/** 圖片被點擊後的回呼 */
-(void)adViewClick;
@end

@interface XBAdvertView : UIView
@property (nonatomic, weak) id<XBAdvertViewDelegate> delegate;
@property (nonatomic, strong) UIImage *adimage;
@end
二、實作檔
 // XBAdvertView.m
#import "XBAdvertView.h"
#import "MacroDefinition.h"
#import "UIDeviceHardware.h"

#define kScreenW [UIScreen mainScreen].bounds.size.width
#define kScreenH [UIScreen mainScreen].bounds.size.height

#define AppViewOriginCenterY kScreenH * 0.335
#define AdvertViewRatio      0.75
#define AppViewObjCenterY    (kScreenH * AdvertViewRatio + 35)
#define AppNameObjCenterY    AppViewObjCenterY + 30
#define AppNameOriginCenterY kScreenH + 20
#define AppImageViewW        60 / 0.6
#define AppImageViewH        AppImageViewW

@interface XBAdvertView ()
@property (nonatomic, strong) UIImageView *advertImv;   // 廣告圖
@property (nonatomic, strong) UIImageView *appImv;      // App 圖示
@property (nonatomic, strong) UILabel     *appName;     // App 名稱
@property (nonatomic, strong) UILabel     *appPinyin;   // 副標 / 拼音
@property (nonatomic, strong) UIImage     *image;       // 依機型挑選的示意圖
@end

@implementation XBAdvertView

/// 圖片一設定就啟動整段動畫,呼叫端只需賦值
- (void)setAdimage:(UIImage *)adimage {
    self.advertImv.image = adimage;

    [UIView animateWithDuration:1.0
                          delay:0.5
                        options:UIViewAnimationOptionCurveEaseIn
                     animations:^{
        UIDeviceResolution ios_Model = [UIDeviceHardware currentResolution];
        // 依機型微調落點,避免不同螢幕比例下位置跑掉
        if (ios_Model == UIDevice_iPhoneHiRes ||
            ios_Model == UIDevice_iPhoneStandardRes ||
            ios_Model == UIDevice_iPhoneTallerHiRes) {
            self.appImv.center = CGPointMake(self.appImv.center.x, SCREEN_HEIGHT - 108 + 20);
        } else {
            self.appImv.center = CGPointMake(self.appImv.center.x, SCREEN_HEIGHT - 108 + 25);
        }
        self.appName.center   = CGPointMake(self.appName.center.x,
                                            SCREEN_HEIGHT - 108 + self.image.size.height/2 + 5 + 15);
        self.appImv.transform = CGAffineTransformMakeScale(0.6, 0.6);
        self.appPinyin.center = CGPointMake(self.appPinyin.center.x, SCREEN_HEIGHT - 15 - 10);
    } completion:^(BOOL finished) {
        self.advertImv.alpha = 1.0f;

        // 廣告圖淡入後停留兩秒,再移除整個視圖
        [UIView animateWithDuration:3.0
                          animations:^{ self.advertImv.alpha = 1.0f; }
                          completion:^(BOOL finished) {
            [NSThread sleepForTimeInterval:2.0];
            [self removeFromSuperview];
        }];
    }];
}

- (instancetype)initWithFrame:(CGRect)frame {
    if (self = [super initWithFrame:frame]) {
        // 廣告圖:初始 alpha 為 0,等動畫接手
        self.backgroundColor = [UIColor whiteColor];
        self.advertImv = [[UIImageView alloc] init];
        self.advertImv.backgroundColor = [UIColor grayColor];
        self.advertImv.contentMode = UIViewContentModeScaleToFill;
        self.advertImv.alpha = 0;
        [self addSubview:self.advertImv];

        UITapGestureRecognizer *tap = [[UITapGestureRecognizer alloc] initWithTarget:self action:@selector(click)];
        tap.numberOfTapsRequired = 1;
        [self.advertImv addGestureRecognizer:tap];

        // App 圖示
        self.appImv = [[UIImageView alloc] init];
        self.appImv.image = [UIImage imageNamed:@"iphone6p"];
        [self addSubview:self.appImv];

        // App 名稱
        self.appName = [[UILabel alloc] init];
        self.appName.text = @"樂校";
        self.appName.font = UIFont(18);
        self.appName.textColor = BLUE_22C4FF;
        self.appName.textAlignment = NSTextAlignmentCenter;
        [self addSubview:self.appName];

        // 副標
        self.appPinyin = [[UILabel alloc] init];
        self.appPinyin.textAlignment = NSTextAlignmentCenter;
        self.appPinyin.font = UIFont(13);
        self.appPinyin.textColor = BLUE_22C4FF;
        self.appPinyin.text = @"使大學生活更精彩";
        [self addSubview:self.appPinyin];

        // 依機型選擇示意圖與初始位置
        UIDeviceResolution ios_Model = [UIDeviceHardware currentResolution];
        if (ios_Model == UIDevice_iPhoneHiRes || ios_Model == UIDevice_iPhoneStandardRes) {
            self.image = [UIImage imageNamed:@"iphone5"];
            self.appImv.frame = CGRectMake(0, 0, self.image.size.width, self.image.size.height);
        } else if (ios_Model == UIDevice_iPhone6HiRes) {
            self.image = [UIImage imageNamed:@"iphone6"];
            self.appImv.frame = CGRectMake(0, 0, self.image.size.width, self.image.size.height);
        } else if (ios_Model == UIDevice_iPhone6pHiRes) {
            self.image = [UIImage imageNamed:@"iphone6p"];
            self.appImv.frame = CGRectMake(0, 0, self.image.size.width, self.image.size.height);
        }

        if (ios_Model == UIDevice_iPhoneHiRes || ios_Model == UIDevice_iPhoneStandardRes) {
            self.appImv.center = CGPointMake(kScreenW/2, AppViewOriginCenterY + 5);
        } else if (ios_Model == UIDevice_iPhone6HiRes) {
            self.appImv.center = CGPointMake(kScreenW/2, AppViewOriginCenterY);
        } else if (ios_Model == UIDevice_iPhoneTallerHiRes || ios_Model == UIDevice_iPhone6pHiRes) {
            self.appImv.center = CGPointMake(kScreenW/2, AppViewOriginCenterY);
        }

        // 名稱與副標初始位置(畫面外,準備進場)
        self.appName.frame = CGRectMake(0, 0, AppImageViewW, 30);
        self.appName.center = CGPointMake(kScreenW/2, AppNameOriginCenterY);

        self.appPinyin.frame = CGRectMake(0, 0, SCREEN_WIDTH, 20);
        self.appPinyin.center = CGPointMake(kScreenW/2, AppNameOriginCenterY + AppImageViewH/2);

        // 廣告圖鋪滿全屏
        self.advertImv.frame = CGRectMake(0, 0, kScreenW, kScreenH);
    }
    return self;
}

/** 交給代理處理點擊 */
-(void)click {
    if ([self.delegate respondsToSelector:@selector(adViewClick)]) {
        [self.delegate adViewClick];
    }
}

@end
三、呼叫端
 [self.view setBackgroundColor:[UIColor greenColor]];

XBAdvertView *ad = [[XBAdvertView alloc] initWithFrame:[UIScreen mainScreen].bounds];
ad.adimage = [UIImage imageNamed:@"ad.jpg"];
[self.view addSubview:ad];
呼叫端非常乾淨:建立、賦值、加入。這正是把動畫時序全部封裝在 setAdimage: 裡的好處——外部不需要知道有幾段動畫、各段多久。
四、實務上更該注意的幾件事
廣告與啟動圖必須對齊。如果啟動圖是「中央一個 logo」,那廣告動畫的起始 frame 就必須讓 logo 落在同一個座標上,否則會看到跳動。這個 demo 用「依機型分支設定 center」來處理,但其實更穩妥的做法是用 Auto Layout 相對約束,避免每出一款新機型就要補一段 if。
用 sleep 阻塞主執行緒是有代價的。示範中的 [NSThread sleepForTimeInterval:2.0] 會讓主執行緒整整兩秒無法回應事件。正式環境建議改用 dispatch_after 或 NSTimer,讓主執行緒保持空閒。
記得提供跳過入口。多數使用者對強制觀看的開屏廣告容忍度很低,加上一個「跳過」按鈕或點擊任意處關閉,體驗會好很多。
以上就是 iOS 動態開屏廣告的完整實作,希望對大家有所幫助。