
iOS 自訂 UIPickerView:改字體、改顏色、換背景
蘋果一向推崇原生元件,系統自帶的 UIPickerView 本來就相當美觀。無奈產品總會提出特殊設計,本文記錄如何在不放棄原生元件的前提下,把它調整成設計稿要的樣子。
需求:自訂選取列的背景色、選取中文字的字色與字級,以及未選取文字的字色。
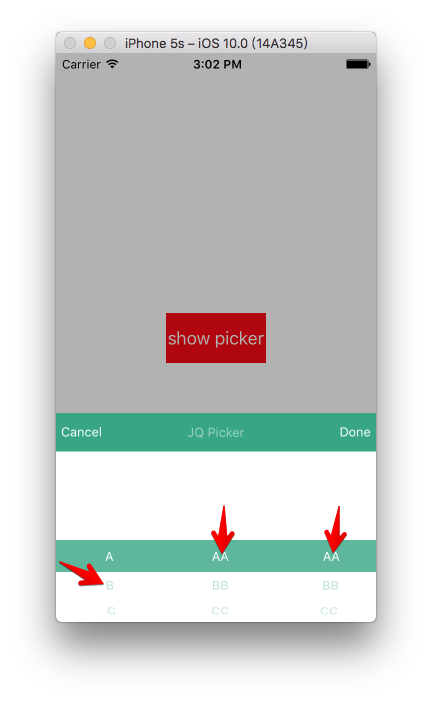
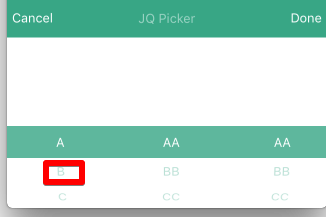
一、改未選取文字的字體與顏色
取消與確定按鈕很好處理,加一條上層視圖即可,這裡不展開。真正需要動手的是文字樣式,這可以在下面的代理方法中完成。
//Change style
- (UIView *)pickerView:(UIPickerView *)pickerView viewForRow:(NSInteger)row forComponent:(NSInteger)component reusingView:(UIView *)view{
    CGFloat width = [self pickerView:self.pickerView widthForComponent:component];
    CGFloat rowheight = [self pickerView:self.pickerView rowHeightForComponent:(component)];
    UIView *myView = [[UIView alloc]init];
    myView.frame = CGRectMake(0.0f, 0.0f, width, rowheight);
    UILabel *txtlabel = [[UILabel alloc] init];
    txtlabel.textColor = self.plainColor;
    txtlabel.tag = 200;
    txtlabel.font = [UIFont systemFontOfSize:15*SCALE_6];
    txtlabel.textAlignment = NSTextAlignmentCenter;
    txtlabel.frame = myView.frame;
    txtlabel.text = [self pickerView:pickerView titleForRow:row forComponent:component];
    [myView addSubview:txtlabel];
    return myView;
}
回傳自訂的 UIView 而非直接改 Label,是因為這個代理方法在 Cell 重用機制下會被頻繁呼叫,包一層能讓 frame 計算更可控。
二、改選取列的背景色與字色
這部分麻煩得多。選取列的中間那塊高亮區域,並不是一個公開的屬性。
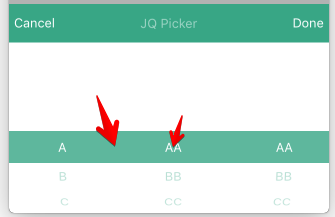
我最初嘗試在 titleForRow 代理裡動態改 Label 屬性:
-(NSString*)pickerView:(UIPickerView *)pickerView titleForRow:(NSInteger)row forComponent:(NSInteger)component {
    if (component == 0) {
        return self.leftArray[row];
    } else if(component == 1){
        return self.rightArray[row];
    } else {
        return self.rightArray[row];
    }
}
結果行不通:手指拖動時索引值對不上,Label 會一卡一卡;快速滑動時更取不到值,變化嚴重落後,完全失去原生那種跟手順滑的手感。
三、最終方案:直接操作系統圖層
最後採用的做法是從 pickerView 的 subviews 樹中把對應的視圖找出來,直接改它的屬性。先看一下 UIPickerView 的圖層結構:
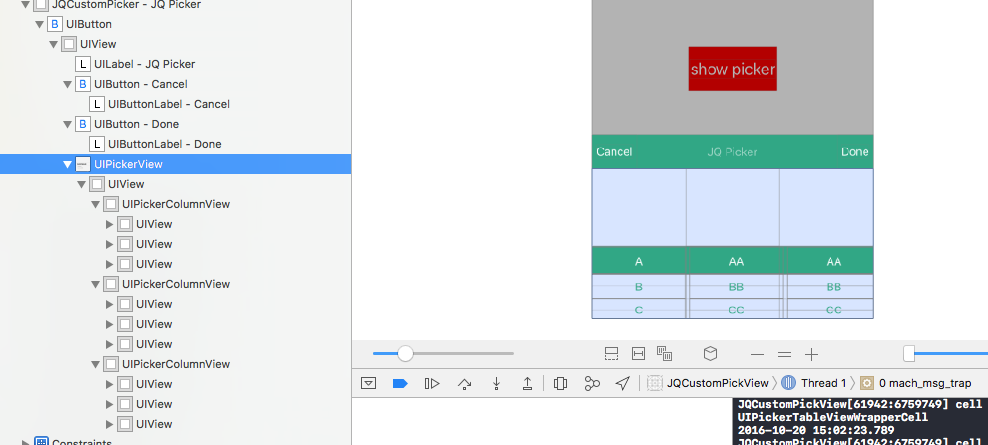
//Change style
- (UIView *)pickerView:(UIPickerView *)pickerView viewForRow:(NSInteger)row forComponent:(NSInteger)component reusingView:(UIView *)view{
    CGFloat width = [self pickerView:self.pickerView widthForComponent:component];
    CGFloat rowheight = [self pickerView:self.pickerView rowHeightForComponent:(component)];
    UIView *myView = [[UIView alloc]init];
    myView.frame = CGRectMake(0.0f, 0.0f, width, rowheight);
    UILabel *txtlabel = [[UILabel alloc] init];
    txtlabel.textColor = self.plainColor;
    txtlabel.tag = 200;
    txtlabel.font = [UIFont systemFontOfSize:15*SCALE_6];
    txtlabel.textAlignment = NSTextAlignmentCenter;
    txtlabel.frame = myView.frame;
    txtlabel.text = [self pickerView:pickerView titleForRow:row forComponent:component];
    [myView addSubview:txtlabel];

    UIView* topLine = [pickerView.subviews objectAtIndex:1];
    UIView* botomLine = [pickerView.subviews objectAtIndex:2];
    topLine.hidden = YES;
    botomLine.hidden = YES;

    BOOL isSetttingBackColor = NO;
    UIView *subview = [self.pickerView.subviews firstObject];
    for (UIView *pickerColumnView in subview.subviews) {
        UIView *pickerView = [pickerColumnView.subviews lastObject];
        if (!isSetttingBackColor) {
            pickerView.backgroundColor = self.selectedBackColor;
            isSetttingBackColor = !isSetttingBackColor;
        }
        UIView *tableView = [pickerView.subviews lastObject];
        for (UIView *cell in tableView.subviews) {
            UIView *cellview = [cell.subviews lastObject];
            UIView *labelSuper = [cellview.subviews lastObject];
            UILabel *label = [labelSuper.subviews lastObject];
            label.textColor = [UIColor whiteColor];
        }
    }
    return myView;
}
隱藏系統那兩條分隔細線的關鍵只有三行:
UIView* topLine = [pickerView.subviews objectAtIndex:1];
UIView* botomLine = [pickerView.subviews objectAtIndex:2];
topLine.hidden = YES;
botomLine.hidden = YES;
BOOL isSetttingBackColor = NO; 這個旗標是為了避免背景色被反覆套用、互相覆蓋——代理方法會被呼叫很多次,不加保護會出現顏色堆疊的怪異情形。
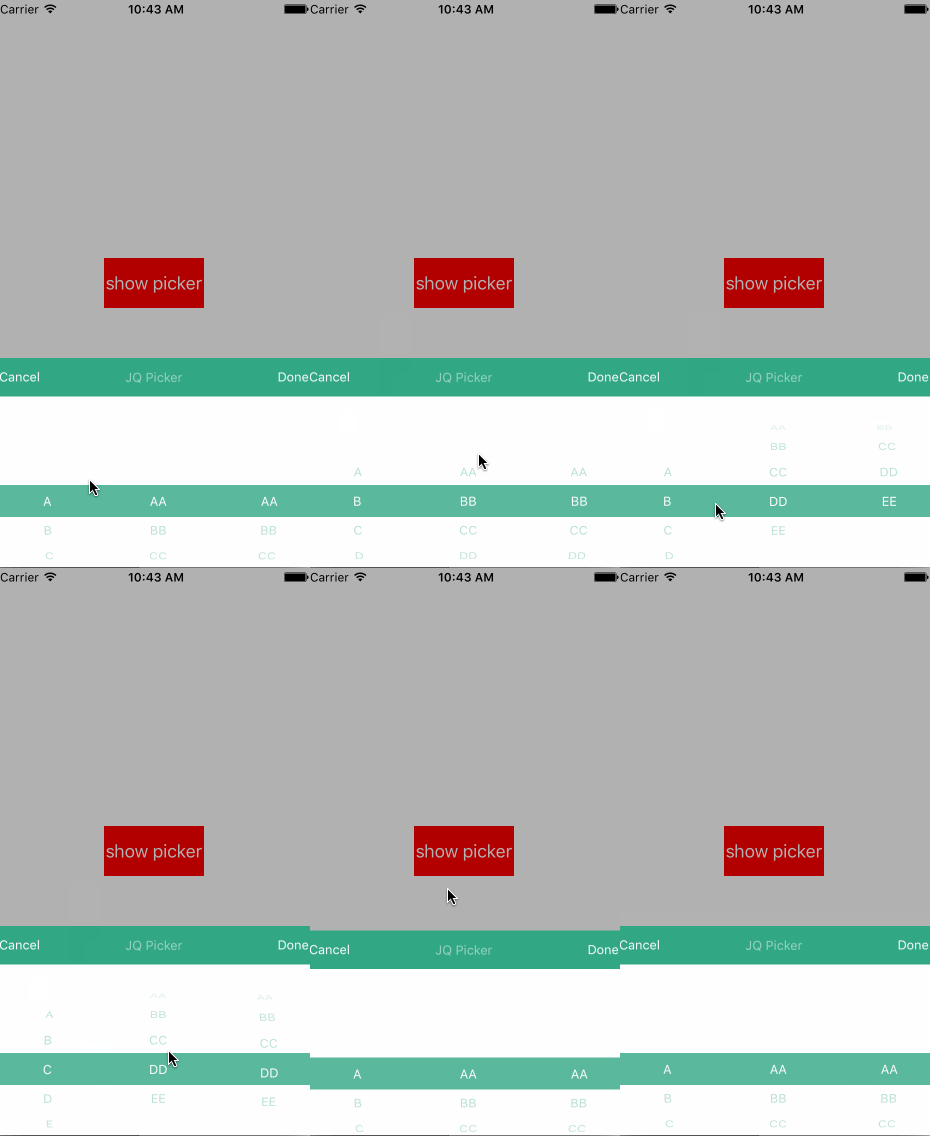
最終效果:
Demo 下載:https://xiazai.jb51.net/201612/yuanma/JSDCustomPickView-master(jb51.net).rar
必須誠實提醒:第三種方案是靠 subviews 的索引與層級硬編碼得來的,屬於私有結構的依賴。蘋果一旦調整 UIPickerView 內部實作(系統更新時確實發生過),這段程式碼就會失效甚至崩潰。因此建議把它集中封裝、加上型別與 nil 判斷,並在每次系統升級後回歸測試。若追求穩定性,自繪一個基于 UICollectionView 的滾輪會是更長遠的選擇。
- 上一篇文章: Xcode 8 升級後模擬器消失怎麼找回
- 下一篇文章: iOS 10 隱私權限設定:缺少描述就會閃退