
iOS 九宮格手勢密碼:從畫線到節點連線的完整實作
編輯:iOS 開發綜合
手勢密碼看起來神奇,本質上就是「自繪畫線」加上「手勢事件追蹤」的組合。本文用九個按鈕搭一個九宮格,示範基本的手勢密碼繪製與節點記錄流程。
先看成果:
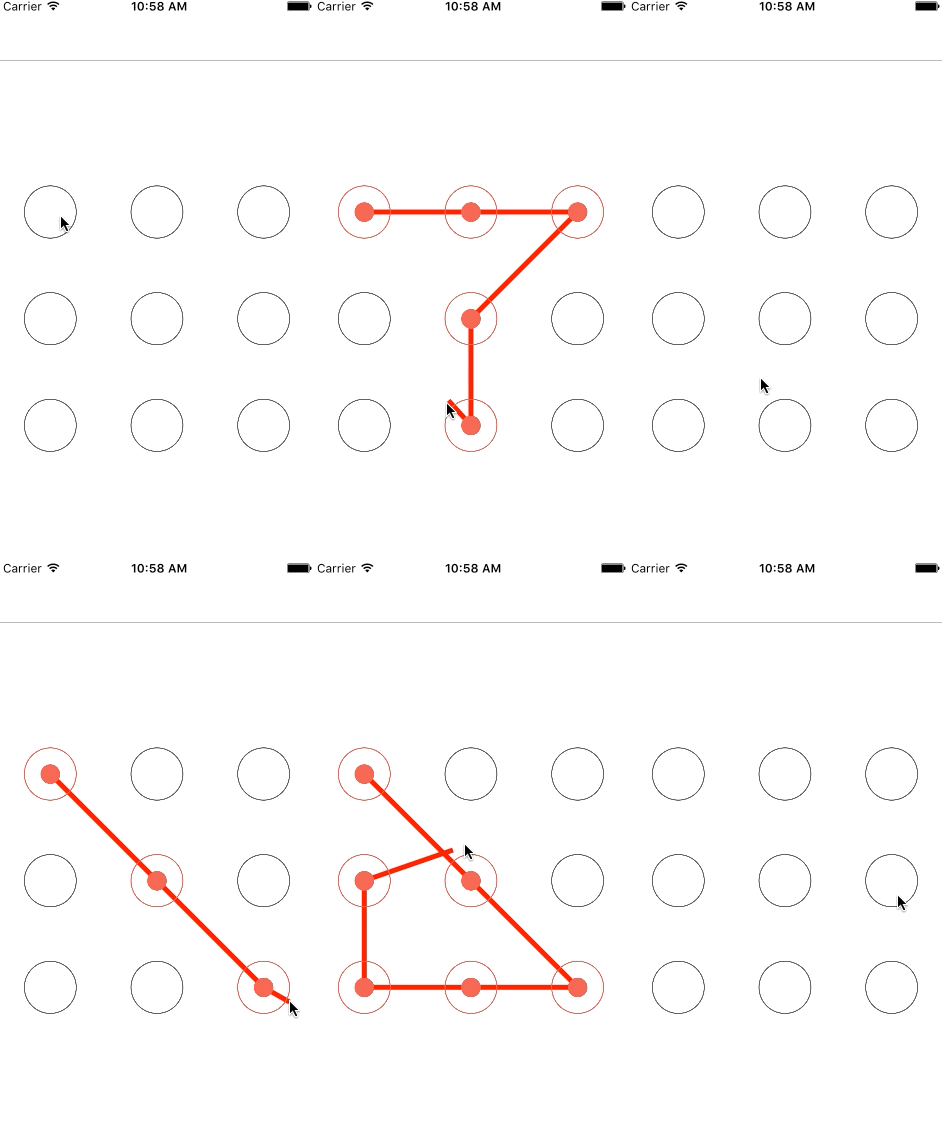
先準備螢幕尺寸
#define ScreenHeight [[UIScreen mainScreen] bounds].size.height
#define ScreenWidth  [[UIScreen mainScreen] bounds].size.width
控制器屬性
imageView 用來承載畫出來的軌跡圖,selectorArr 記錄被選中的按鈕,startPoint 與 endPoint 分別是起點與目前手指位置。
@property (nonatomic, strong) NSMutableArray *buttonArr;   // 全部手勢按鍵
@property (nonatomic, strong) NSMutableArray *selectorArr; // 已選中的按鍵
@property (nonatomic, assign) CGPoint startPoint;          // 起點座標
@property (nonatomic, assign) CGPoint endPoint;            // 目前手指座標
@property (nonatomic, strong) UIImageView *imageView;      // 畫圖用
- (NSMutableArray *)selectorArr {
    if (!_selectorArr) {
        _selectorArr = [[NSMutableArray alloc] init];
    }
    return _selectorArr;
}
建立九宮格
實務上每顆按鈕通常要準備三種狀態圖:預設、選中正確、選中錯誤。錯誤狀態的用途是:使用者需要連續畫兩次相同的手勢才能完成設定,兩次不一致就算錯誤。
這裡有一行是關鍵:
btn.userInteractionEnabled = NO;
若不關閉按鈕的用戶交互,手指的 UITouch 事件會被 UIButton 自己吃掉,下面的 touchesBegan/Moved 就永遠不會在按鈕上觸發。所以這行必須關。
- (void)viewDidLoad {
    [super viewDidLoad];
    self.view.backgroundColor = [UIColor whiteColor];

    if (!_buttonArr) {
        _buttonArr = [[NSMutableArray alloc] initWithCapacity:9];
    }

    self.imageView = [[UIImageView alloc] initWithFrame:CGRectMake(0, 0, ScreenWidth, ScreenHeight)];
    [self.view addSubview:self.imageView];

    for (int i = 0; i < 3; i++) {
        for (int j = 0; j < 3; j++) {
            UIButton *btn = [UIButton buttonWithType:UIButtonTypeCustom];
            btn.frame = CGRectMake(ScreenWidth / 12 + ScreenWidth / 3 * j,
                                   ScreenHeight / 3 + ScreenWidth / 3 * i,
                                   ScreenWidth / 6, ScreenWidth / 6);
            [btn setImage:[UIImage imageNamed:@"pbg"] forState:UIControlStateNormal];
            [btn setImage:[UIImage imageNamed:@"pbg01"] forState:UIControlStateHighlighted];
            btn.userInteractionEnabled = NO;
            [_buttonArr addObject:btn];
            [self.imageView addSubview:btn];
        }
    }
}
畫線
這段是整個功能的核心:從起點開始,依序連到每個被選中的按鈕中心,每連完一段就把畫筆移到該點,最後再連到目前手指位置,形成一條持續延伸的折線。
- (UIImage *)drawLine {
    UIImage *image = nil;
    UIColor *col = [UIColor colorWithRed:1 green:0 blue:0 alpha:1];

    UIGraphicsBeginImageContext(self.imageView.frame.size); // 畫布大小等於 imageView
    CGContextRef context = UIGraphicsGetCurrentContext();
    CGContextSetLineWidth(context, 5);
    CGContextSetStrokeColorWithColor(context, col.CGColor);
    CGContextMoveToPoint(context, self.startPoint.x, self.startPoint.y); // 設定起點

    // 從起點畫到每個選中按鈕的中心,並把畫筆移到該點
    for (UIButton *btn in self.selectorArr) {
        CGPoint btnPo = btn.center;
        CGContextAddLineToPoint(context, btnPo.x, btnPo.y);
        CGContextMoveToPoint(context, btnPo.x, btnPo.y);
    }

    // 畫出正在移動的最後一段
    CGContextAddLineToPoint(context, self.endPoint.x, self.endPoint.y);
    CGContextStrokePath(context);

    image = UIGraphicsGetImageFromCurrentImageContext(); // 輸出圖片
    UIGraphicsEndImageContext();                         // 結束繪圖

    return image;
}
手勢事件
// 手勢開始
- (void)touchesBegan:(NSSet<UITouch *> *)touches withEvent:(UIEvent *)event {
    UITouch *touch = [touches anyObject];
    if (touch) {
        for (UIButton *btn in self.buttonArr) {
            CGPoint po = [touch locationInView:btn];
            // 判斷手指是否落在按鈕範圍內,是則作為起始按鈕
            if ([btn pointInside:po withEvent:nil]) {
                [self.selectorArr addObject:btn];
                btn.highlighted = YES;
                self.startPoint = btn.center;
            }
        }
    }
}

// 手勢移動中:持續重畫
- (void)touchesMoved:(NSSet<UITouch *> *)touches withEvent:(UIEvent *)event {
    UITouch *touch = [touches anyObject];
    if (touch) {
        self.endPoint = [touch locationInView:self.imageView];

        for (UIButton *btn in self.buttonArr) {
            CGPoint po = [touch locationInView:btn];
            if ([btn pointInside:po withEvent:nil]) {
                BOOL isAdd = YES; // 記錄是否為重複的按鈕
                for (UIButton *seBtn in self.selectorArr) {
                    if (seBtn == btn) {
                        isAdd = NO; // 已經選過,不再重複加入
                        break;
                    }
                }
                if (isAdd) {
                    [self.selectorArr addObject:btn];
                    btn.highlighted = YES;
                }
            }
        }
    }
    // 每次移動都要重畫,把軌跡輸出顯示
    self.imageView.image = [self drawLine];
}

// 手勢結束
- (void)touchesEnded:(NSSet<UITouch *> *)touches withEvent:(UIEvent *)event {
    self.imageView.image = nil;
    self.selectorArr = nil;
    for (UIButton *btn in self.buttonArr) {
        btn.highlighted = NO;
    }
}
兩個實務細節
一、讓軌跡停留一秒。如果希望密碼畫完後保留短暫顯示,不能直接重用上面的輸出——因為最後一段「跟著手指的線」也被畫進去了。做法是在 drawLine 裡加一個 bool 參數控制要不要畫最後一段,手勢結束時傳 NO 再呼叫一次,然後把這張圖停留顯示幾次即可。注意繪製過程中一定要傳 YES,否則整條線都畫不出來。
二、把按鈕與密碼關聯。最簡單的方式是給每顆 btn 設定 tag,再把 tag 依序組合成密碼字串來儲存與比對。若要用比對而非儲存明文,記得對密碼做 hash 而不是直接存原文。
- 上一篇文章: 用 UIScrollView 三屏復用實作無限循環廣告
- 下一篇文章: 自繪帶動畫的環形進度條,並讓數字與動畫同步