
iOS運用開辟中對UIImage停止截取和縮放的辦法詳解
編輯:IOS開發綜合
截取UIImage指定年夜小區域
比來碰到如許的需求:從辦事器獲得到一張照片,只須要顯示他的左半部門,或許中央部門等等。也就是截取UIImage指定年夜小區域。
UIImage擴大:
我的處理計劃是對UIImage停止擴大。經由過程CGImageRef和CGImage完成截取,挪用的辦法是:CGImageCreateWithImageInRect。擴大類叫UIImage+Crop,詳細代碼以下:
UIImage+Crop.h
#import <UIKit/UIKit.h>

typedef NS_ENUM(NSInteger, XYCropImageStyle){
  XYCropImageStyleRight        =0,   // 右半部門
  XYCropImageStyleCenter       =1,   // 中央部門
  XYCropImageStyleLeft        =2,   // 左半部門
  XYCropImageStyleRightOneOfThird   =3,   // 右邊三分之一部門
  XYCropImageStyleCenterOneOfThird  =4,   // 中央三分之一部門
  XYCropImageStyleLeftOneOfThird   =5,   // 左邊三分之一部門
  XYCropImageStyleRightQuarter    =6,   // 右邊四分之一部門
  XYCropImageStyleCenterRightQuarter =7,   // 中央右邊四分之一部門
  XYCropImageStyleCenterLeftQuarter  =8,   // 中央左邊四分之一部門
  XYCropImageStyleLeftQuarter     =9,   // 左邊四分之一部門
};

@interface UIImage (Crop)
- (UIImage *)imageByCroppingWithStyle:(XYCropImageStyle)style;

@end
UIImage+Crop.m

#import "UIImage+Crop.h"

@implementation UIImage (Crop)

- (UIImage *)imageByCroppingWithStyle:(XYCropImageStyle)style
{
  CGRect rect;
  switch (style) {
    case XYCropImageStyleLeft:
      rect = CGRectMake(0, 0, self.size.width/2, self.size.height);
      break;
    case XYCropImageStyleCenter:
      rect = CGRectMake(self.size.width/4, 0, self.size.width/2, self.size.height);
      break;
    case XYCropImageStyleRight:
      rect = CGRectMake(self.size.width/2, 0, self.size.width/2, self.size.height);
      break;
    case XYCropImageStyleLeftOneOfThird:
      rect = CGRectMake(0, 0, self.size.width/3, self.size.height);
      break;
    case XYCropImageStyleCenterOneOfThird:
      rect = CGRectMake(self.size.width/3, 0, self.size.width/3, self.size.height);
      break;
    case XYCropImageStyleRightOneOfThird:
      rect = CGRectMake(self.size.width/3*2, 0, self.size.width/3, self.size.height);
      break;
    case XYCropImageStyleLeftQuarter:
      rect = CGRectMake(0, 0, self.size.width/4, self.size.height);
      break;
    case XYCropImageStyleCenterLeftQuarter:
      rect = CGRectMake(self.size.width/4, 0, self.size.width/4, self.size.height);
      break;
    case XYCropImageStyleCenterRightQuarter:
      rect = CGRectMake(self.size.width/4*2, 0, self.size.width/4, self.size.height);
      break;
    case XYCropImageStyleRightQuarter:
      rect = CGRectMake(self.size.width/4*3, 0, self.size.width/4, self.size.height);
      break;
    default:
      break;
  }
  CGImageRef imageRef = self.CGImage;
  CGImageRef imagePartRef = CGImageCreateWithImageInRect(imageRef, rect);
  UIImage *cropImage = [UIImage imageWithCGImage:imagePartRef];
  CGImageRelease(imagePartRef);
  return cropImage;
}
現實應用:
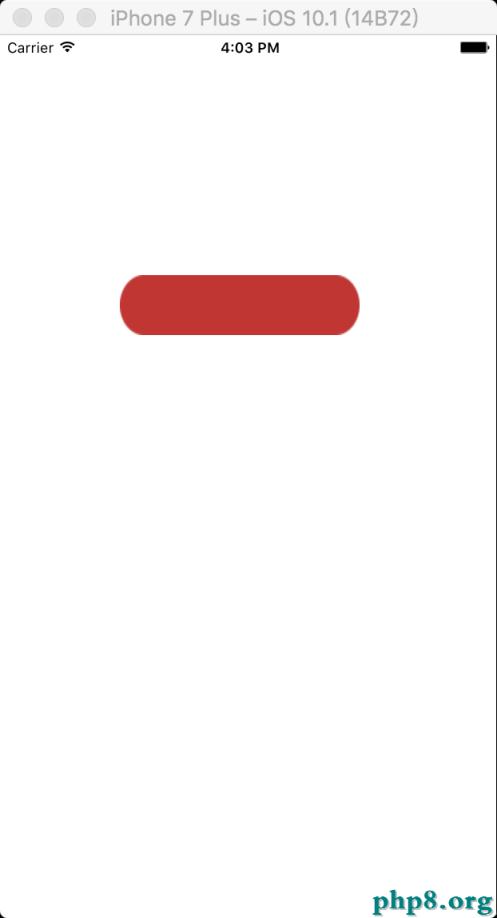
簡略測試一下,看看有無完成我們想要的後果。起首,先加載一個完全的UIImageView。這個應當不難。代碼以下:
UIImageView *imgView = [[UIImageView alloc] init];
imgView.frame = CGRectMake((SCREEN.width - 226) / 2, 100, 226, 106);
UIImage *image = [UIImage imageNamed:@"ganggang"];
imgView.image = image;
[self.view addSubview:imgView];
運轉一下:

要對UIImage停止裁剪,起首導入頭文件:
#import "UIImage+Crop.h"
在下面UIImage *image = [UIImage imageNamed:@"ganggang"];這段代碼以後加高低面這句:
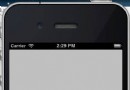
image = [image imageByCroppingWithStyle:XYCropImageStyleLeft];
XYCropImageStyleLeft是截取照片的左半部門。後果以下:
截取勝利,還可以截取其他區域的,只須要傳入分歧的XYCropImageStyle便可完成。
UIImage等比縮放
後面講了截取UIImage指定年夜小區域,很便利的截取UIImage。明天要和年夜家分享的是UIImage的縮放。
兩種縮放:
- 縮放到指定年夜小,也就是指定的size.
- 等比縮放。
1.縮放到指定年夜小
- (UIImage*)imageCompressWithSimple:(UIImage*)image scaledToSize:(CGSize)size
{
  UIGraphicsBeginImageContext(size);
  [image draWinRect:CGRectMake(0,0,size.width,size.height)];
  UIImage* newImage = UIGraphicsGetImageFromCurrentImageContext();
  UIGraphicsEndImageContext();
  return newImage;
}
2.等比縮放
(1)經由過程縮放系數:
- (UIImage*)imageCompressWithSimple:(UIImage*)image scale:(float)scale
{
  CGSize size = image.size;
  CGFloat width = size.width;
  CGFloat height = size.height;
  CGFloat scaledWidth = width * scale;
  CGFloat scaledHeight = height * scale;
  UIGraphicsBeginImageContext(size); // this will crop
  [image draWinRect:CGRectMake(0,0,scaledWidth,scaledHeight)];
  UIImage* newImage= UIGraphicsGetImageFromCurrentImageContext();
  UIGraphicsEndImageContext();
  return newImage;
}
scale是縮放系數 。
(2)經由過程盤算獲得縮放系數
- (UIImage*)imageByScalingAndCroppingForSize:(CGSize)targetSize
{

  UIImage *sourceImage = [UIImage imageNamed:@"test.jpg"];
  UIImage *newImage = nil;
  CGSize imageSize = sourceImage.size;
  CGFloat width = imageSize.width;
  CGFloat height = imageSize.height;
  CGFloat targetWidth = targetSize.width;
  CGFloat targetHeight = targetSize.height;
  CGFloat scaleFactor = 0.0;
  CGFloat scaledWidth = targetWidth;
  CGFloat scaledHeight = targetHeight;
  CGPoint thumbnailPoint = CGPointMake(0.0,0.0);

  if (CGSizeEqualToSize(imageSize, targetSize) == NO)
  {
    CGFloat widthFactor = targetWidth / width;
    CGFloat heightFactor = targetHeight / height;
    if (widthFactor > heightFactor)
      scaleFactor = widthFactor; // scale to fit height
    else
      scaleFactor = heightFactor; // scale to fit width

    scaledWidth= width * scaleFactor;
    scaledHeight = height * scaleFactor;
    // center the image
    if (widthFactor > heightFactor)
    {
      thumbnailPoint.y = (targetHeight - scaledHeight) * 0.5;
    }
    else if (widthFactor < heightFactor)
    {
      thumbnailPoint.x = (targetWidth - scaledWidth) * 0.5;
    }
  }

  UIGraphicsBeginImageContext(targetSize); // this will crop
  CGRect thumbnailRect = CGRectZero;
  thumbnailRect.origin = thumbnailPoint;
  thumbnailRect.size.width= scaledWidth;
  thumbnailRect.size.height = scaledHeight;
  [sourceImage draWinRect:thumbnailRect];
  newImage = UIGraphicsGetImageFromCurrentImageContext();

  if(newImage == nil)
    NSLog(@"could not scale image");
  //pop the context to get back to the default
  UIGraphicsEndImageContext();

  return newImage;

}
【iOS運用開辟中對UIImage停止截取和縮放的辦法詳解】的相關資料介紹到這裡,希望對您有所幫助! 提示:不會對讀者因本文所帶來的任何損失負責。如果您支持就請把本站添加至收藏夾哦!
相關文章
+