IOS實現展開二級列表效果
編輯:IOS開發綜合
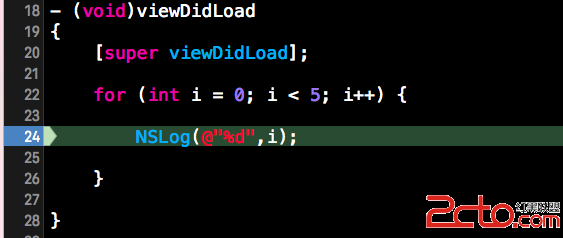
先來看看效果圖

用法(類似UITableView)
初始化XDMultTableView
#import "XDMultTableView.h"
...
@property(nonatomic, readwrite, strong)XDMultTableView *tableView;

 _tableView = [[XDMultTableView alloc] initWithFrame:CGRectMake(0, 64, self.view.frame.size.width, self.view.frame.size.height-64)];
 _tableView.openSectionArray = [NSArray arrayWithObjects:@1,@2, nil];
 _tableView.delegate = self;
 _tableView.datasource = self;
 _tableView.backgroundColor = [UIColor whiteColor];
 [self.view addSubview:_tableView];
實現數據源
- (NSInteger)mTableView:(XDMultTableView *)mTableView numberOfRowsInSection:(NSInteger)section{
 return 5;
}

- (XDMultTableViewCell *)mTableView:(XDMultTableView *)mTableView
    cellForRowAtIndexPath:(NSIndexPath *)indexPath{
 static NSString *cellIdentifier = @"cell";
 UITableViewCell *cell = [mTableView dequeueReusableCellWithIdentifier:cellIdentifier];
 if (cell == nil)
 {
  cell = [[UITableViewCell alloc] initWithStyle:UITableViewCellStyleDefault reuseIdentifier:cellIdentifier];
 }
 UIView *view = [[UIView alloc] initWithFrame:cell.bounds] ;
 view.layer.backgroundColor = [UIColor whiteColor].CGColor;
 view.layer.masksToBounds = YES;
 view.layer.borderWidth  = 0.3;
 view.layer.borderColor  = [UIColor lightGrayColor].CGColor;

 cell.backgroundView = view;
 cell.selectionStyle = UITableViewCellSelectionStyleNone;

 return cell;
}

- (NSInteger)numberOfSectionsInTableView:(XDMultTableView *)mTableView{
 return 6;
}

-(NSString *)mTableView:(XDMultTableView *)mTableView titleForHeaderInSection:(NSInteger)section{
 return @"我是頭部";
}
實現代理
- (CGFloat)mTableView:(XDMultTableView *)mTableView heightForRowAtIndexPath:(NSIndexPath *)indexPath{
 return 50;
}

- (CGFloat)mTableView:(XDMultTableView *)mTableView heightForHeaderInSection:(NSInteger)section{
 return 40;
}

- (void)mTableView:(XDMultTableView *)mTableView willOpenHeaderAtSection:(NSInteger)section{
 NSLog(@"即將展開");
}

- (void)mTableView:(XDMultTableView *)mTableView willCloseHeaderAtSection:(NSInteger)section{
 NSLog(@"即將關閉");
}

- (void)mTableView:(XDMultTableView *)mTableView didSelectRowAtIndexPath:(NSIndexPath *)indexPath{
 NSLog(@"點擊cell");
}
列表展開關閉的實現原理
在section header注冊一個手勢
//section header view 設置tag值為section
view.tag = section;
UITapGestureRecognizer *tap = [[UITapGestureRecognizer alloc] initWithTarget:self action:@selector(tapHeader:)];
 [view addGestureRecognizer:tap];
手勢的響應事件
- (void)tapHeader:(UITapGestureRecognizer *) tap {
 NSInteger section = tap.view.tag;
 NSNumber *sectionObj = [NSNumber numberWithInteger:section];
 UIImageView *imageView = (UIImageView *)[tap.view viewWithTag:100];
 //_multopenSectionArray 用於記錄每個 section的展開和關閉狀態
 if ([_multopenSectionArray containsObject:sectionObj]) {
  NSArray *deleteArray = [self buildDeleteRowWithSection:section];
  [_multopenSectionArray removeObject:sectionObj];
  //想關閉的section的所有indexPath
  [_tableView deleteRowsAtIndexPaths:deleteArray withRowAnimation:UITableViewRowAnimationFade];
  [UIView animateWithDuration:0.3 animations:^{
   imageView.transform = CGAffineTransformMakeRotation(-M_PI/2);
  }];
 }else{
  [_multopenSectionArray addObject:sectionObj];
  //想展開的section的所有indexPath
  NSArray *insertArray = [self buildInsertRowWithSection:section];
  [_tableView insertRowsAtIndexPaths:insertArray withRowAnimation:UITableViewRowAnimationFade];
  [UIView animateWithDuration:0.3 animations:^{
   imageView.transform = CGAffineTransformMakeRotation(0);
  }];
 }
}
總結
以上就是IOS實現展開二級列表效果的全部內容,希望對大家學習開發IOS能有所幫助。
- 上一頁:IOS實現碎片化動畫詳解
- 下一頁:iOS實時監控網絡狀態的改變


相關文章
+