iOS實現爆炸的粒子效果示例代碼
照例我們先看看效果圖
怎麼樣?效果很不錯吧,下面來一起看看實現的過程和代碼示例。
實現原理
從圖中可以大致看出,爆炸點點都是取的某坐標的顏色值,然後根據一些動畫效果來完成的。
取色值
怎麼取的view的某個點的顏色值呢?google一下,就可以找到很多答案。就不具體說了。創建1*1的位圖,然後渲染到屏幕上,然後得到RGBA。我這裡寫的是UIView的extension。
extension UIView {

 public func colorOfPoint(point:CGPoint) -> UIColor
 {
  var pixel:[CUnsignedChar] = [0,0,0,0]

  let colorSpace = CGColorSpaceCreateDeviceRGB()
  let bitmapInfo = CGBitmapInfo(rawValue: CGImageAlphaInfo.PremultipliedLast.rawValue)

  let context = CGBitmapContextCreate(&pixel, 1, 1, 8, 4, colorSpace, bitmapInfo.rawValue)

  CGContextTranslateCTM(context, -point.x, -point.y)

  self.layer.renderInContext(context!)

  let red: CGFloat = CGFloat(pixel[0]) / 255.0
  let green: CGFloat = CGFloat(pixel[1]) / 255.0
  let blue: CGFloat = CGFloat(pixel[2]) / 255.0
  let alpha: CGFloat = CGFloat(pixel[3]) / 255.0

  return UIColor(red:red, green: green, blue:blue, alpha:alpha)
 }
}
粒子的生成
這裡我寫的比較簡單,就是固定每個粒子大小,根據View的寬高算出橫向,縱向的粒子數,取該點的色值,設置粒子背景色,然後生成即可。
主要代碼如下:
frameDict是我預先計算好的坐標表,colorDict是顏色表。以"i-j"為key
class func createExplosionPoints(containerLayer: ExplosionLayer, targetView: UIView, animationType: ExplosionAnimationType) {

  let hCount = self.caculatePointHCount(containerLayer.targetSize.width)
  let vCount = self.caculatePointVCount(containerLayer.targetSize.height)

  for i in 0..<hCount {
   for j in 0..<vCount {
    let key = String(format: "%d-%d", i, j)
    if let rect = containerLayer.frameDict[key], color = containerLayer.colorDict[key] {

     let layer = createExplosionPointLayer(rect, bgColor: color, targetViewSize: containerLayer.targetSize)

     // animation
     layer.explosionAnimation = self.createAnimationWithType(animationType, position: layer.position, targetViewSize: containerLayer.targetSize)

     containerLayer.addSublayer(layer)

     layer.beginAnimation()
    }
   }
  }
 }
動畫效果
每個粒子都有一個CAAnimation動畫,數據由調用者提供,靈活點。
這裡定義了一個protocol:ExplosionAnimationProtocol ,可以自定義實現了該protocol的動畫對象,提供動畫效果。
protocol ExplosionAnimationProtocol {

 // 粒子初始位置
 var oldPosition: CGPoint { set get }

 // 粒子最終位置
 var newPosition: CGPoint { set get }

 // 縮放
 var scale: CGFloat { set get }

 // 動畫時長
 var duration: CFTimeInterval { set get }

 // 動畫重復次數
 var repeatCount: Float { set get }

 // 生成動畫
 func animation() -> CAAnimation

 // 設置動畫完之後的屬性
 func resetLayerProperty(layer: CALayer)
}
要發生爆炸view的動畫效果
這個比較簡單,就是上下左右震動下。具體代碼就不貼出來了。
let shakeAnimation = CAKeyframeAnimation(keyPath: "position")
...
代碼結構
大致思路就是這樣。代碼結構如下:
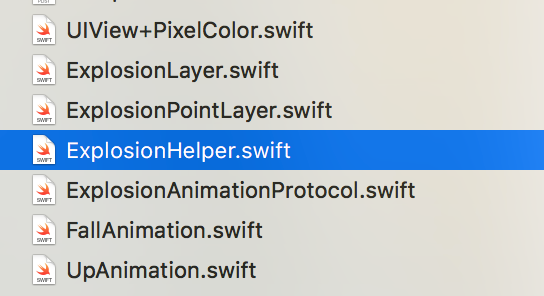
ExplosionLayer是粒子的父容器,
ExplosionPointLayer是粒子本身
ExplosionHelper是個輔助類,用於計算粒子位置,顏色值。
FallAnimation,UpAnimation是實現了ExplosionAnimationProtocol的動畫,分別提供向下落,向上的效果。
碰到的問題
剛開始我是在邊計算顏色值,邊繪制粒子,發現會卡一下才會有爆炸效果出來,分析可能是在計算顏色值在主線程,時間較長,所以卡住了。
後來想到放到後台線程中去做,但是在主線程中取色值的時候,後台必須執行完,所以用了信號量來進行同步。
// 震動效果
private func shake() {

  self.createSemaphore()

  // 計算位置,色值
  self.caculate()

  let shakeAnimation = CAKeyframeAnimation(keyPath: "position")

  shakeAnimation.values = [NSValue.init(CGPoint: self.position), NSValue.init(CGPoint: CGPointMake(self.position.x, self.position.y + 1)), NSValue.init(CGPoint: CGPointMake(self.position.x + 1, self.position.y - 1)), NSValue.init(CGPoint: CGPointMake(self.position.x - 1, self.position.y + 1))]

  shakeAnimation.duration = 0.2
  shakeAnimation.repeatCount = 15
  shakeAnimation.delegate = self
  shakeAnimation.removedOnCompletion = true

  self.targetView?.layer.addAnimation(shakeAnimation, forKey: "shake")
 }
當要爆炸的view開始震動時,就開始在後台計算。震動動畫結束後,等待計算完成。
override func animationDidStop(anim: CAAnimation, finished flag: Bool) {

  // wait for caculate
  dispatch_semaphore_wait(self.semaphore!, DISPATCH_TIME_FOREVER)

  print("shake animation stop")

  // begin explode
  if let targetView = self.targetView {
   self.parentLayer?.addSublayer(self)
   ExplosionHelper.createExplosionPoints(self, targetView: targetView, animationType: self.animationType)

   self.targetView?.hidden = true
  }
 }
在後續的創建粒子時,就直接從緩存中取就行了。
總結
好了,以上就是iOS實現爆炸效果的全部內容了,實現後的效果是不是非常的炫酷?感興趣的朋友們快快實踐起來吧,只有自己操作了才能真正的理解,希望這篇文章對大家的學習或者工作能帶來一定的幫助。