iOS--Quartz2D使用(自定義UIImageView控件、繪制基本圖形)
自定義UIImageView控件
一、實現思路
Quartz2D最大的用途在於自定義View(自定義UI控件),當系統的View不能滿足我們使用需求的時候,自定義View。 使用Quartz2D自定義View,可以從模仿系統的ImageView的使用開始。 需求驅動開發:模仿系統的imageview的使用過程 1.創建 2.設置圖片 3.設置frame 4.把創建的自定義的view添加到界面上(在自定義的View中,需要一個image屬性接收image圖片參數->5)。 5.添加一個image屬性(接下來,拿到image之後,應該把拿到的這個image給渲染出來。怎麼渲染?自定義的view怎麼把圖片顯示出來?->把圖片給畫出來,所以需要重寫自定義View的drawRect:方法)。 6.重寫自定義View的drawRect:方法,在該方法內部畫出圖形。 二、代碼實現 系統自帶的ImageView的使用
//
//  YYViewController.m
//
//
//  Created by apple on 14-6-22.
//  Copyright (c) 2014年 itcase. All rights reserved.
//

#import "YYViewController.h"

@interface YYViewController ()

@end

@implementation YYViewController

- (void)viewDidLoad
{
    [super viewDidLoad];
    //系統的UIImageview的使用
//    1.創建一個UIImageView
    UIImageView *iv=[[UIImageView alloc]init];
//    2.設置圖片
    iv.image=[UIImage imageNamed:@"me"];
//    3.設置frame
    iv.frame=CGRectMake(100, 100, 100, 100);
//    4.把創建的自定義的view添加到界面上
    [self.view addSubview:iv];
}
@end
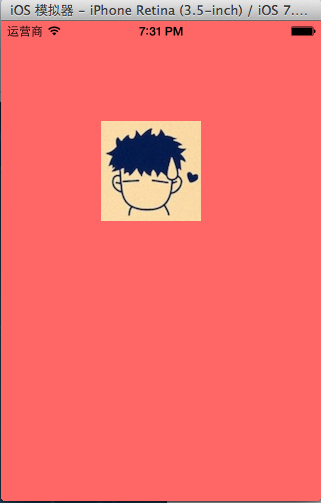
實現效果:
使用Quartz2D自定義View,代碼如下:
新建一個自定義的類,讓其繼承自UIView,YYimageView.h文件代碼如下:
1 // 2 // YYimageView.h 3 // 4 // 5 // Created by apple on 14-6-22. 6 // Copyright (c) 2014年 itcase. All rights reserved. 7 // 8 9 #import10 11 @interface YYimageView : UIView 12 @property(nonatomic,strong)UIImage *image; 13 @end
在自定義類的實現中,重寫DrawRect:方法繪制並渲染圖形。YYimageView.m文件代碼如下:
 1 //
 2 //  YYimageView.m
 3 //
 4 //
 5 //  Created by apple on 14-6-22.
 6 //  Copyright (c) 2014年 itcase. All rights reserved.
 7 //
 8
 9 #import "YYimageView.h"
10
11 @implementation YYimageView
12
13 //重寫drawRect:方法
14 - (void)drawRect:(CGRect)rect
15 {
16     [self.image drawInRect:rect];
17 }
18
19 @end
在主控制器中,模仿系統自帶的UIImageView的使用過程,實現同樣的效果。
 1 //
 2 //  YYViewController.m
 3 //
 4 //
 5 //  Created by apple on 14-6-22.
 6 //  Copyright (c) 2014年 itcase. All rights reserved.
 7 //
 8
 9 #import "YYViewController.h"
10 #import "YYimageView.h"
11
12 @interface YYViewController ()
13
14 @end
15
16 @implementation YYViewController
17
18 - (void)viewDidLoad
19 {
20     [super viewDidLoad];
21
22 //    //系統的UIImageview的使用
23 ////    1.創建一個UIImageView
24 //    UIImageView *iv=[[UIImageView alloc]init];
25 ////    2.設置圖片
26 //    iv.image=[UIImage imageNamed:@"me"];
27 ////    3.設置frame
28 //    iv.frame=CGRectMake(100, 100, 100, 100);
29 ////    4.把創建的自定義的view添加到界面上
30 //    [self.view addSubview:iv];
31
32
33     //自定義UIImageView
34     //1.創建
35     //2.設置圖片
36     //3.設置frame
37     //4.把創建的自定義的view添加到界面上
38     YYimageView *yyiv=[[YYimageView alloc]init];
39     yyiv.image=[UIImage imageNamed:@"me"];
40     yyiv.frame=CGRectMake(100, 100, 100, 100);
41     [self.view addSubview:yyiv];
42
43 }
44 @end
三、完善
存在的問題?
在界面上,添加一個按鈕,要求點擊按鈕,能夠實現圖片的切換。
 1 //
 2 //  YYViewController.m
 3 //
 4 //
 5 //  Created by apple on 14-6-22.
 6 //  Copyright (c) 2014年 itcase. All rights reserved.
 7 //
 8
 9 #import "YYViewController.h"
10 #import "YYimageView.h"
11
12 @interface YYViewController ()
13 @property(nonatomic,strong)UIImageView *imageView;
14 @end
15
16 @implementation YYViewController
17
18 - (void)viewDidLoad
19 {
20     [super viewDidLoad];
21
22     //系統的UIImageview的使用
23 //    1.創建一個UIImageView
24     UIImageView *iv=[[UIImageView alloc]init];
25 //    2.設置圖片
26     iv.image=[UIImage imageNamed:@"me"];
27 //    3.設置frame
28     iv.frame=CGRectMake(100, 100, 100, 100);
29 //    4.把創建的自定義的view添加到界面上
30     [self.view addSubview:iv];
31     self.imageView=iv;
32
33
34     //自定義UIImageView
35     //1.創建
36     //2.設置圖片
37     //3.設置frame
38     //4.把創建的自定義的view添加到界面上
39 //    YYimageView *yyiv=[[YYimageView alloc]init];
40 //    yyiv.image=[UIImage imageNamed:@"me"];
41 //    yyiv.frame=CGRectMake(100, 100, 100, 100);
42 //    [self.view addSubview:yyiv];
43
44     //添加一個button按鈕,當點擊button按鈕的時候,切換圖片
45     UIButton *btn=[[UIButton alloc]initWithFrame:CGRectMake(100, 300, 100, 50)];
46     [btn setTitleColor:[UIColor blackColor] forState:UIControlStateNormal];
47     [btn setTitle:@"點擊切換" forState:UIControlStateNormal];
48     [btn addTarget:self action:@selector(btnClick) forControlEvents:UIControlEventTouchUpInside];
49     [self.view addSubview:btn];
50
51 }
52
53 -(void)btnClick
54 {
55     UIImage *image=[UIImage imageNamed:@"psb.jpeg"];
56     self.imageView.image=image;
57 }
58 @end
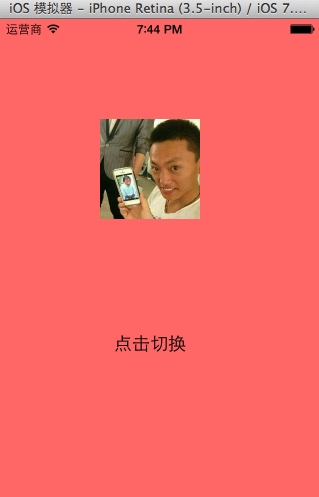
點擊按鈕後,實現圖片的切換。
完善後的代碼如下:
主控制器中,YYViewController.m文件的代碼:
 1 //
 2 //  YYViewController.m
 3 //
 4 //
 5 //  Created by apple on 14-6-22.
 6 //  Copyright (c) 2014年 itcase. All rights reserved.
 7 //
 8
 9 #import "YYViewController.h"
10 #import "YYimageView.h"
11
12 @interface YYViewController ()
13 @property(nonatomic,strong)UIImageView *imageView;
14 @property(nonatomic,strong)YYimageView *yyimageView;
15 @end
16
17 @implementation YYViewController
18
19 - (void)viewDidLoad
20 {
21     [super viewDidLoad];
22
23 //    //系統的UIImageview的使用
24 ////    1.創建一個UIImageView
25 //    UIImageView *iv=[[UIImageView alloc]init];
26 ////    2.設置圖片
27 //    iv.image=[UIImage imageNamed:@"me"];
28 ////    3.設置frame
29 //    iv.frame=CGRectMake(100, 100, 100, 100);
30 ////    4.把創建的自定義的view添加到界面上
31 //    [self.view addSubview:iv];
32 //    self.imageView=iv;
33
34
35     //自定義UIImageView
36     //1.創建
37     //2.設置圖片
38     //3.設置frame
39     //4.把創建的自定義的view添加到界面上
40     YYimageView *yyiv=[[YYimageView alloc]init];
41     yyiv.image=[UIImage imageNamed:@"me"];
42     yyiv.frame=CGRectMake(100, 100, 100, 100);
43     [self.view addSubview:yyiv];
44     self.yyimageView=yyiv;
45
46     //添加一個button按鈕,當點擊button按鈕的時候,切換圖片
47     UIButton *btn=[[UIButton alloc]initWithFrame:CGRectMake(100, 300, 100, 50)];
48     [btn setTitleColor:[UIColor blackColor] forState:UIControlStateNormal];
49     [btn setTitle:@"點擊切換" forState:UIControlStateNormal];
50     [btn addTarget:self action:@selector(btnClick) forControlEvents:UIControlEventTouchUpInside];
51     [self.view addSubview:btn];
52
53 }
54
55 -(void)btnClick
56 {
57     NSLog(@"按鈕被點擊了");
58     UIImage *image=[UIImage imageNamed:@"psb.jpeg"];
59 //    self.imageView.image=image;
60     self.yyimageView.image=image;
61 }
62 @end
YYimageView.m文件的代碼:
 1 //
 2 //  YYimageView.m
 3 //
 4 //
 5 //  Created by apple on 14-6-22.
 6 //  Copyright (c) 2014年 itcase. All rights reserved.
 7 //
 8
 9 #import "YYimageView.h"
10
11 @implementation YYimageView
12
13 //重寫drawRect:方法
14 - (void)drawRect:(CGRect)rect
15 {
16     [self.image drawInRect:rect];
17 }
18
19 //重寫set方法
20 -(void)setImage:(UIImage *)image
21 {
22     _image=image;
23     [self setNeedsDisplay];
24 }
25 @end
繪制基本圖形
一、簡單說明
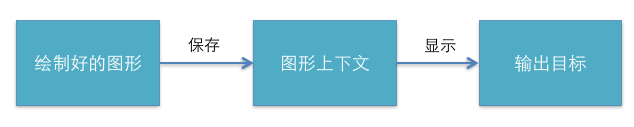
圖形上下文(Graphics Context):是一個CGContextRef類型的數據
圖形上下文的作用:保存繪圖信息、繪圖狀態
決定繪制的輸出目標(繪制到什麼地方去?)(輸出目標可以是PDF文件、Bitmap或者顯示器的窗口上)
相同的一套繪圖序列,指定不同的Graphics Context,就可將相同的圖像繪制到不同的目標上。
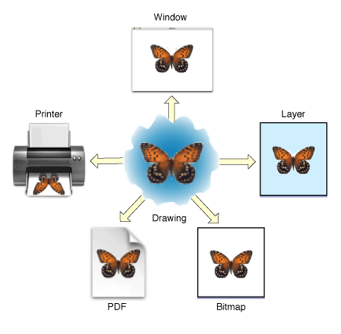
Quartz2D提供了以下幾種類型的Graphics Context:
Bitmap Graphics Context
PDF Graphics Context
Window Graphics Context
Layer Graphics Context
Printer Graphics Context
只要上下文不同,繪制的地方就不同。
本文說明如何把圖片繪制到Bitmap上面去,即要求生成一張圖片,圖片上面保存了繪圖信息。
Bitmap就是圖片,相當於系統的UIimage。一個UIImage就是一個Bitmap
二、怎麼把圖片繪制到Bitmap上?
注意:不能在drawRect:方法中直接獲取Bitmap的上下文,需要我們自己進行創建。
代碼示例:
 8
 9 #import "YYViewController.h"
10
11 @interface YYViewController ()
12 @property (weak, nonatomic) IBOutlet UIImageView *iv;
13 @end
14
15 @implementation YYViewController
16
17 - (void)viewDidLoad
18 {
19     [super viewDidLoad];
20
21     //加載圖片
22     //0.創建一個Bitmap上下文
23     //c語言的方法
24 //    CGBitmapContextCreate(<#void *data#>, <#size_t width#>, <#size_t height#>, <#size_t bitsPerComponent#>, <#size_t bytesPerRow#>, <#CGColorSpaceRef space#>, <#CGBitmapInfo bitmapInfo#>)
25     //oc中封裝的方法
26     //方法1
27 //    UIGraphicsBeginImageContext(<#CGSize size#>);
28     //方法2
29     UIGraphicsBeginImageContextWithOptions( CGSizeMake(200, 200), NO, 0);
30     //1.獲取bitmap上下文
31     CGContextRef ctx = UIGraphicsGetCurrentContext();
32     //2.繪圖(畫一個圓)
33     CGContextAddEllipseInRect(ctx, CGRectMake(0, 0, 100, 100));
34     //3.渲染
35     CGContextStrokePath(ctx);
36     //4.獲取生成的圖片
37     UIImage *image=UIGraphicsGetImageFromCurrentImageContext();
38     //5.顯示生成的圖片到imageview
39     self.iv.image=image;
40     //6.保存繪制好的圖片到文件中
41     //先將圖片轉換為二進制數據,然後再將圖片寫到文件中
42 //    UIImageJPEGRepresentation(image, 1); //第二個參數為保存的圖片的效果
43     NSData *data=UIImagePNGRepresentation(image);
44     [data writeToFile:@"/Users/apple/Desktop/abc.png" atomically:YES];
45 }
46
47 - (void)didReceiveMemoryWarning
48 {
49     [super didReceiveMemoryWarning];
50     // Dispose of any resources that can be recreated.
51 }
52
53 @end
程序執行效果:
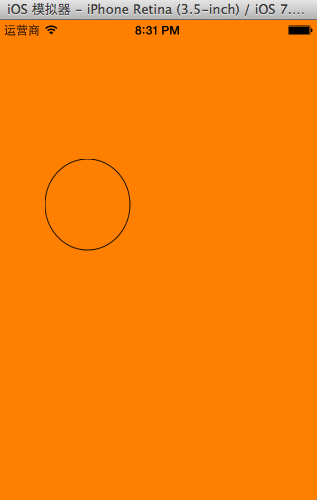
程序執行完畢後,會在指定的位置創建一個abc.png的圖片

補充說明:
1.創建Bitmap圖形上下文的方法//方法1 UIGraphicsBeginImageContext(<#CGSize size#>);
//方法2UIGraphicsBeginImageContextWithOptions(CGSize size,BOOLopaque, CGFloat scale)
使用兩個方法同樣都可以創建,但是使用第一個方法將來創建的圖片清晰度和質量沒有第二種方法的好。 方法2接收三個參數:CGSize size:指定將來創建出來的bitmap的大小
BOOL opaque:默認為YES,不透明,位圖中沒有繪制的區域會以黑色顯示;NO代表透明,位圖中沒有繪制的區域會以透明顯示;主要是用 於繪圖時進行性能優化的開關。
CGFloat scale:代表縮放,0代表系統會自動設置根據當前設備的屏幕因數設置縮放因數。
創建出來的bitmap就對應一個UIImage對象