
iPhone 開發 [四]:常用控件 UIActionSheet 與 UIAlertView 實作
關鍵詞:ActionSheet、AlertView
這兩個控件幾乎每個 App 都會用到:刪除前的最後確認、操作結果的提示、表單填寫錯誤的警告。本文用一個「刪除」的示範,把 ActionSheet 與 AlertView 的搭配用法完整走一遍。
1. 建立專案
新增一個 Single View Application,命名為 ActionSheetDemo。
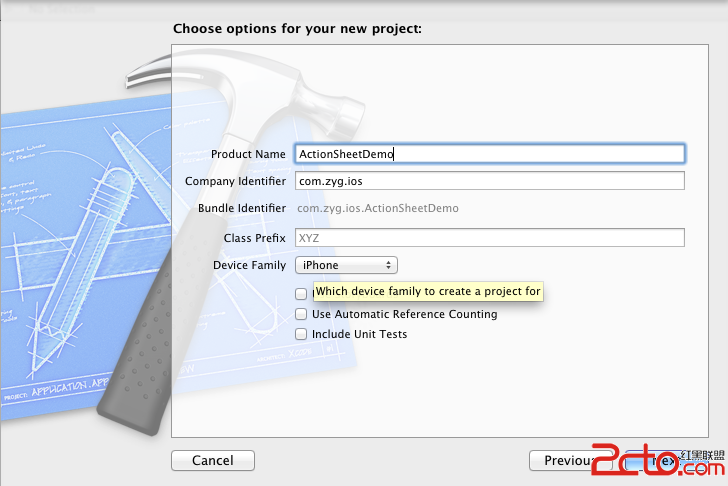
2. 在 ViewController.xib 上放一個按鈕
拖一個 Button 進來,Title 設為「刪除」。接著修改 ViewController.h,宣告對應的 IBAction:
-(IBAction)delete:(id)sender;然後把 Button「刪除」的 Touch Up Inside 事件連到 delete 這個 action(連線方式在前幾篇已說明)。
3. 讓 ViewController 採用 UIActionSheetDelegate 協議
// 修改,實作 UIActionSheetDelegate 協議
@interface ViewController : UIViewController<UIActionSheetDelegate>
4. 在 ViewController.m 實作 delete 動作
// 執行刪除操作
-(IBAction)delete:(id)sender{
    UIActionSheet *actionSheet = [[UIActionSheet alloc]
                  initWithTitle:@"確定要刪除該服務器?"
                        delegate:self   // 按下按鈕時會收到通知,回呼協議中的方法
               cancelButtonTitle:@"取消"
          destructiveButtonTitle:@"確定"
               otherButtonTitles:nil];
    // 展示 actionSheet
    [actionSheet showInView:self.view];
}
作為 ActionSheet 的代理,ViewController 需要實作協議中定義的方法。這裡有兩種選擇,差別在於回呼的時機。
方法一:didDismissWithButtonIndex(ActionSheet 消失後處理)
// 方法 1
-(void)actionSheet:(UIActionSheet *)actionSheet
didDismissWithButtonIndex:(NSInteger)buttonIndex{
    NSLog(@"didDismissWithButtonIndex");
    UIAlertView *alert = nil;
    if(buttonIndex == [actionSheet destructiveButtonIndex]){   // 確定
        alert = [[UIAlertView alloc]
                  initWithTitle:@"結果"
                        message:@"刪除完畢"
                       delegate:self
              cancelButtonTitle:@"確定"
              otherButtonTitles:nil];
        [alert show];
    }else if(buttonIndex == [actionSheet cancelButtonIndex]){   // 取消
        NSLog(@"取消");
    }
}
方法二:clickedButtonAtIndex(按鈕被點擊的當下處理)
// 方法 2
- (void)actionSheet:(UIActionSheet *)actionSheet
    clickedButtonAtIndex:(NSInteger)buttonIndex{
    NSLog(@"clickedButtonAtIndex");
    UIAlertView *alert = nil;
    if(buttonIndex == [actionSheet destructiveButtonIndex]){   // 確定
        // 執行刪除操作
        [self doDelete];
        alert = [[UIAlertView alloc]
                  initWithTitle:@"結果"
                        message:@"刪除完畢"
                       delegate:self
              cancelButtonTitle:@"確定"
              otherButtonTitles:nil];
        [alert show];
    }else if(buttonIndex == [actionSheet cancelButtonIndex]){   // 取消
        NSLog(@"取消");
    }
}
兩種寫法都是靠 buttonIndex 判斷使用者按了哪顆按鈕,再分別處理。差異在於時機:clickedButtonAtIndex 在點擊瞬間觸發,畫面上的 ActionSheet 尚未消失;didDismissWithButtonIndex 則是等 ActionSheet 已經收起來才呼叫。若你的後續動作會再彈出另一個彈窗(如上例的 AlertView),用 didDismiss 版本會更順,比較不會有兩個彈層互搶的視覺問題。
示範用的 doDelete 只是個空殼:
-(void)doDelete{
    NSLog(@"執行刪除操作");
}
5. 編譯執行


按「刪除」會先彈出 ActionSheet 確認;按「確定」後再跳出 AlertView 提示「刪除完畢」。這正是破壞性操作該有的兩段式互動:先確認、再回報結果。
補充一個實務建議:destructiveButtonTitle 在 iOS 7 之後會以紅色呈現,用來標示危險操作,非常適合放「刪除」這類不可逆的行為;一般選項則放在 otherButtonTitles 之後。