
iOS 開發筆記 2:UITableView 的刪除、移動、插入與勾選
編輯:iOS 開發綜合
列表的編輯操作是 UITableView 的固定套路,但每個方法該改哪裡、該同步哪些資料,第一次寫總要查一下。這裡把四種常見操作整理成對照。
一、刪除列
實作 commitEditingStyle:forRowAtIndexPath:,左滑就會出現刪除鈕。重點是「先改資料來源,再叫 table view 更新」:
- (void)tableView:(UITableView *)tableView
commitEditingStyle:(UITableViewCellEditingStyle)editingStyle
 forRowAtIndexPath:(NSIndexPath *)indexPath {
    if (editingStyle == UITableViewCellEditingStyleDelete) {
        NSUInteger row = indexPath.row;
        [self.editArray removeObjectAtIndex:row];
        [tableView deleteRowsAtIndexPaths:[NSArray arrayWithObject:indexPath]
                        withRowAnimation:UITableViewRowAnimationTop];
    }
    // 需要持久化時,在這裡呼叫 [self replaceCurrentViewData:self.editArray];
}
二、移動列
實作 moveRowAtIndexPath:toIndexPath:,再讓 row 進入編輯模式即可拖動。搬移元素時要注意目標索引可能超出目前範圍:
- (void)tableView:(UITableView *)tableView
moveRowAtIndexPath:(NSIndexPath *)sourceIndexPath
      toIndexPath:(NSIndexPath *)destinationIndexPath {
    if (sourceIndexPath != destinationIndexPath) {
        id object = [self.editArray objectAtIndex:sourceIndexPath.row];
        [object retain];
        [self.editArray removeObjectAtIndex:sourceIndexPath.row];

        if (destinationIndexPath.row > [self.editArray count]) {
            [self.editArray addObject:object];
        } else {
            [self.editArray insertObject:object atIndex:destinationIndexPath.row];
        }
        [object release];
    }
}
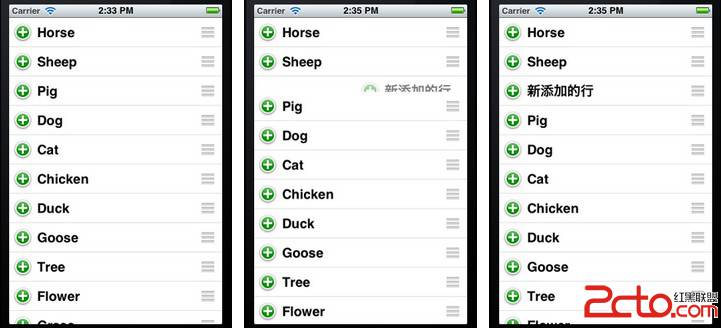
三、插入新列
插入與刪除共用同一個方法,只是把判斷的樣式換成 Insert,並改呼叫 insertRowsAtIndexPaths:。通常再搭配 canEditRowAtIndexPath: 回傳 Insert 讓「+」號出現:
if (editingStyle == UITableViewCellEditingStyleDelete) {
    // ...刪除的處理
} else {
    NSArray *insertIndexPaths = [NSArray arrayWithObjects:indexPath, nil];
    [self.list insertObject:@"新添加的行" atIndex:indexPath.row];
    [tableView insertRowsAtIndexPaths:insertIndexPaths
                   withRowAnimation:UITableViewRowAnimationRight];
}
四、勾選標記
在 didSelectRowAtIndexPath: 裡切換 accessoryType,就能做出能打勾的清單:
- (void)tableView:(UITableView *)tableView didSelectRowAtIndexPath:(NSIndexPath *)indexPath {
    UITableViewCell *oneCell = [tableView cellForRowAtIndexPath:indexPath];
    if (oneCell.accessoryType == UITableViewCellAccessoryNone) {
        oneCell.accessoryType = UITableViewCellAccessoryCheckmark;
    } else {
        oneCell.accessoryType = UITableViewCellAccessoryNone;
    }
    [tableView deselectRowAtIndexPath:indexPath animated:YES];
}
這裡透過 cellForRowAtIndexPath: 反查目前那個 cell 來改狀態;若你的 cell 會被重複使用,比較穩健的做法是把「勾選狀態」存在資料來源裡,並在 cellForRow 時據以設定 accessoryType,這樣捲動出去再捲回來才不會掉狀態。