
iOS TableView 詳解:用 UIRefreshControl 實作下拉刷新
編輯:iOS 開發綜合
前陣子住處網路出了狀況,除了即時通訊與社群網站,其他網頁一律打不開,部落格也就停更了。網路恢復後,正好翻到以前寫過的一個 TableView 上下拉刷新的範例,於是補成一份 demo 放上來。
什麼是內置刷新
下拉刷新並不是從一開始就有的功能,而是 iOS 6 之後才由蘋果提供的官方 API。它在 UITableViewController 上新增了一個 refreshControl 屬性,也就是說,想用這套內建機制,你的列表最好由一個專屬的視圖控制器來管理,而不是自己在任意 UIViewController 上拼一個 UITableView。
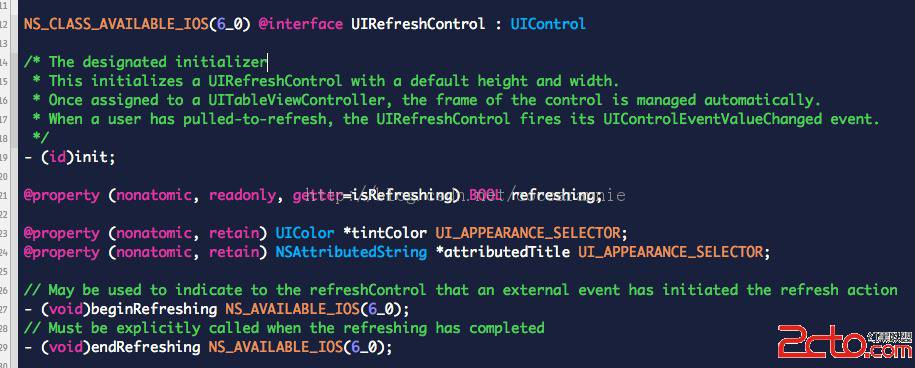
從頭文件中可以看到 UIRefreshControl 只暴露了幾個屬性與初始化方法,難度不高。配置方式如下:
/****** 內置刷新的常用屬性設定 ******/
UIRefreshControl *refresh = [[UIRefreshControl alloc] init];
refresh.attributedTitle = [[NSAttributedString alloc] initWithString:@"下拉刷新"];
refresh.tintColor = [UIColor blueColor];
[refresh addTarget:self
            action:@selector(pullToRefresh)
  forControlEvents:UIControlEventValueChanged];
self.refreshControl = refresh;
刷新時做什麼
註冊好事件後,實作被呼叫的方法。這裡用 dispatch_after 假裝一次網路請求:
// 下拉刷新
- (void)pullToRefresh
{
    // 模擬網路訪問
    [UIApplication sharedApplication].networkActivityIndicatorVisible = YES;
    self.refreshControl.attributedTitle =
        [[NSAttributedString alloc] initWithString:@"刷新中"];

    double delayInSeconds = 1.5;
    dispatch_time_t popTime = dispatch_time(DISPATCH_TIME_NOW,
                                            (int64_t)(delayInSeconds * NSEC_PER_SEC));
    dispatch_after(popTime, dispatch_get_main_queue(), ^(void){
        _rowCount += 5;
        [self.tableView reloadData];

        // 刷新結束時的收尾設定
        [self.refreshControl endRefreshing];
        self.refreshControl.attributedTitle =
            [[NSAttributedString alloc] initWithString:@"下拉刷新"];
        [UIApplication sharedApplication].networkActivityIndicatorVisible = NO;

        _bottomRefresh.frame = CGRectMake(0, 44 + _rowCount * RCellHeight,
                                          320, RCellHeight);
    });
}
幾個實務提醒
dispatch_after 的用法並不難,指定延遲時間,再把要跑的程式碼放進 block 即可。要注意的是,UI 更新一定要回到主線程,範例中指定 dispatch_get_main_queue() 就是這個用意。
另外,無論請求成功或失敗,都必須呼叫 endRefreshing,否則轉圈動畫會一直轉下去。實務上建議把「開始刷新/結束刷新」包成兩個方法,並在失敗分支也呼叫結束,避免使用者卡在轉圈狀態。若列表同時支援上拉載入更多,記得把兩者的指示器狀態分開管理,範例中重新計算 _bottomRefresh 的 frame 就是為了讓底部提示緊接在資料之後。