
iOS 去掉 UINavigationController 與 UITabBarController 的邊框黑線
編輯:iOS 開發綜合
從 iOS 7 開始,導航列與底部工具列在背景圖之外還會多出一條細細的分隔線,若設計稿要求完全無邊框的視覺效果,就得自行把這些線全部清掉。
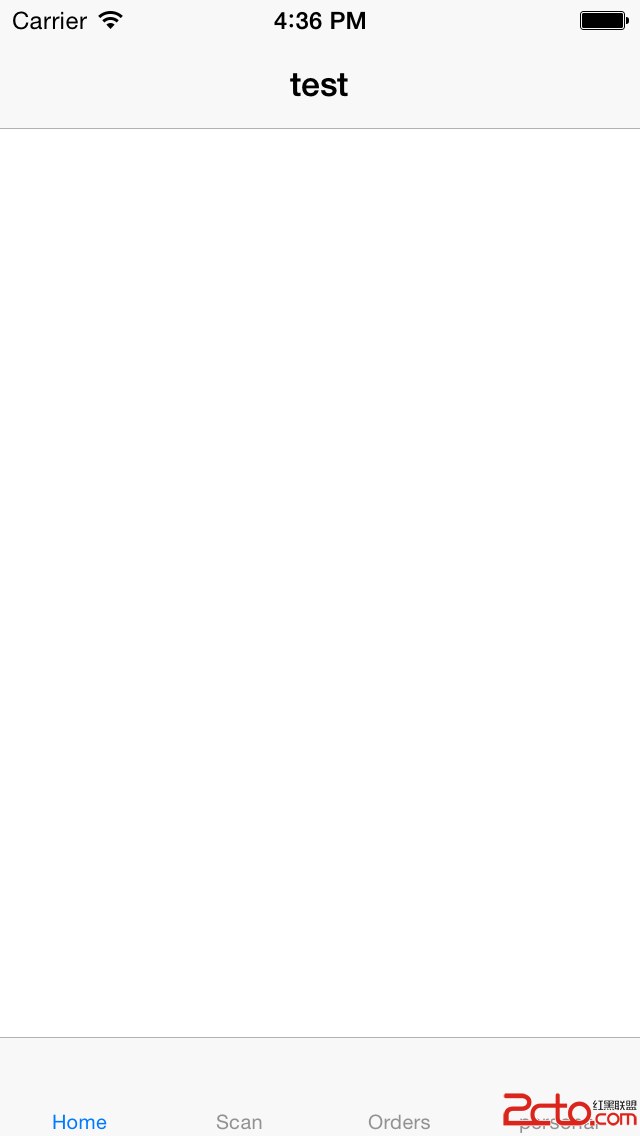
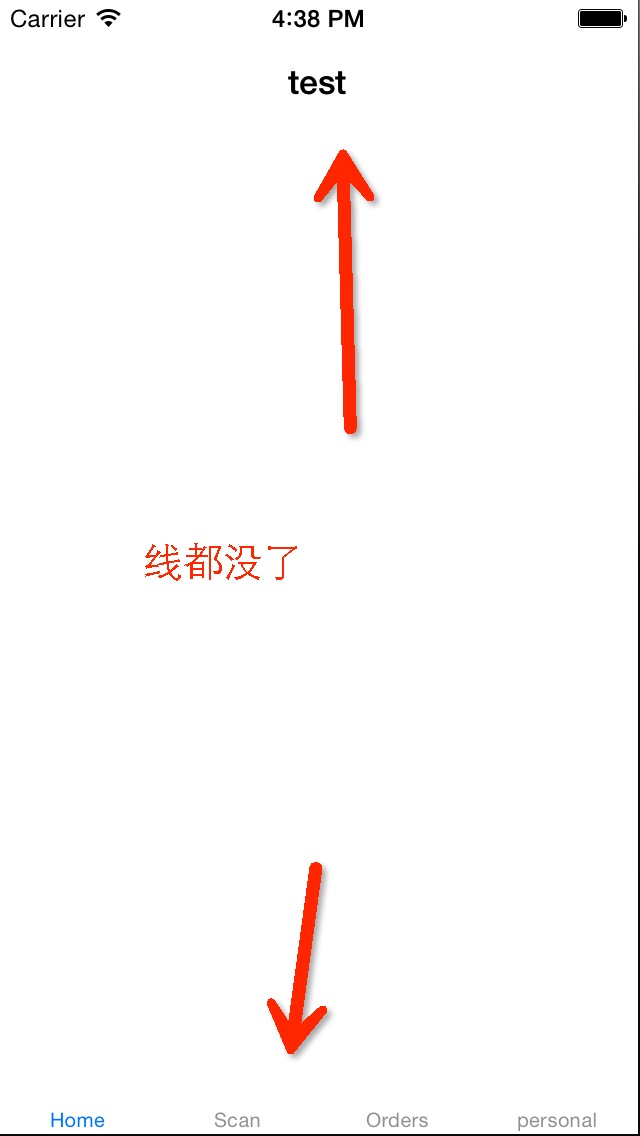
要處理的一共有四條線:導航列的漸層背景、返回按鈕的邊緣、導航列下方的陰影線,以及 tabBar 的背景與陰影線。做法是用一張全透明的圖片分別指定給這些屬性:
- (void)viewWillAppear:(BOOL)animated {
    [super viewWillAppear:animated];

    [self.navigationController.navigationBar setBackgroundImage:[TDUtils createImageWithColor:[UIColor clearColor]]
                                                  forBarMetrics:UIBarMetricsDefault];
    [self.navigationController.navigationBar setBackIndicatorTransitionMaskImage:[TDUtils createImageWithColor:[UIColor clearColor]]];
    [self.navigationController.navigationBar setShadowImage:[TDUtils createImageWithColor:[UIColor clearColor]]];

    [self.tabBarController.tabBar setBackgroundImage:[TDUtils createImageWithColor:[UIColor clearColor]]];
    [self.tabBarController.tabBar setShadowImage:[TDUtils createImageWithColor:[UIColor clearColor]]];
}
其中 createImageWithColor: 是一個自訂的工具方法,用 Core Graphics 畫出指定顏色、1×1 尺寸的 UIImage:
+ (UIImage *)createImageWithColor:(UIColor *)color {
    CGRect rect = CGRectMake(0.0f, 0.0f, 1.0f, 1.0f);
    UIGraphicsBeginImageContext(rect.size);
    CGContextRef context = UIGraphicsGetCurrentContext();
    CGContextSetFillColorWithColor(context, [color CGColor]);
    CGContextFillRect(context, rect);
    UIImage *image = UIGraphicsGetImageFromCurrentImageContext();
    UIGraphicsEndImageContext();
    return image;
}
幾個實務上的提醒:
這類設定寫在 viewWillAppear 而非 viewDidLoad,是因為 App 內不同頁面可能對導航列有不同需求,每次即將顯示時重設一次才能避免被上一頁的設定影響。
若要全域生效,更合適的位置是 UINavigationBar.appearance() 與 UITabBar.appearance(),在 App 啟動時設定一次即可,不必每頁重複。
另外,setBackgroundImage 設為透明後,導航列上的文字與圖示顏色需要自行調整(例如改用 whiteColor),否則白底白字會完全看不見。
- 上一篇文章: iOS 開發:Plist 檔案的基本操作
- 下一篇文章: iOS 音頻播放(五):AudioQueue 深入解析