
iOS 開發:仿新版 QQ 側滑導航欄的實現
編輯:iOS 開發綜合
新版 QQ 在 UI 上有不少更新,其中一個頗為炫酷的效果就是側滑導航欄。這種設計雖然已被模仿得近乎氾濫,也有統計指出其用戶體驗未必最佳,但我個人仍相當喜歡,於是研究了它的實現並記錄於此。
一、效果展示
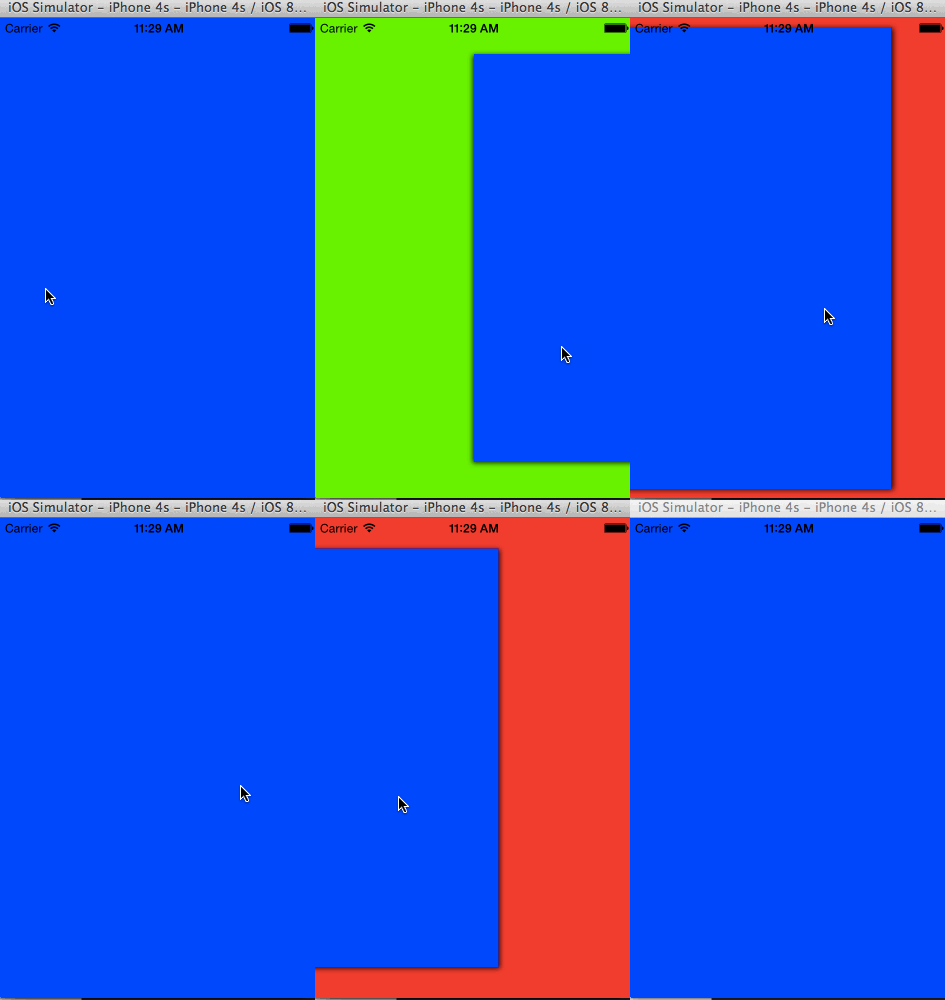
二、實現思路
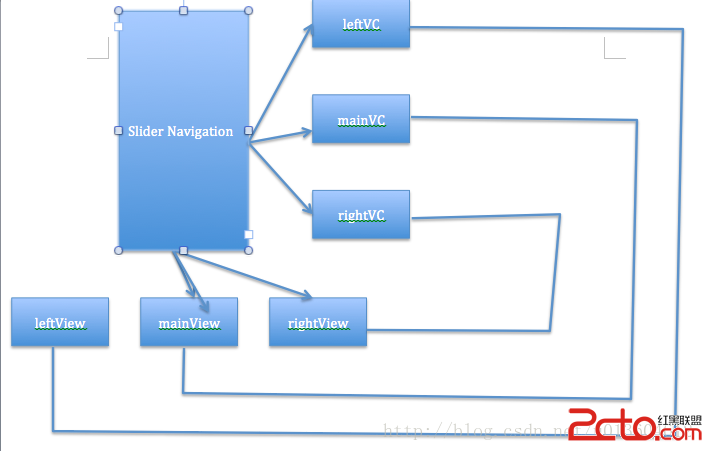
整體架構關係如下圖:
主要思路:
SliderNavigation擁有三個子視圖:leftView、rightView、mainView。左右滑動時,透過切換這三個視圖的層次關係來實現。- 另外加上三個屬性
leftVC、rightVC、mainVC,目的是簡化操作;同時mainVC還負責記錄已展示過的視圖,讓所有視圖都能透過左右滑動喚出導航欄。 - 向左滑動展示右視圖時,把
leftView調到最底層,並讓mainView隨手指移動,其下的rightView便顯露出來。 - 在上述基礎上,為各環節加上動畫,即可實現流暢好看的效果。
三、接口定義
在 .h 檔中定義外界可自訂的屬性。首先是三個控制器:
@property (strong, nonatomic) UIViewController *leftController;
@property (strong, nonatomic) UIViewController *rightController;
@property (strong, nonatomic) UIViewController *mainController;
其次是左右視圖的相關設定,包括偏移量、判斷點、動畫時間、缩放比例與能否被拉出:
// 左右視圖被拉出後主視圖 X 方向的 offset(正值)
@property (assign, nonatomic) CGFloat leftOffsetX;
@property (assign, nonatomic) CGFloat rightOffsetX;
// 拉動過程中判斷點的 X 值(正值)
@property (assign, nonatomic) CGFloat leftJudgeX;
@property (assign, nonatomic) CGFloat rightJudegX;
// 拉出與收回所用的時間
@property (assign, nonatomic) NSTimeInterval leftOpenDuration;
@property (assign, nonatomic) NSTimeInterval rightOpenDuration;
@property (assign, nonatomic) NSTimeInterval leftCloseDuration;
@property (assign, nonatomic) NSTimeInterval rightCloseDuration;
// 拉出後主視圖縮放比例(0 到 1)
@property (assign, nonatomic) CGFloat rightScale;
@property (assign, nonatomic) CGFloat leftScale;
// 左右視圖能否被拉出
@property (assign, nonatomic) BOOL canShowRight;
@property (assign, nonatomic) BOOL canShowLeft;
此外,用一個字典記錄已展示過的控制器,方便下次直接取出:
@property (strong, nonatomic) NSMutableDictionary *controllersDict;
對外暴露的公開方法:
+ (id)sharedInstance;                              // 單例
- (void)showLeftView;                              // 展示左視圖
- (void)showRightView;                             // 展示右視圖
- (void)showContentViewWithModel:(NSString *)className; // 展示自訂主視圖
四、具體實現
先定義一些常量:
// 製造反彈的動態效果(通過按鈕叫出導航欄時有效)
static const CGFloat kOpenSpringDamping = 0.65f;
static const CGFloat kOpenSpringVelocity = 0.10f;

typedef NS_ENUM(NSUInteger, sliderMoveDirection) {
    SliderMoveDirectionLeft = 0,
    SliderMoveDirectionRight,
};
初始化三個子視圖,注意添加順序——主視圖必須最後添加,才能顯示在最上層:
- (void)_initSubviews {
    _rightView = [[UIView alloc] initWithFrame:self.view.bounds];
    [self.view insertSubview:_rightView atIndex:0];

    _leftView = [[UIView alloc] initWithFrame:self.view.bounds];
    [self.view insertSubview:_leftView atIndex:1];

    // 主視圖要最後添加(顯示在最上層)
    _mainView = [[UIView alloc] initWithFrame:self.view.bounds];
    [self.view insertSubview:_mainView aboveSubview:_leftView];
}
「展示自訂類的主視圖」方法:以類名為鍵從字典取控制器,若無則新建並存入;移除目前主視圖上的舊視圖,再把新控制器視圖加進 mainView:
- (void)showContentViewWithModel:(NSString *)className {
    [self _closeSliderNavigation];

    UIViewController *controller = [self.controllersDict objectForKey:className];
    if (controller == nil) {
        Class c = NSClassFromString(className);
        controller = [[c alloc] init];
        [self.controllersDict setObject:controller forKey:className];
    }
    if (_mainView.subviews.count > 0) {
        [[_mainView.subviews firstObject] removeFromSuperview];
    }
    controller.view.frame = _mainView.frame;
    [_mainView addSubview:controller.view];
    self.mainController = controller;
}
動畫方面,主要透過 transform 改變主視圖的大小與位置,並用 spring 動畫製造反彈效果,同時依滑動方向調整視圖層次與陰影:
CGAffineTransform concat = [self _transformWithMoveDirection:SliderMoveDirectionLeft];
[self.view sendSubviewToBack:_leftView]; // 將另一個視圖調到最下面
[self _configureViewShadowWithDirection:SliderMoveDirectionLeft]; // 設置陰影

[UIView animateWithDuration:self.rightOpenDuration delay:0
      usingSpringWithDamping:kOpenSpringDamping
       initialSpringVelocity:kOpenSpringVelocity
                    options:UIViewAnimationOptionCurveLinear
                 animations:^{
    _mainView.transform = concat;
} completion:^(BOOL finished) {
    _showingLeft = NO;
    _showingRight = YES;
    self.mainController.view.userInteractionEnabled = NO;
    _tapGesture.enabled = YES;
}];
最關鍵也最繁瑣的是滑動手勢:獲取偏移量,滑動過程中計算對應的變換矩陣並設置,滑動結束時依位置與判斷點的關係決定要播放哪一段動畫。例如向右拉時:
CGFloat translateX = [recognizer translationInView:_mainView].x;
translateX += currentOffsetX;
float scale = 0;

// 向右拉,展示的是左視圖
if (translateX > 0) {
    if (self.canShowLeft == NO || self.leftController == nil) {
        return;
    }
    [self.view sendSubviewToBack:_rightView];
    [self _configureViewShadowWithDirection:SliderMoveDirectionRight];

    if (_mainView.frame.origin.x < self.leftOffsetX) {
        scale = 1 - (_mainView.frame.origin.x / self.leftOffsetX) * (1 - self.leftScale);
    } else {
        scale = self.leftScale;
    }
}
這裡比較頭痛的是 scale 的計算:要求 view 從最初到最末時,scale 從 1.0 變化到 self.leftScale,用簡單的數學比例即可推出上述公式。
小結
整體來說,側滑導航欄的核心是「三視圖層次切換 + transform 動畫 + 滑動手勢判斷」。只要理清各視圖的層級關係,並在滑動的不同階段給予對應的矩陣變換,就能實現一個流暢自然的側滑效果。