
iOS 錄音功能實作(含靜音自動停止)
編輯:iOS 開發綜合
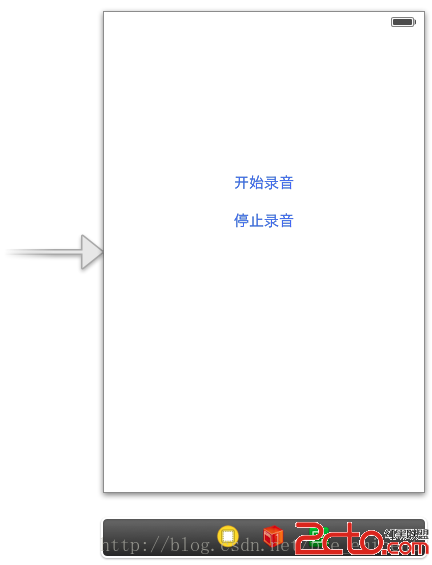
本文實作一個錄音功能,透過 AVAudioRecorder 進行錄音,並利用定時器即時監測音量,當偵測到一段時間的靜音後自動停止錄音。
錄音機參數示意:
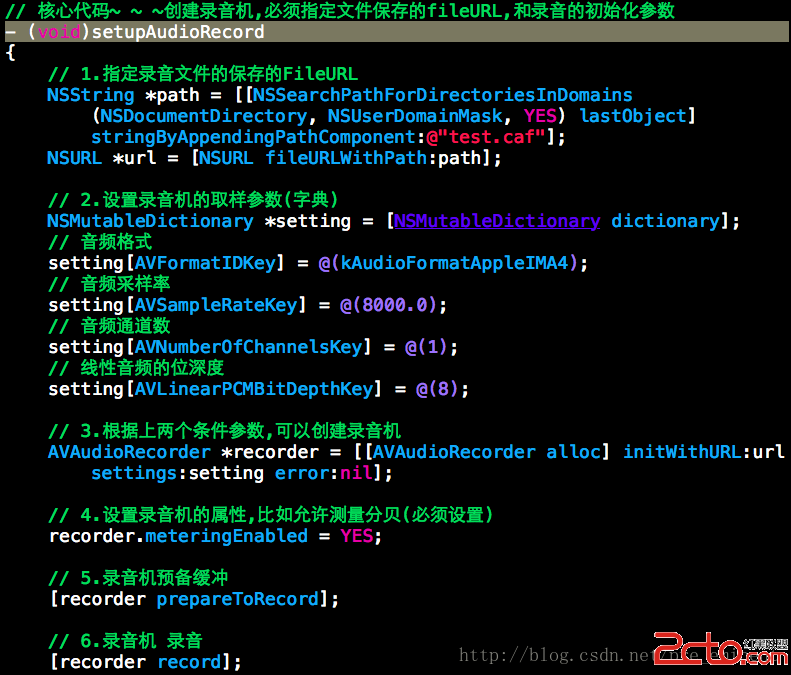
控制器核心程式碼
錄音需要導入 AVFoundation 框架。以下是包含錄音機建立、錄音、停止與靜音偵測的完整實作:
#import <AVFoundation/AVFoundation.h>

@interface BeyondViewController ()

// 錄音機
@property (nonatomic, strong) AVAudioRecorder *recorder;
// 時鐘,用於監聽音量
@property (nonatomic, strong) CADisplayLink *link;
// 標記無聲的時間長度,用於判斷停止錄音條件
@property (nonatomic, assign) double slientDuration;

- (IBAction)startRecord;
- (IBAction)stopRecord;
@end

@implementation BeyondViewController

#pragma mark - 懶加載
- (CADisplayLink *)link {
    if (!_link) {
        self.link = [CADisplayLink displayLinkWithTarget:self selector:@selector(update)];
    }
    return _link;
}

#pragma mark - 開始錄音
- (IBAction)startRecord {
    // 1. 創建錄音機
    [self setupAudioRecord];
    // 2. 開啟定時器
    self.slientDuration = 0;
    [self.link addToRunLoop:[NSRunLoop mainRunLoop] forMode:NSDefaultRunLoopMode];
}

#pragma mark - 創建錄音機
- (void)setupAudioRecord {
    // 1. 指定錄音文件保存路徑
    NSString *path = [[NSSearchPathForDirectoriesInDomains(NSDocumentDirectory, NSUserDomainMask, YES) lastObject] stringByAppendingPathComponent:@"test.caf"];
    NSURL *url = [NSURL fileURLWithPath:path];

    // 2. 設置錄音取樣參數
    NSMutableDictionary *setting = [NSMutableDictionary dictionary];
    setting[AVFormatIDKey] = @(kAudioFormatAppleIMA4);   // 音頻格式
    setting[AVSampleRateKey] = @(8000.0);                // 采樣率
    setting[AVNumberOfChannelsKey] = @(1);               // 通道數
    setting[AVLinearPCMBitDepthKey] = @(8);              // 位深度

    // 3. 創建錄音機
    AVAudioRecorder *recorder = [[AVAudioRecorder alloc] initWithURL:url settings:setting error:nil];
    // 4. 允許測量分貝(必須設置)
    recorder.meteringEnabled = YES;
    // 5. 預備緩沖
    [recorder prepareToRecord];
    // 6. 開始錄音
    [recorder record];
    self.recorder = recorder;
}

#pragma mark - 停止錄音
- (IBAction)stopRecord {
    [self.recorder stop];
}

#pragma mark - 定時器方法:根據無聲時長自動停止
- (void)update {
    // 1. 必須先更新測量值,才能獲得分貝
    [self.recorder updateMeters];
    // 2. 取得平均分貝(安靜約 -50,大聲約 -10)
    float power = [self.recorder averagePowerForChannel:0];

    if (power < -30) {
        // 累計無聲時長
        self.slientDuration += self.link.duration;
        // 沉默超過 2 秒,判定說話結束
        if (self.slientDuration >= 2) {
            [self.recorder stop];
            [self.link invalidate];
            self.link = nil;
            NSLog(@"--------停止錄音");
        }
    } else {
        // 正在說話,清零計時
        self.slientDuration = 0;
    }
}
@end
錄音工具類
為了讓錄音邏輯可重複使用,我們把創建錄音機的步驟封裝成一個類方法,透過傳入目標文件名即可快速取得錄音機物件:
#import <AVFoundation/AVFoundation.h>

@interface RecordTool : NSObject
// 快速返回一個錄音機物件,參數為目標文件名
+ (AVAudioRecorder *)record:(NSString *)destFileName;
@end

@implementation RecordTool
+ (AVAudioRecorder *)record:(NSString *)destFileName {
    NSString *path = [[NSSearchPathForDirectoriesInDomains(NSDocumentDirectory, NSUserDomainMask, YES) lastObject] stringByAppendingPathComponent:destFileName];
    NSURL *url = [NSURL fileURLWithPath:path];

    NSMutableDictionary *setting = [NSMutableDictionary dictionary];
    setting[AVFormatIDKey] = @(kAudioFormatAppleIMA4);
    setting[AVSampleRateKey] = @(8000.0);
    setting[AVNumberOfChannelsKey] = @(1);
    setting[AVLinearPCMBitDepthKey] = @(8);

    AVAudioRecorder *recorder = [[AVAudioRecorder alloc] initWithURL:url settings:setting error:nil];
    recorder.meteringEnabled = YES;
    [recorder prepareToRecord];
    return recorder;
}
@end
重點說明
- 錄音前必須設定
meteringEnabled = YES,否則無法取得音量值。 updateMeters必須在讀取分貝前呼叫,才能拿到最新的測量數據。- 透過
CADisplayLink定時比對平均音量,當連續靜音超過設定門檻(這裡是 2 秒)就自動停止錄音,非常適合語音輸入的情境。