
iOS 觸摸解鎖(九宮格手勢密碼)實作
編輯:iOS 開發綜合
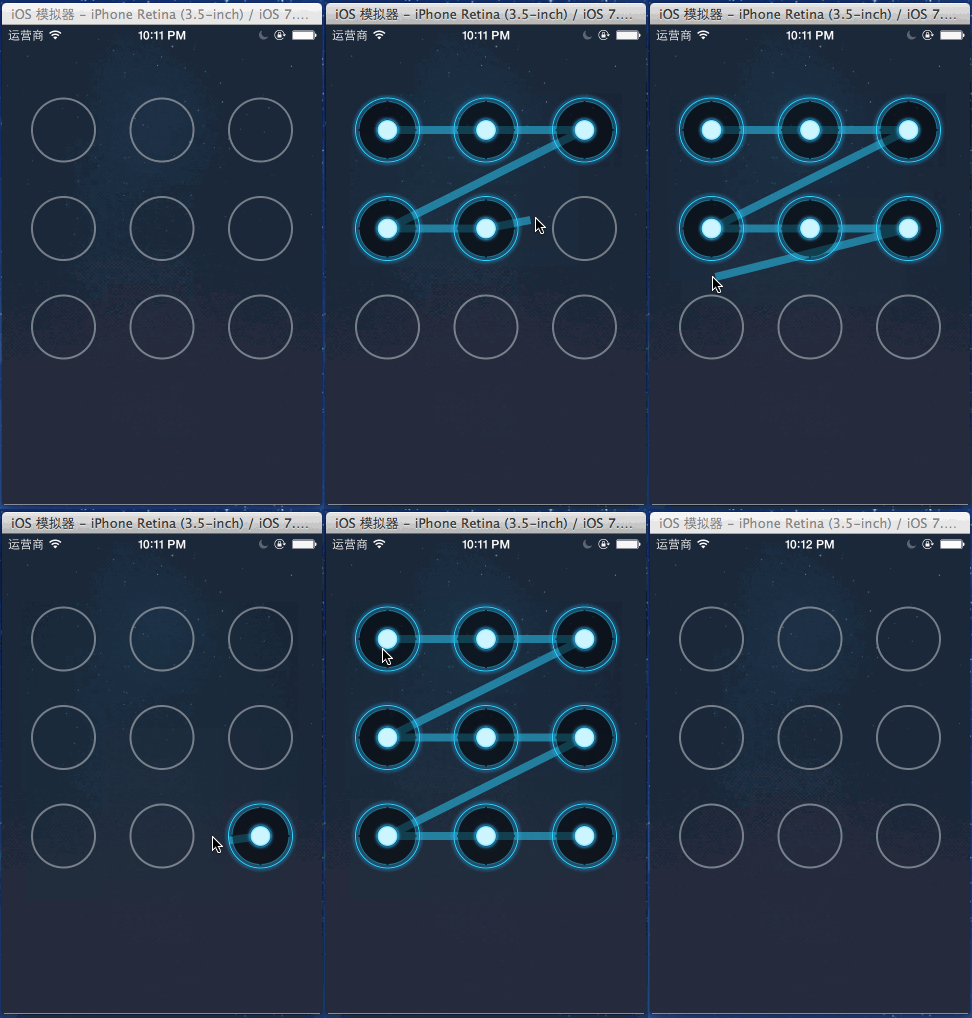
本文實作一個類似手機鎖屏的九宮格手勢解鎖功能,使用者用手指在九個節點上滑動,即可繪製出解鎖路徑。
最終效果圖:
控制器:接收解鎖路徑
控制器遵守 LockViewDelegate 協議,用來接收使用者繪製完成的路徑:
#import "BeyondViewController.h"
#import "LockView.h"
#import "LockViewDelegate.h"

// 遵守協議,用於獲知使用者在 LockView 上畫的解鎖路徑
@interface BeyondViewController () <LockViewDelegate>
@end

@implementation BeyondViewController
#pragma mark - LockView 代理方法
- (void)lockView:(LockView *)lockView didFinishPath:(NSString *)path {
    [MBProgressHUD showSuccess:path];
    NSLog(@"獲得用戶的手勢路徑:%@", path);
}
@end
自訂 CircleButton
每個節點都是一個自訂的按鈕,禁用使用者互動,並設定一般與選中兩種狀態的背景圖:
#import "Circle.h"

@implementation Circle
- (id)initWithFrame:(CGRect)frame {
    self = [super initWithFrame:frame];
    if (self) {
        [self setup];
    }
    return self;
}
- (id)initWithCoder:(NSCoder *)aDecoder {
    if (self = [super initWithCoder:aDecoder]) {
        [self setup];
    }
    return self;
}
- (void)setup {
    // 設置按鈕不可用(不可點擊)
    self.userInteractionEnabled = NO;
    // 默認背景圖片
    [self setBackgroundImage:[UIImage imageNamed:@"gesture_node_normal"] forState:UIControlStateNormal];
    // 選中時的背景圖片
    [self setBackgroundImage:[UIImage imageNamed:@"gesture_node_highlighted"] forState:UIControlStateSelected];
}
@end
LockView 定義的協議
#import <Foundation/Foundation.h>
@class LockView;

@protocol LockViewDelegate <NSObject>
@optional
// 鎖屏手勢繪製完成時調用,通知外界
- (void)lockView:(LockView *)lockView didFinishPath:(NSString *)path;
@end
核心:自訂 LockView
LockView 是整個功能的核心,負責佈置九個節點、追蹤手指移動路徑,並在 drawRect: 中繪製連線:
#import "LockView.h"
#import "Circle.h"
#import "LockViewDelegate.h"

@interface LockView()
// 記住所有 touchMove 經過的 circle
@property (nonatomic, strong) NSMutableArray *circleArr;
// 手指當前活動的點,用於繪製最後一段線
@property (nonatomic, assign) CGPoint activePoint;
@end

@implementation LockView

#pragma mark - 懶加載
- (NSMutableArray *)circleArr {
    if (_circleArr == nil) {
        _circleArr = [NSMutableArray array];
    }
    return _circleArr;
}

#pragma mark - 初始化
- (id)initWithFrame:(CGRect)frame {
    self = [super initWithFrame:frame];
    if (self) {
        [self addAllCircles];
    }
    return self;
}
- (id)initWithCoder:(NSCoder *)aDecoder {
    if (self = [super initWithCoder:aDecoder]) {
        [self addAllCircles];
    }
    return self;
}
// 一次性添加所有按鈕
- (void)addAllCircles {
    for (int index = 0; index < 9; index++) {
        Circle *btn = [Circle buttonWithType:UIButtonTypeCustom];
        btn.tag = index; // 綁定 tag,用於驗證鎖的順序
        [self addSubview:btn];
    }
}

#pragma mark - 佈局
- (void)layoutSubviews {
    [super layoutSubviews];
    for (int i = 0; i < self.subviews.count; i++) {
        Circle *btn = self.subviews[i];
        CGFloat btnW = 74;
        CGFloat btnH = 74;
        int totalColumns = 3;
        int col = i % totalColumns;
        int row = i / totalColumns;
        CGFloat marginX = (self.frame.size.width - totalColumns * btnW) / (totalColumns + 1);
        CGFloat marginY = marginX;
        CGFloat btnX = marginX + col * (btnW + marginX);
        CGFloat btnY = row * (btnH + marginY);
        btn.frame = CGRectMake(btnX, btnY, btnW, btnH);
    }
}

#pragma mark - 觸摸方法
- (void)touchesBegan:(NSSet *)touches withEvent:(UIEvent *)event {
    self.activePoint = CGPointZero;
    CGPoint startPoint = [self pointWithTouches:touches];
    Circle *btn = [self buttonWithPoint:startPoint];
    if (btn && btn.selected == NO) {
        btn.selected = YES;
        [self.circleArr addObject:btn];
    }
    [self setNeedsDisplay];
}
- (void)touchesMoved:(NSSet *)touches withEvent:(UIEvent *)event {
    CGPoint pos = [self pointWithTouches:touches];
    Circle *btn = [self buttonWithPoint:pos];
    if (btn && btn.selected == NO) {
        btn.selected = YES;
        [self.circleArr addObject:btn];
    } else {
        self.activePoint = pos;
    }
    [self setNeedsDisplay];
}
- (void)touchesEnded:(NSSet *)touches withEvent:(UIEvent *)event {
    if ([self.delegate respondsToSelector:@selector(lockView:didFinishPath:)]) {
        NSMutableString *path = [NSMutableString string];
        for (Circle *btn in self.circleArr) {
            [path appendFormat:@"%d", btn.tag];
        }
        [self.delegate lockView:self didFinishPath:path];
    }
    [self.circleArr makeObjectsPerformSelector:@selector(setSelected:) withObject:@(NO)];
    [self.circleArr removeAllObjects];
    [self setNeedsDisplay];
}
- (void)touchesCancelled:(NSSet *)touches withEvent:(UIEvent *)event {
    [self touchesEnded:touches withEvent:event];
}

#pragma mark - 自訂方法
- (CGPoint)pointWithTouches:(NSSet *)touches {
    UITouch *touch = [touches anyObject];
    return [touch locationInView:touch.view];
}
- (Circle *)buttonWithPoint:(CGPoint)point {
    for (Circle *btn in self.subviews) {
        if (CGRectContainsPoint(btn.frame, point)) {
            return btn;
        }
    }
    return nil;
}

#pragma mark - 繪圖
- (void)drawRect:(CGRect)rect {
    if (self.circleArr.count == 0) return;

    UIBezierPath *path = [UIBezierPath bezierPath];
    for (int i = 0; i < self.circleArr.count; i++) {
        Circle *btn = self.circleArr[i];
        if (i == 0) {
            [path moveToPoint:btn.center];
        } else {
            [path addLineToPoint:btn.center];
        }
    }
    if (CGPointEqualToPoint(self.activePoint, CGPointZero) == NO) {
        [path addLineToPoint:self.activePoint];
    }
    path.lineWidth = 8;
    path.lineJoinStyle = kCGLineJoinBevel;
    [[UIColor colorWithRed:32/255.0 green:210/255.0 blue:254/255.0 alpha:0.5] set];
    [path stroke];
}
@end
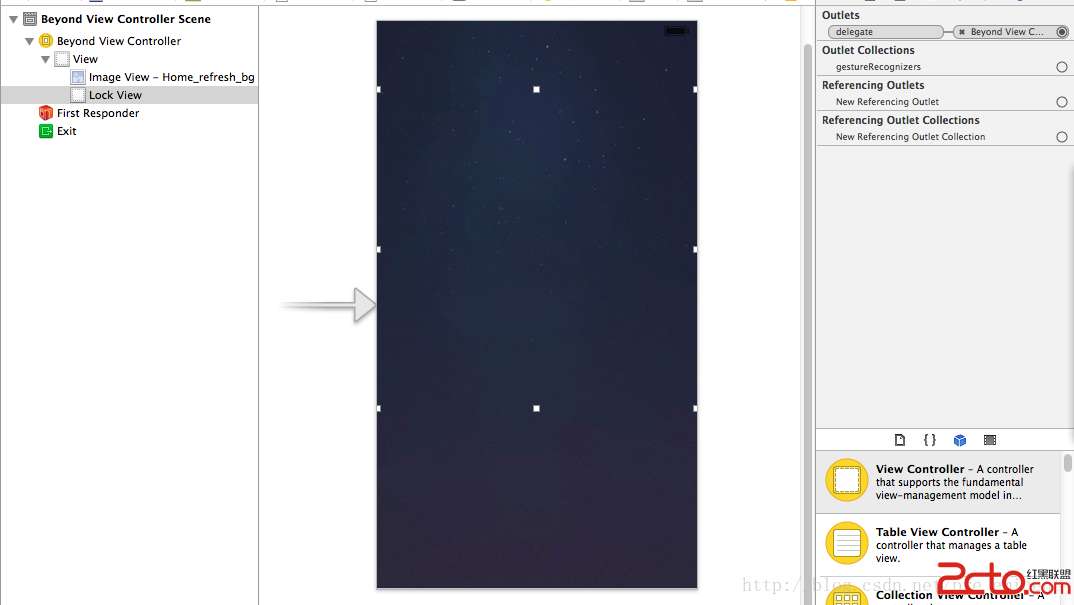
Storyboard 佈局:
原理小結
整個功能的關鍵在於四個觸摸回呼:touchesBegan 記錄起點、touchesMoved 持續追蹤經過的節點、touchesEnded 拼接節點 tag 形成路徑字串並通知代理,最後由 drawRect: 用貝塞爾曲線把路徑畫出來。每個節點的 tag 就是最終解鎖密碼的依據。
- 上一篇文章: iOS 相機手動對焦實作
- 下一篇文章: iOS 圖像處理:調整圖像亮度