
iOS 實作:點擊 UITableViewCell 展開下拉子選單
編輯:iOS 開發綜合
很多列表都會有「點一下展開細節」的互動。實作思路其實很單純:用一個資料陣列描述每一列的狀態,點擊時判斷該列的展開旗標,然後在它的下一個位置插入或移除一個自訂的附加 cell,最後用 beginUpdates / insertRowsAtIndexPaths: 讓表格帶著動畫更新。
資料結構設計
每一列用一個字典描述:Cell 代表要載入哪一種 cell,isAttached 代表它下面的附加列是否已展開。
NSDictionary *dic = @{@"Cell": @"MainCell", @"isAttached": @(NO)};
NSArray *array = @[dic, dic, dic, dic, dic, dic];
self.dataArray = [NSMutableArray arrayWithArray:array];
兩種 cell 的分派
-(UITableViewCell *)tableView:(UITableView *)tableView cellForRowAtIndexPath:(NSIndexPath *)indexPath
{
    if ([[self.dataArray[indexPath.row] objectForKey:@"Cell"] isEqualToString:@"MainCell"]) {
        static NSString *CellIdentifier = @"MainCell";
        DDIUICtrl_messageCell *cell = [tableView dequeueReusableCellWithIdentifier:CellIdentifier];
        if (cell == nil) {
            cell = [[DDIUICtrl_messageCell alloc] initWithStyle:UITableViewCellStyleDefault
                                              reuseIdentifier:CellIdentifier];
            cell.selectionStyle = UITableViewCellSelectionStyleGray;
        }
        return cell;
    } else if ([[self.dataArray[indexPath.row] objectForKey:@"Cell"] isEqualToString:@"AttachedCell"]) {
        static NSString *CellIdentifier = @"AttachedCell";
        DDUICtrl_menuCell *cell = [tableView dequeueReusableCellWithIdentifier:CellIdentifier];
        if (cell == nil) {
            cell = [[DDUICtrl_menuCell alloc] initWithStyle:UITableViewCellStyleDefault
                                          reuseIdentifier:CellIdentifier];
            cell.selectionStyle = UITableViewCellSelectionStyleNone;
        }
        return cell;
    }
    return nil;
}
點擊時插入或移除
-(void)tableView:(UITableView *)tableView didSelectRowAtIndexPath:(NSIndexPath *)indexPath
{
    [tableView deselectRowAtIndexPath:indexPath animated:YES];

    NSIndexPath *path = nil;
    if ([[self.dataArray[indexPath.row] objectForKey:@"Cell"] isEqualToString:@"MainCell"]) {
        path = [NSIndexPath indexPathForItem:(indexPath.row + 1) inSection:indexPath.section];
    } else {
        path = indexPath;   // 點的是附加列,等同關閉
    }

    if ([[self.dataArray[indexPath.row] objectForKey:@"isAttached"] boolValue]) {
        // 關閉附加 cell
        self.dataArray[(path.row - 1)] = @{@"Cell": @"MainCell", @"isAttached": @(NO)};
        [self.dataArray removeObjectAtIndex:path.row];

        [self.my_tableView beginUpdates];
        [self.my_tableView deleteRowsAtIndexPaths:@[path] withRowAnimation:UITableViewRowAnimationMiddle];
        [self.my_tableView endUpdates];
    } else {
        // 打開附加 cell
        self.dataArray[(path.row - 1)] = @{@"Cell": @"MainCell", @"isAttached": @(YES)};
        [self.dataArray insertObject:@{@"Cell": @"AttachedCell", @"isAttached": @(YES)} atIndex:path.row];

        [self.my_tableView beginUpdates];
        [self.my_tableView insertRowsAtIndexPaths:@[path] withRowAnimation:UITableViewRowAnimationMiddle];
        [self.my_tableView endUpdates];
    }
}
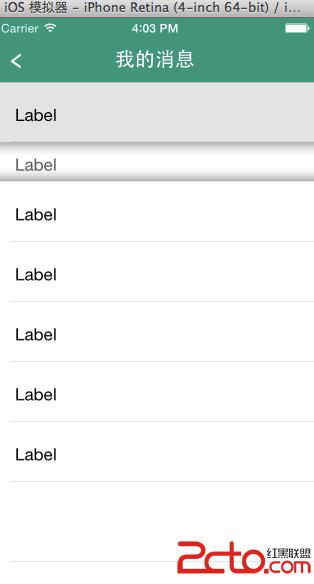
幾個實務提醒
- 展開狀態一定要放進資料來源,不要存在 cell 物件上。cell 會被回收重用,狀態存 cell 上必然錯亂。
- 附加列的展開動畫高度若是動態的,記得實作
heightForRowAtIndexPath:,並在 begin/endUpdates 之間讓高度計算能拿到最新狀態。 - 同一時間建議只允許展開一列(accordion 行為):插入前先掃過陣列,把其他已展開的列收回去。
- 若列數很多、附加內容高度不一,改用 UITableView 自帶的
expandedIndexPaths概念或第三方 accordion 元件會更好維護。