
iOS 開發:圖片壓縮與解壓成 Zip 文件
編輯:iOS 開發綜合
App 上傳圖片、備份數據時,打包成 Zip 是常見做法——能把多個文件合成一個、順便降低體積。iOS 沒有原生的 Zip API,實務上通常用第三方庫 ZipArchive。本文示範如何把一張網絡圖片存到本地、壓縮、解壓並還原顯示,以及刪除打包產物。
一、文件結構
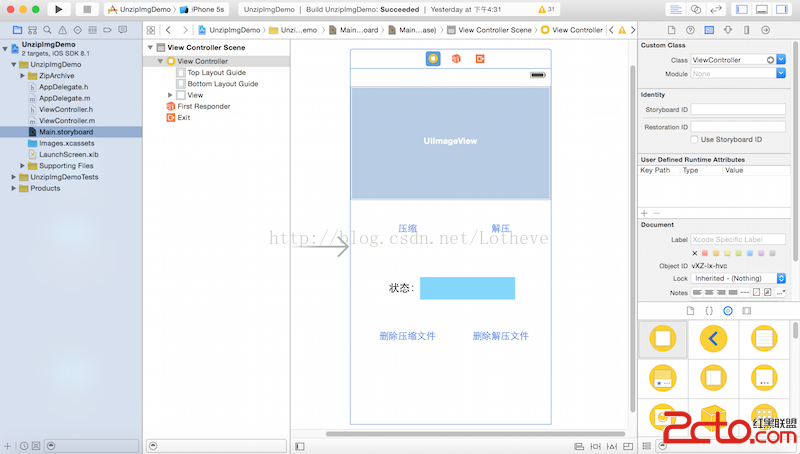
二、準備工作
1. 導入框架
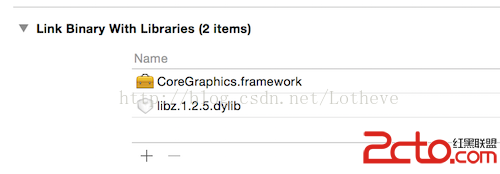
2. 把 ZipArchive.m 設為非 ARC(Target → Build Phases → Compile Sources → 加上 -fno-objc-arc 標記)

三、代碼示例
//
//  ViewController.m
//  UnzipImgDemo
//

#import "ViewController.h"
#import "ZipArchive.h"

@interface ViewController ()
@property (weak, nonatomic) IBOutlet UIImageView *imgView;
@property (weak, nonatomic) IBOutlet UIButton    *zipBtn;
@property (weak, nonatomic) IBOutlet UIButton    *unzipBtn;
@property (weak, nonatomic) IBOutlet UIButton    *zipFileDeBtn;
@property (weak, nonatomic) IBOutlet UIButton    *zipedFiledeBtn;
@property (weak, nonatomic) IBOutlet UILabel     *statusLabel;
@end

@implementation ViewController

- (void)viewDidLoad {
    [super viewDidLoad];
    [self downLoadImg];
}

#pragma mark - 下載圖片到本地

- (void)downLoadImg {
    NSString *URLString = @"https://www.baidu.com/img/bdlogo.png";
    NSURL *URL = [NSURL URLWithString:URLString];
    NSData *data = [NSData dataWithContentsOfURL:URL];

    NSString *path = [NSSearchPathForDirectoriesInDomains(NSCachesDirectory,
                                                          NSUserDomainMask, YES) firstObject];
    NSString *imgPath = [path stringByAppendingPathComponent:@"baidu.png"];
    [data writeToFile:imgPath atomically:YES];
}

#pragma mark - 壓縮

- (IBAction)zipFile:(id)sender {
    NSString *docsPath   = [NSSearchPathForDirectoriesInDomains(NSDocumentDirectory,
                                                                NSUserDomainMask, YES) firstObject];
    NSString *cachesPath = [NSSearchPathForDirectoriesInDomains(NSCachesDirectory,
                                                               NSUserDomainMask, YES) firstObject];

    NSString *imgPath     = [cachesPath stringByAppendingPathComponent:@"baidu.png"];
    NSString *zipFilePath = [docsPath stringByAppendingPathComponent:@"newZipFile.zip"];

    // 建立壓縮文檔
    ZipArchive *za = [[ZipArchive alloc] init];
    [za CreateZipFile2:zipFilePath];

    // 加入要壓縮的文件(可指定壓縮後的名稱)
    [za addFileToZip:imgPath newname:@"baidu_zipped.png"];

    // 關閉並寫入
    BOOL success = [za CloseZipFile2];
    _statusLabel.text = success ? @"壓縮成功" : @"壓縮失敗";
}

#pragma mark - 解壓

- (IBAction)unzipFile:(id)sender {
    NSString *docsPath = [NSSearchPathForDirectoriesInDomains(NSDocumentDirectory,
                                                             NSUserDomainMask, YES) firstObject];
    NSString *zipPath  = [docsPath stringByAppendingPathComponent:@"newZipFile.zip"];

    ZipArchive *za = [[ZipArchive alloc] init];

    if ([za UnzipOpenFile:zipPath]) {
        BOOL success = [za UnzipFileTo:docsPath overWrite:YES];
        if (!success) {
            _statusLabel.text = @"解壓失敗";
        } else {
            [za UnzipCloseFile];
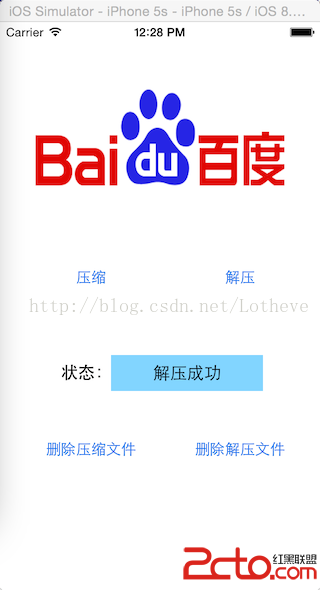
            _statusLabel.text = @"解壓成功";

            NSString *imgPath = [docsPath stringByAppendingPathComponent:@"baidu_zipped.png"];
            _imgView.image = [UIImage imageWithData:[NSData dataWithContentsOfFile:imgPath]];
        }
    } else {
        _statusLabel.text = @"壓縮文件不存在";
    }
}

#pragma mark - 刪除壓縮包

- (IBAction)deleteZipFile:(id)sender {
    NSString *docsPath = [NSSearchPathForDirectoriesInDomains(NSDocumentDirectory,
                                                             NSUserDomainMask, YES) firstObject];
    NSString *zipPath  = [docsPath stringByAppendingPathComponent:@"newZipFile.zip"];

    NSFileManager *fm = [NSFileManager defaultManager];
    if ([fm fileExistsAtPath:zipPath]) {
        NSError *error = nil;
        [fm removeItemAtPath:zipPath error:&error];
        _statusLabel.text = error ? @"刪除壓縮文件失敗" : @"刪除壓縮文件成功";
    } else {
        _statusLabel.text = @"文件不存在";
    }
}

#pragma mark - 刪除解壓後的文件

- (IBAction)deleteZipedFile:(id)sender {
    NSString *docsPath = [NSSearchPathForDirectoriesInDomains(NSDocumentDirectory,
                                                             NSUserDomainMask, YES) firstObject];
    NSString *zippedFilePath = [docsPath stringByAppendingPathComponent:@"baidu_zipped.png"];

    NSFileManager *fm = [NSFileManager defaultManager];
    if ([fm fileExistsAtPath:zippedFilePath]) {
        NSError *error = nil;
        [fm removeItemAtPath:zippedFilePath error:&error];
        if (!error) {
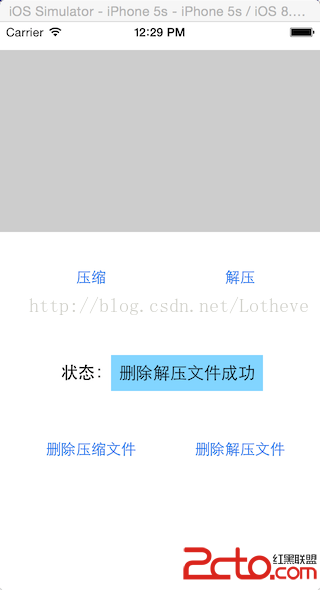
            _statusLabel.text = @"刪除解壓文件成功";
            _imgView.image = nil;
        } else {
            _statusLabel.text = @"刪除解壓文件失敗";
        }
    } else {
        _statusLabel.text = @"文件不存在";
    }
}

@end
四、效果演示
點擊壓縮按鈕:
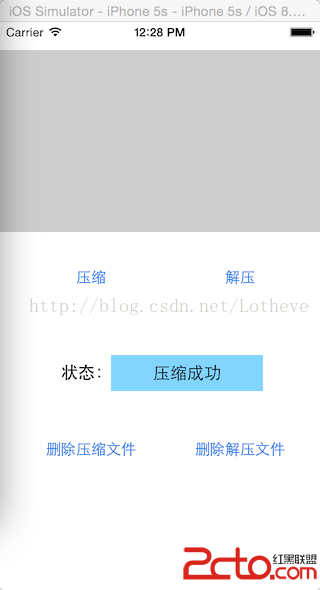
點擊解壓按鈕:
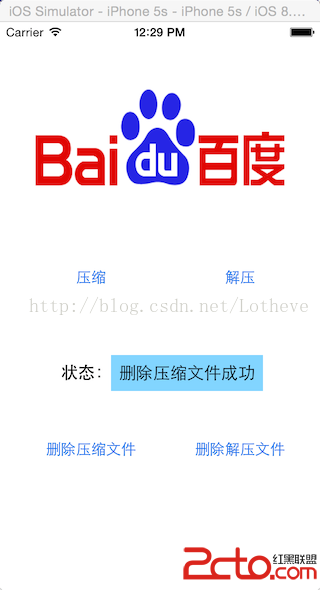
刪除操作:
實務建議
壓縮與解壓都是 CPU 密集的 I/O 操作,正式專案中務必放到子線程執行,完成後再回主線程更新 UI,否則大文件會直接凍結界面。另外,示例中的 dataWithContentsOfURL: 是同步網絡請求,實際專案請改用 NSURLSession。
若只是為了上傳單張圖片,其實不需要 Zip——直接上傳原圖或用 UIImageJPEGRepresentation 調整壓縮質量即可;Zip 更適合「一次打包多個文件」的場景。iOS 13 之後也可以考慮原生的 NSFileCoordinator 搭配 ArchiveFoundation(蘋果的 libcompression)來處理歸檔需求。
- 上一篇文章: iOS UIScrollView 代理實戰:滾動與縮放的關鍵方法
- 下一篇文章: iOS 的 MVC 設計模式入門