
iOS 入門:用純程式碼打造登錄界面
編輯:iOS 開發綜合
幾乎每個 App 都有登錄頁,拿它來練手再合適不過。本文示範如何完全用程式碼(不使用 storyboard)排版一個手機號加驗證碼的登錄界面,同時複習 UITextField、UIButton 與導覽列的基礎用法。
先看效果:
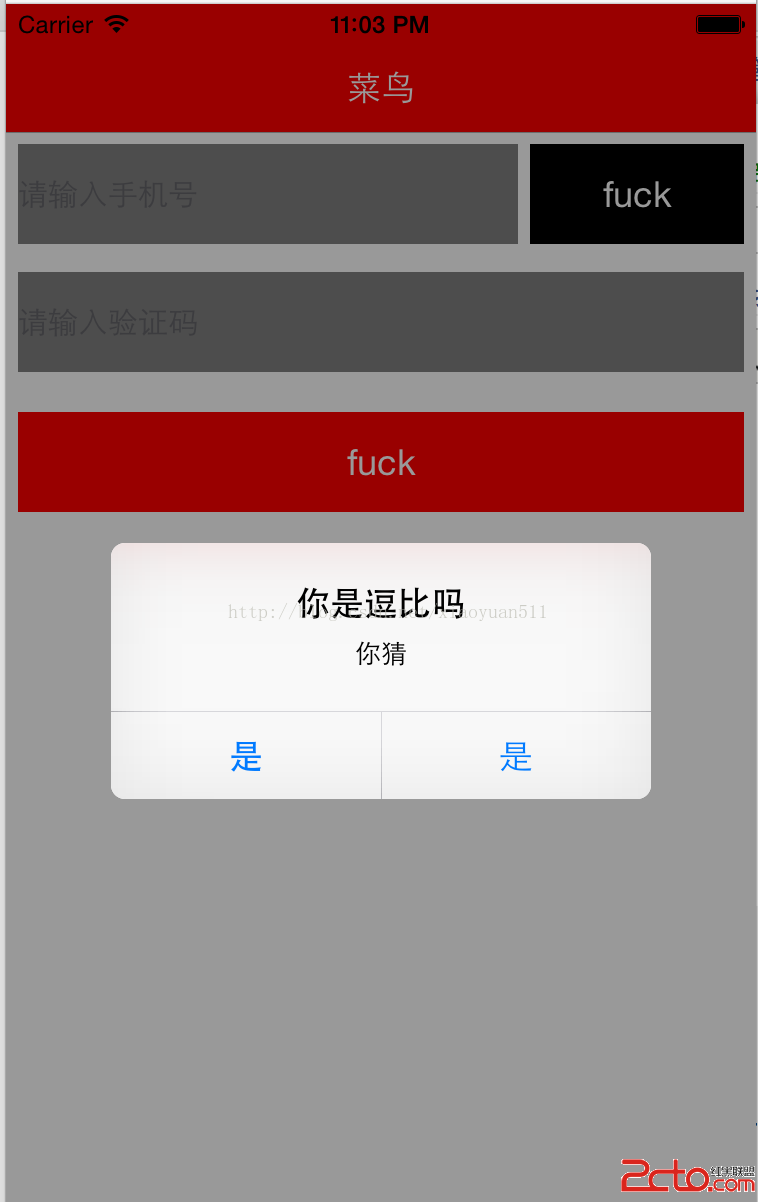
登錄頁面程式碼
//
//  MineUiViewController.m
//
#import "MineUiViewController.h"

@interface MineUiViewController () <UITextFieldDelegate> {
    UITextField *phone;
    UITextField *code;
    UIButton *btn;
    UIButton *getcode;
}
@end

@implementation MineUiViewController

- (void)viewDidLoad {
    [super viewDidLoad];

    // 自訂導覽列標題
    UILabel *title = [[UILabel alloc] initWithFrame:CGRectZero];
    title.backgroundColor = [UIColor clearColor];
    title.textColor = [UIColor whiteColor];
    self.navigationItem.titleView = title;
    title.text = @"登錄";
    [title sizeToFit];

    self.navigationController.navigationBar.barTintColor = [UIColor redColor];
    [self.navigationController.navigationBar setTranslucent:NO];

    int width = (int)self.view.frame.size.width;
    int top = 6;

    // 手機號輸入框
    phone = [[UITextField alloc] initWithFrame:CGRectMake(top, top, width * 2 / 3, 50)];
    phone.textColor = [UIColor greenColor];
    phone.font = [UIFont systemFontOfSize:15];
    phone.placeholder = @"請輸入手機號";
    phone.backgroundColor = [UIColor grayColor];
    phone.returnKeyType = UIReturnKeyDefault;
    phone.delegate = self;
    phone.keyboardType = UIKeyboardTypeNumberPad;
    [self.view addSubview:phone];

    // 取得驗證碼按鈕
    getcode = [[UIButton alloc] initWithFrame:CGRectMake(width * 2 / 3 + top * 2, top,
                                                        width * 1 / 3 - top * 3, 50)];
    getcode.backgroundColor = [UIColor blackColor];
    [getcode setTitle:@"獲取驗證碼" forState:UIControlStateNormal];
    [getcode addTarget:self action:@selector(getcode) forControlEvents:UIControlEventTouchUpInside];
    [self.view addSubview:getcode];

    // 驗證碼輸入框
    int y = 50 + 20;
    code = [[UITextField alloc] initWithFrame:CGRectMake(top, y, width - top * 2, 50)];
    code.textColor = [UIColor blueColor];
    code.font = [UIFont systemFontOfSize:15];
    code.placeholder = @"請輸入驗證碼";
    code.backgroundColor = [UIColor grayColor];
    code.returnKeyType = UIReturnKeyDefault;
    code.delegate = self;
    code.keyboardType = UIKeyboardTypeNumberPad;
    [self.view addSubview:code];

    // 登錄按鈕
    y += 50 + 20;
    btn = [[UIButton alloc] initWithFrame:CGRectMake(top, y, width - top * 2, 50)];
    btn.backgroundColor = [UIColor redColor];
    [btn setTitle:@"登錄" forState:UIControlStateNormal];
    [btn addTarget:self action:@selector(getcode) forControlEvents:UIControlEventTouchUpInside];
    [self.view addSubview:btn];
}

- (void)getcode {
    UIAlertView *show = [[UIAlertView alloc] initWithTitle:@"提示"
                                                   message:@"功能待實作"
                                                  delegate:nil
                                         cancelButtonTitle:@"確定"
                                         otherButtonTitles:nil];
    [show show];
}

- (void)didReceiveMemoryWarning {
    [super didReceiveMemoryWarning];
}

@end
在 AppDelegate 中指定根視圖
若使用純程式碼建立介面,記得在啟動方法中自行建立 window 與根視圖控制器,否則會看到空白畫面。
//
//  AppDelegate.m
//
#import "AppDelegate.h"
#import "MineUiViewController.h"

@implementation AppDelegate

- (BOOL)application:(UIApplication *)application
    didFinishLaunchingWithOptions:(NSDictionary *)launchOptions {
    // 建立 window
    _window = [[UIWindow alloc] initWithFrame:CGRectMake(0, 0, 400, 600)];
    _window.backgroundColor = [UIColor whiteColor];

    MineUiViewController *rootVC = [[MineUiViewController alloc] init];
    UINavigationController *nav = [[UINavigationController alloc] initWithRootViewController:rootVC];
    _window.rootViewController = nav;

    [_window makeKeyAndVisible];
    return YES;
}

- (void)applicationWillResignActive:(UIApplication *)application {
    // 即將進入非活動狀態,可在此暫停任務與計時器
}

- (void)applicationDidEnterBackground:(UIApplication *)application {
    // 進入背景,釋放共用資源並保存使用者資料
}

- (void)applicationWillEnterForeground:(UIApplication *)application {
    // 回到前景,還原先前所做的變更
}

- (void)applicationDidBecomeActive:(UIApplication *)application {
    // 恢復被暫停的任務,必要時刷新介面
}

- (void)applicationWillTerminate:(UIApplication *)application {
    // 即將終止,保存資料
}

@end
這個範例刻意保持簡單,但排版邏輯值得學:用一個 y 變數累加間距,比每個控件都寫死座標好維護得多。若要進一步優化,可以把重複的樣式設定抽成 helper 方法,並改用 layout 邊界相對定位,換到不同尺寸螢幕時就不用重算寬度了。
- 上一篇文章: iOS 中的動畫:Core Animation 四大家族
- 下一篇文章: iOS 開發:CocoaPods 實戰入門