
iOS 實戰:在 UITableView 的 Section Footer 添加按鈕
編輯:iOS 開發綜合
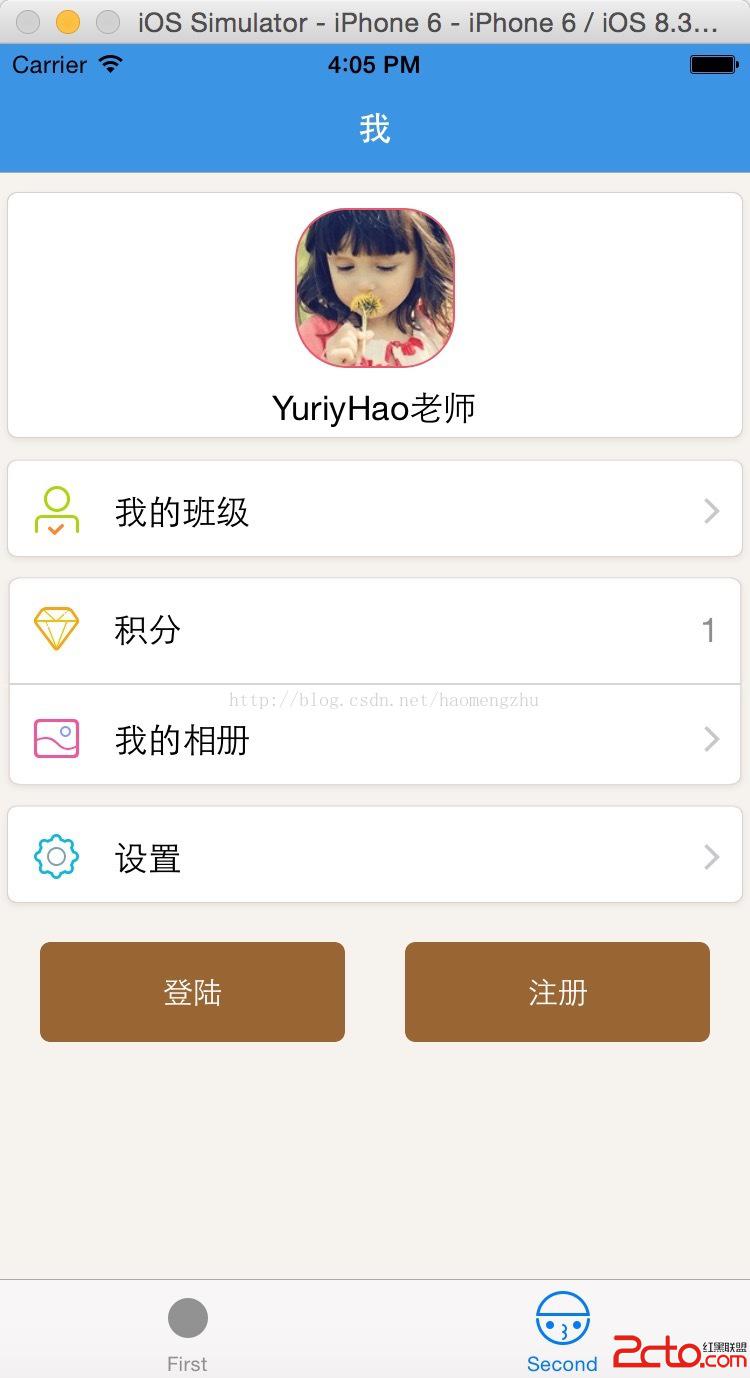
在處理 UITableView 表格時,我們常常希望在列表底部添加按鈕,並且讓按鈕能夠跟隨用戶的拖動而移動。這可以透過 Section Footer 來實現。以下示範如何在 footer 中放置「登入」與「註冊」兩個並排的按鈕。
- (CGFloat)tableView:(UITableView *)tableView heightForFooterInSection:(NSInteger)section {
    if (section >= kSetSetting) {
        return 80;
    } else {
        return 2;
    }
}

- (UIView *)tableView:(UITableView *)tableView viewForFooterInSection:(NSInteger)section {
    if (section >= kSetSetting) {
        UIView *footerView = [[UIView alloc] init];
        footerView.userInteractionEnabled = YES;
        footerView.backgroundColor = [UIColor clearColor];

        // 登入按鈕
        UIButton *loginButton = [UIButton buttonWithType:UIButtonTypeSystem];
        [loginButton.layer setMasksToBounds:YES];
        [loginButton.layer setCornerRadius:5.0];
        [loginButton setBackgroundColor:[UIColor brownColor]];
        [loginButton setTitle:@"登陸" forState:UIControlStateNormal];
        [loginButton setTitleColor:[UIColor whiteColor] forState:UIControlStateNormal];
        [loginButton.titleLabel setFont:[UIFont systemFontOfSize:15]];
        [loginButton setTranslatesAutoresizingMaskIntoConstraints:NO];
        [loginButton addTarget:self action:@selector(loginBtnClick:) forControlEvents:UIControlEventTouchUpInside];
        [footerView addSubview:loginButton];

        // 註冊按鈕
        UIButton *registerButton = [UIButton buttonWithType:UIButtonTypeSystem];
        [registerButton.layer setMasksToBounds:YES];
        [registerButton.layer setCornerRadius:5.0];
        [registerButton setBackgroundColor:[UIColor brownColor]];
        [registerButton setTitle:@"注冊" forState:UIControlStateNormal];
        [registerButton setTitleColor:[UIColor whiteColor] forState:UIControlStateNormal];
        [registerButton.titleLabel setFont:[UIFont systemFontOfSize:15]];
        [registerButton setTranslatesAutoresizingMaskIntoConstraints:NO];
        [registerButton addTarget:self action:@selector(registerBtnClick:) forControlEvents:UIControlEventTouchUpInside];
        [footerView addSubview:registerButton];

        // 使用 Auto Layout 約束佈局
        NSDictionary *views = NSDictionaryOfVariableBindings(loginButton, registerButton);
        [footerView addConstraints:[NSLayoutConstraint constraintsWithVisualFormat:@"V:|-15-[loginButton]-15-|" options:0 metrics:nil views:views]];
        [footerView addConstraints:[NSLayoutConstraint constraintsWithVisualFormat:@"|-20-[loginButton]" options:0 metrics:nil views:views]];
        [footerView addConstraints:[NSLayoutConstraint constraintsWithVisualFormat:@"V:|-15-[registerButton(==loginButton)]-15-|" options:0 metrics:nil views:views]];
        [footerView addConstraints:[NSLayoutConstraint constraintsWithVisualFormat:@"H:[loginButton]-30-[registerButton(==loginButton)]-20-|" options:0 metrics:nil views:views]];

        return footerView;
    } else {
        return nil;
    }
}
關鍵在於實作 heightForFooterInSection: 決定 footer 高度,以及 viewForFooterInSection: 回傳自訂的 footerView。透過 Auto Layout 的 Visual Format Language 設定約束,就能讓兩個按鈕自動均分寬度並保持整齊的間距。