
iOS 開發實戰小技巧彙編:從 UI 細節到常見報錯的 40 多個解法
這份清單收錄了日常開發中反覆遇到的琐碎問題,多半沒有官方教學會寫,卻每個都能卡住你半小時。以下依主題整理。
一、搜尋框與文字輸入
1. 如何讓 UISearchBar 完全透明?
Storyboard 的屬性面板只能設定 backgroundColor,設成 clearColor 卻沒有效果。真正的原因是 searchBar 底層還墊著一個 subview,把它移除即可:
[[self.searchBar.subviews objectAtIndex:0] removeFromSuperview];2. NSDateFormatter 的格式符號
常用符號對照:y 表示年、M 表示月份(可輸出 July / Jul / 07)、d 表示月份中的第幾天、E 表示星期(Tuesday / Tue)、H 是 0–23 小時、h 是 1–12 小時、a 是 AM/PM、m 是分、s 是秒、S 是毫秒、z 與 Z 是時區。
最容易踩的坑:日期用 yyyy-MM-dd,時間一定要寫 HH:mm,千萬別寫成 HH-mm,否則解析結果會出錯。
NSDate *date = [NSDate date];
NSDate *yesterday = [NSDate dateWithTimeIntervalSinceNow:-(24 * 60 * 60)];

NSString *dateString = @"1999-09-03";
NSDateFormatter *formatter = [[NSDateFormatter alloc] init];
[formatter setDateFormat:@"yyyy-MM-dd"];

NSDate *newDate = [formatter dateFromString:dateString];   // 字串轉日期
NSString *back = [formatter stringFromDate:newDate];       // 日期轉字串
3. 限制 UITextField 的輸入長度
很多人會寫 if (range.location <= 11) return YES;,這其實有嚴重副作用:一旦達到上限就回傳 NO,鍵盤的「刪除鍵」也會跟著失效,使用者再也退不回來。正確做法是把替換後的總長度算清楚:
- (BOOL)textField:(UITextField *)textField
shouldChangeCharactersInRange:(NSRange)range
replacementString:(NSString *)string {
    NSInteger maxLength = 11;
    NSInteger newLength = textField.text.length - range.length + string.length;
    return newLength <= maxLength;
}
range 是被替換掉的區間(range.length 為 0 代表插入),string 是替換字串(length 為 0 代表刪除)。
4. 只有輸入內容後,鍵盤的「完成」鍵才可按
searchField.enablesReturnKeyAutomatically = YES;5. 密文輸入
在屬性面板勾選 Secure 即可,會採用系統預設的圓點顯示方式。
6. 隱藏鍵盤的兩種做法
一是在 textField 的 Did End On Exit 事件中呼叫 resignFirstResponder;二是監聽畫面的觸碰:
- (void)touchesBegan:(NSSet *)touches withEvent:(UIEvent *)event {
    UITouch *touch = [[event allTouches] anyObject];
    if (touch.tapCount >= 1) {
        [chi resignFirstResponder];
        [meter resignFirstResponder];
    }
}
7. 用 NSPredicate 做正則表達式校驗
NSString *regex = @"^1(3[4-9]|5[012789]|8[2378]|47)\\d{8}$";
NSPredicate *predicate = [NSPredicate predicateWithFormat:@"SELF MATCHES %@", regex];
BOOL isMatch = [predicate evaluateWithObject:editPhoneField.text];
二、Cell 與列表
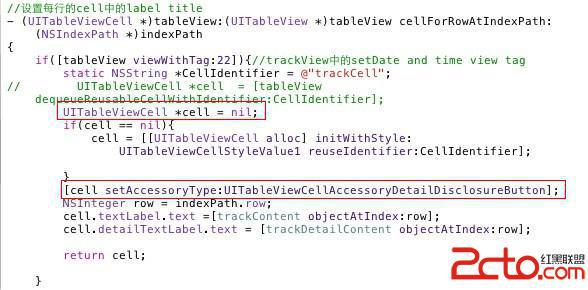
8. cell 右側的 detail 按鈕沒出現?
把 accessory 設為 Detail Disclosure 後,若使用 Storyboard,記得在 cellForRowAtIndexPath: 裡設定 reuseIdentifier,否則執行時會因為 cell 未實例化而報錯。
9. 用 UINib 註冊自訂 Cell(iOS 5 以後)
UINib *nib = [UINib nibWithNibName:@"TvWeiboCell" bundle:nil];
[tableView registerNib:nib forCellReuseIdentifier:CellIdentifier];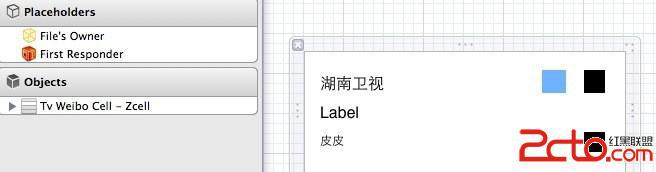
三、跳轉與導航
10. 登入頁跳轉後,後續 push 卻完全沒反應
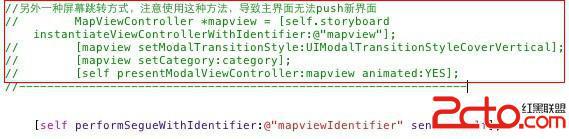
這個問題困擾過不少人:登入頁用 [[self storyboard] instantiateViewControllerWithIdentifier:] 手動建立主界面,導致主界面雖然是 NavigationController 的 root,卻不在正常的導航堆疊脈絡裡,後續 push 便靜默失效——不報錯,就是不動。
建議改用 segue 進入主界面,並在 prepareForSegue:sender: 中把需要傳遞的資料塞給目標控制器,這樣導航關係才會正確建立。
11. 返回上一頁 / 跳回指定的那一頁
回上一頁:[self.navigationController popViewControllerAnimated:YES];
要跳回堆疊中特定的一頁,最乾淨的做法是從 viewControllers 陣列取出目標,而不是自己 new 一個同類型的物件(那樣做永遠跳不回去):
NSArray *vcs = [self.navigationController viewControllers];
UIViewController *target = [vcs objectAtIndex:1];
[self.navigationController popToViewController:target animated:YES];
12. 返回按鈕標題改不掉?
無論設 leftBarButtonItem.title 還是 backBarButtonItem.title 都沒有用,因為 backBarButtonItem 屬於上一級頁面。要在上一級頁面的 viewDidLoad 中這樣寫:
UIBarButtonItem *item = [[UIBarButtonItem alloc] init];
item.title = @"返回";
self.navigationItem.backBarButtonItem = item;
換句話說:backBarButtonItem 在一級頁面設定(決定下一頁的返回鈕長相),left/rightBarButtonItem 則在當前頁面設定。
13. self.navigationItem 與 self.navigationController.navigationItem 的差別
前者是 UIViewController 對 UINavigationItem 的類別擴充,用來定制「自己」在導航列中的樣貌,例如 titleView、leftBarButtonItem、rightBarButtonItem。
後者取得的是導航控制器自身的 navigationItem,屬於導航層級的設定,一般不會直接動它。
而 UINavigationBar 繼承自 UIView,屬於整個 UINavigationController,用來設定整條導航列的色系與外觀,只能透過 self.navigationController.navigationBar 存取。
14. 隱藏 UINavigationBar
- (void)viewWillAppear:(BOOL)animated {
    [self.navigationController setNavigationBarHidden:YES animated:YES];
    [super viewWillAppear:animated];
}

- (void)viewWillDisappear:(BOOL)animated {
    [self.navigationController setNavigationBarHidden:NO animated:YES];
    [super viewWillDisappear:animated];
}
15. 客製 UINavigationBar 背景
UIColor *color = [UIColor colorWithRed:100.0f/255 green:176.0f/255 blue:0.0f/255 alpha:0.3f];
self.navigationController.navigationBar.tintColor = color;

[self.navigationController.navigationBar
    setBackgroundImage:[UIImage imageNamed:@"navbg.png"]
    forBarMetrics:UIBarMetricsDefault];
注意:背景圖不會自動對齊 back 按鈕或右側 BarButtonItem,需要自行處理這兩個元素。
16. 在導航列與工具列之上蓋一個全屏遮罩
加到 window 上,而不是 self.view 上:
[[UIApplication sharedApplication].keyWindow addSubview:waitingView];17. 調整子視圖的層級順序
NSLog(@"subviews: %@", self.view.subviews);
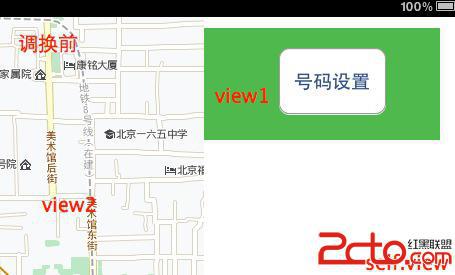
[self.view exchangeSubviewAtIndex:1 withSubviewAtIndex:2];
先印出 subviews 確認索引,再交換即可。

四、視圖外觀
18. 給 UIView 加圓角
testView.layer.cornerRadius = 6;
testView.layer.masksToBounds = YES;
記得 #import <QuartzCore/QuartzCore.h>,否則 cornerRadius 與 masksToBounds 無法識別。
19. 用圖片當 UIView 的背景
Storyboard 的屬性面板沒有 image 欄位(只有 UIImageView 有),所以只能在程式碼裡處理:
[theMainView setBackgroundColor:[UIColor colorWithPatternImage:[UIImage imageNamed:@"bg.png"]]];
[theMainView setFrame:CGRectMake(9, 60, 120, 250)];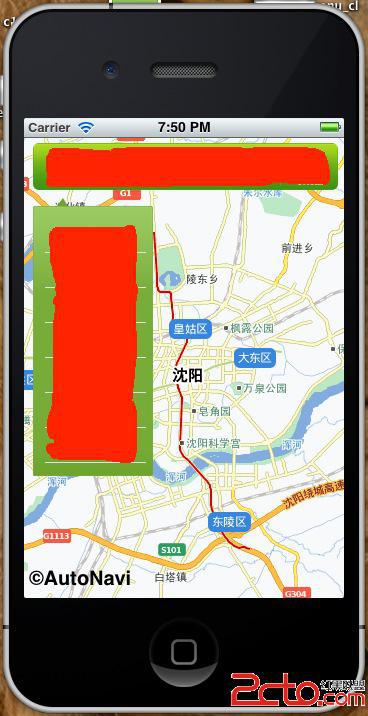
20. 圖片縮放
+ (UIImage *)scale:(UIImage *)image toSize:(CGSize)size {
    UIGraphicsBeginImageContext(size);
    [image drawInRect:CGRectMake(0, 0, size.width, size.height)];
    UIImage *scaled = UIGraphicsGetImageFromCurrentImageContext();
    UIGraphicsEndImageContext();
    return scaled;
}補充:imageNamed: 會走系統快取,而 initWithContentsOfFile: 每次都重新解碼,適合大量一次性的圖片。
21. 自訂勾選框按鈕
UIButton *checkbox = [UIButton buttonWithType:UIButtonTypeCustom];
checkbox.frame = CGRectMake(135, 150, 36, 36);
[checkbox setImage:[UIImage imageNamed:@"checkbox_off.png"] forState:UIControlStateNormal];
[checkbox setImage:[UIImage imageNamed:@"checkbox_on.png"]  forState:UIControlStateSelected];
[checkbox addTarget:self action:@selector(checkboxClick:) forControlEvents:UIControlEventTouchUpInside];
[self.view addSubview:checkbox];

- (void)checkboxClick:(UIButton *)btn {
    btn.selected = !btn.selected;
}
22. UIImageView 裡的按鈕點不動
UIImageView 預設 userInteractionEnabled 為 NO,其子視圖自然收不到事件:
imageView.userInteractionEnabled = YES;五、系統整合與應用資訊
23. 用 openURL 跳轉電話、瀏覽器、郵件、簡訊
[[UIApplication sharedApplication] openURL:[NSURL URLWithString:@"tel://4008008288"]];
[[UIApplication sharedApplication] openURL:[NSURL URLWithString:@"https://www.abt.com"]];
[[UIApplication sharedApplication] openURL:[NSURL URLWithString:@"mailto://admin@abt.com"]];
[[UIApplication sharedApplication] openURL:[NSURL URLWithString:@"sms://800888"]];
openURL 只能帶「收件人」,無法預填內容。要自帶正文,得引入 MessageUI.framework 並實作 MFMessageComposeViewControllerDelegate 或 MFMailComposeViewControllerDelegate,自行控制 body 與 recipients。
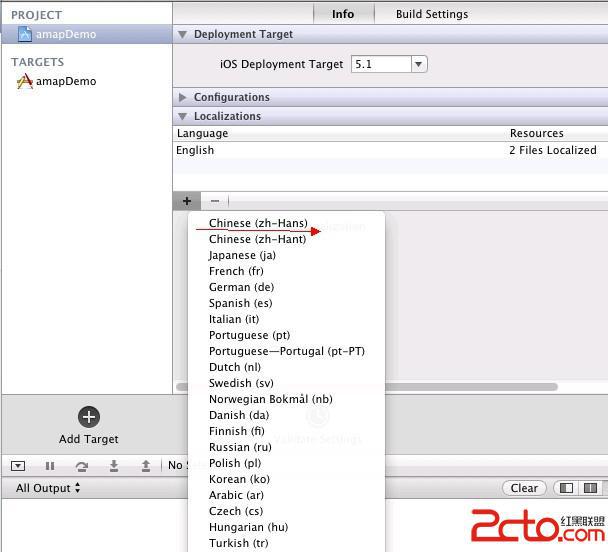
預設的簡訊介面是英文的,解法是在 .xib 的 Localization 中補一組 Chinese。
24. 跳轉 App Store
NSString *url = @"https://itunes.apple.com/cn/app/id549425594?l=en&mt=8";
[[UIApplication sharedApplication] openURL:[NSURL URLWithString:url]];
25. 註冊遠端推播權限
[[UIApplication sharedApplication] registerForRemoteNotificationTypes:
    UIRemoteNotificationTypeBadge | UIRemoteNotificationTypeSound | UIRemoteNotificationTypeAlert];
26. 讀取版本號與 App 名稱
NSDictionary *info = [[NSBundle mainBundle] infoDictionary];
NSString *version = [info objectForKey:@"CFBundleVersion"];
NSString *name    = [info objectForKey:@"CFBundleDisplayName"];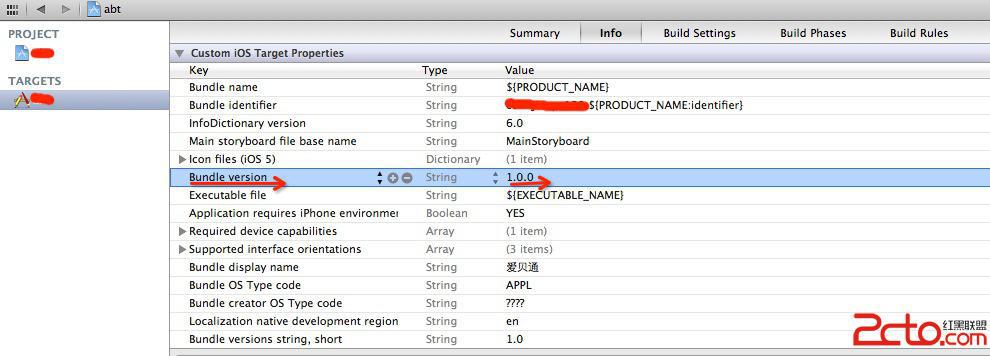
27. 取得裝置資訊
[[UIDevice currentDevice] systemName];
[[UIDevice currentDevice] systemVersion];
[[UIDevice currentDevice] model];
[[UIDevice currentDevice] name];
uniqueIdentifier 是硬體標識與序號經雜湊後生成的結果,後來已被官方禁止使用,新專案請改用 identifierForVendor。
28. 播放系統音效與震動
先加入 AudioToolbox.framework,然後:
AudioServicesPlaySystemSound(1000);                     // 新郵件提示音
AudioServicesPlaySystemSound(kSystemSoundID_Vibrate);   // 震動
29. 讓螢幕保持不休眠
[[UIApplication sharedApplication] setIdleTimerDisabled:YES];記得在不需要時(例如影片播完)設回 NO,否則螢幕會一直亮著。
30. 啟動時全屏顯示 Default.png
把啟動圖命名為 Default.png 即可,系統會自動載入並全屏呈現。要用別的名字,在 Info.plist 裡設定對應鍵值即可。
預設情況下狀態列仍會顯示,所以看起來「沒全屏」。在 AppDelegate 裡隱藏是來不及的——Default.png 是在啟動「過程」中載入,而 didFinishLaunching 是啟動「完成」後才呼叫。正確做法是在 Info.plist 加上 Status bar is initially hidden = YES。


31. 修改 App 顯示名稱
在 Supporting Files 中找到 InfoPlist.strings,加上:
"CFBundleDisplayName" = "愛貝通";為了兼顧國際化,建議另建一份中文專用的 InfoPlist.strings,系統會依使用者語言自動挑選對應檔案。
32. 更改 Xcode 預設公司名
defaults write com.apple.Xcode PBXCustomTemplateMacroDefinitions '{ "ORGANIZATIONNAME" = "COMPANY"; }'六、判空陷阱(值得單獨記住)
33. if (dict == nil) 為什麼判斷不出空值?
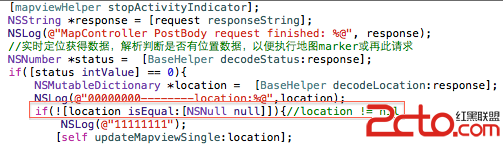
後端回傳 JSON 時,某個欄位的值可能是 null。這個值被反序列化後,在 Objective-C 裡是一個 NSNull 的單例物件,指標本身存在、並不為 nil,所以 if (dict == nil)、if (dict == NULL)、isEqual:nil 全都失效。
控制台有兩種不同的印法,意義完全不同:
印成 (null):代表指標為空,這時 if (str == nil) 才成立。
印成 <null>:代表這是一個 NSNull 物件,必須用:
if ([str isEqual:[NSNull null]]) { /* 處理空值 */ }
最根本的解法還是在介面上和後端溝通:遇到空值時回傳空字串 @"",客戶端判斷起來乾淨得多。
七、屏幕方向與鍵盤通知
34. iOS 5 的旋轉相關方法
四種方向:UIInterfaceOrientationLandscapeLeft / LandscapeRight / Portrait / PortraitUpsideDown。前兩者是橫屏,後兩者是正立與上下顛倒。要注意 Left 與 Right 在模擬器上旋轉時的視覺方向剛好相反。
- (BOOL)shouldAutorotateToInterfaceOrientation:(UIInterfaceOrientation)orientation {
    return (orientation != UIInterfaceOrientationPortraitUpsideDown);
}

- (void)willAnimateRotationToInterfaceOrientation:(UIInterfaceOrientation)orientation
                                         duration:(NSTimeInterval)duration {
    if (UIInterfaceOrientationIsLandscape(orientation)) {
        myMapView.frame = CGRectMake(0, 0, 480, 300);
    } else {
        myMapView.frame = CGRectMake(0, 0, 320, 460);
    }
}
值得注意的是,專案設定的 Supported Device Orientations 並不影響 shouldAutorotate 的回傳值,兩者是獨立的。
另外,這兩個方法在 iOS 6 之後已被取代,新專案請改用 supportedInterfaceOrientations 與 willTransitionToTraitCollection。

35. 判斷是否為 iPhone 5 的巨集
#define iPhone5 ([UIScreen instancesRespondToSelector:@selector(currentMode)] \
    ? CGSizeEqualToSize(CGSizeMake(640, 1136), [[UIScreen mainScreen] currentMode].size) \
    : NO)
iPhone 5 的可用高度為 504(568 減去狀態列 20 與導航列 44),比 iPhone 4s 多出 88pt。
八、Xcode 常見報錯速查
36. Application windows are expected to have a root view controller
iOS 5 之後必須設定 rootViewController:
_rootViewController = [[RootViewController alloc] init];
self.window.rootViewController = _rootViewController;
這個錯誤多半來自在 Xib/Storyboard 上誤連了 window 的 view,檢查並刪掉多餘的連線,再 Clean 一次。
37. Storyboard 啟動後黑屏
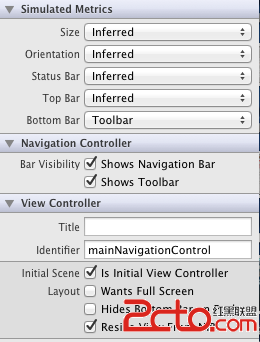
報錯訊息為 Failed to instantiate the default view controller for UIMainStoryboardFile。原因是沒有任何 view controller 被設為入口點。選中作為首屏的那個 controller,在屬性面板勾上「Is Initial View Controller」即可。
38. invalid deployment target for -stdlib=libc++
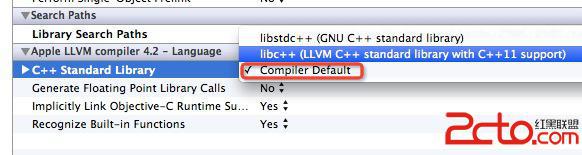
Target → Build Settings → 找到 C++ Standard Library,改為 Compiler Default,重新編譯即可。
39. 真機報 could not change executable permissions
通常是 Bundle Identifier 與舊 App 重複。把真機上先前安裝的同 identifier 版本刪掉,再重新執行即可。
40. loadView 與 viewDidLoad 被呼叫兩次
如果在 loadView 中修改狀態列的顯示狀態,系統會因為可用高度改變而重新計算,於是 loadView 與 viewDidLoad 各被觸發兩次,白白多建一個 UIView。把狀態列相關的設定移出 loadView 就好。
九、Xcode 小知識
41. 檔名後面的 M 和 C 是什麼?
那是版本控制狀態標記:M 表示自上次提交後有修改,C 表示衝突。只有開啟了版本控制的專案才會顯示。
42. 用 NSLog 輸出結構體
NSLog(@"rect: %@", NSStringFromCGRect(rect1));
NSLog(@"point: %@", NSStringFromCGPoint(p1));
NSLog(@"size: %@", NSStringFromCGSize(s1));
NSLog(@"range: %@", NSStringFromRange(r1));
43. NSString 大小寫轉換(iOS 6 起)
NSString *str = @"mobile developer tips";
NSString *upper = [str uppercaseStringWithLocale:[NSLocale currentLocale]];
NSString *cap   = [upper capitalizedStringWithLocale:[NSLocale currentLocale]];
NSString *lower = [cap lowercaseStringWithLocale:[NSLocale currentLocale]];
44. 圖標與啟動頁尺寸參考
iPhone 圖標 57×57、@2x 為 114×114;啟動頁建議 320×480,命名 Default.png。
iPad 圖標 72×72、@2x 為 144×144;啟動頁 768×1024,命名 Default-Portrait~ipad.png。
45. ASIHTTPRequest 保存 Cookie
App 重啟後上次的 Cookie 不會自動存在。兩種思路:一是重啟時自動登入換取新 Cookie(較推薦,因為 session 本來就會過期);二是把 Cookie 存進 UserDefaults / SQLite,下次請求時手動塞回 Header:
ASIFormDataRequest *request = [ASIFormDataRequest requestWithURL:UserInfoURL];
[request setRequestMethod:@"POST"];
[request addRequestHeader:@"Cookie"
                    value:[NSString stringWithFormat:@"cookie=%@",
                           [[NSUserDefaults standardUserDefaults] objectForKey:@"cookie"]]];