
iOS 多種風格時間軸的設計與實作總結
編輯:iOS 開發綜合
前言
上一篇為大家整理了繪圖的各種畫法,今天則接著總結時間軸的各種設計風格,其中同樣用到了繪圖技巧。
時間軸有什麼用?
如今在專案中,時間軸幾乎已無所不在。最典型的就是社群媒體——像 Facebook、人人網這類 SNS 社群會把用戶的生活以時間軸形式呈現;QQ、微博、Twitter 自不必說,同樣以時間軸排列資訊;而行動 App Path 更是憑藉時間軸一戰成名。
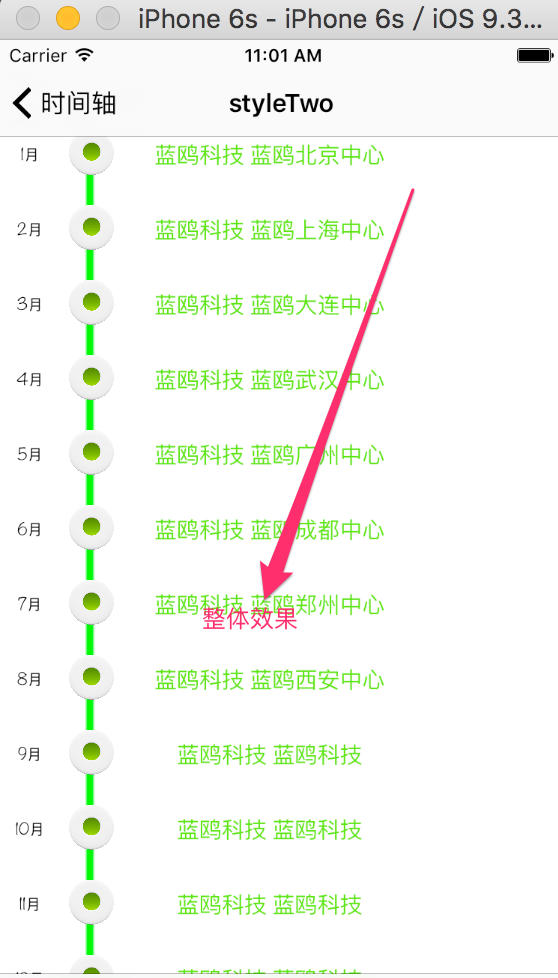
時間軸不僅幫助用戶梳理資訊,更是使用者互動的基礎規則。今天就來談談三種時間軸風格的不同實作。先看看這三種風格的整体畫面效果。
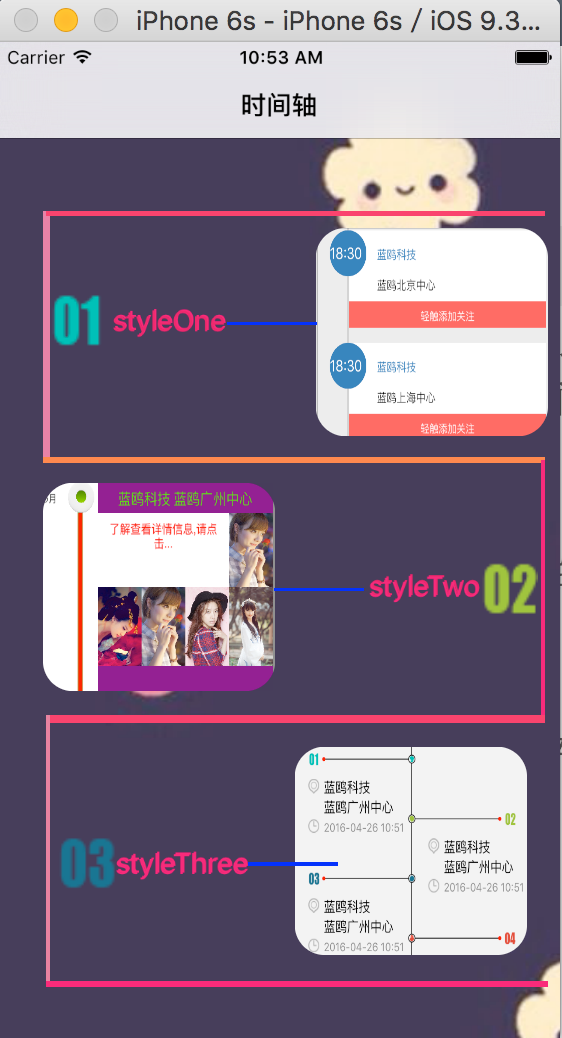
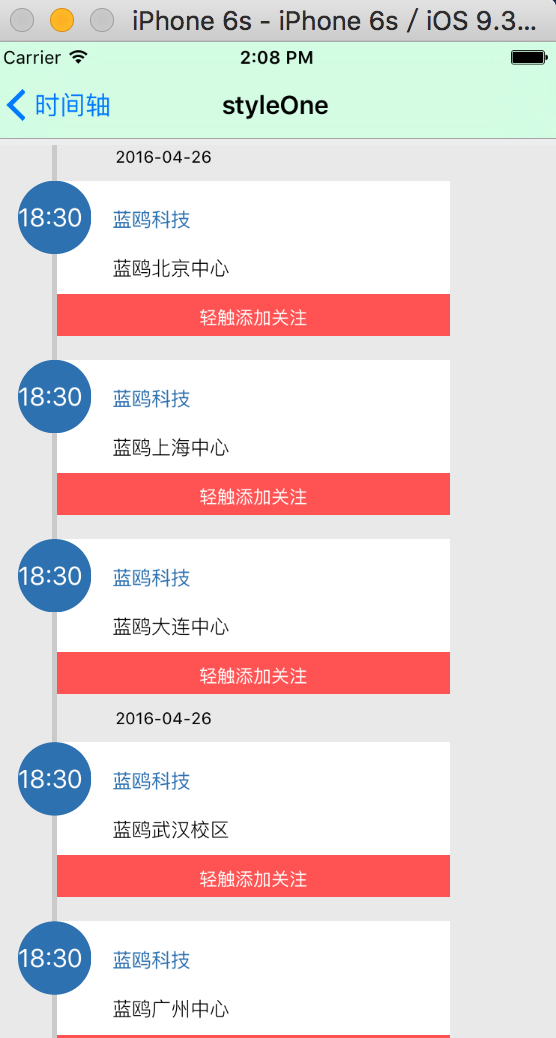
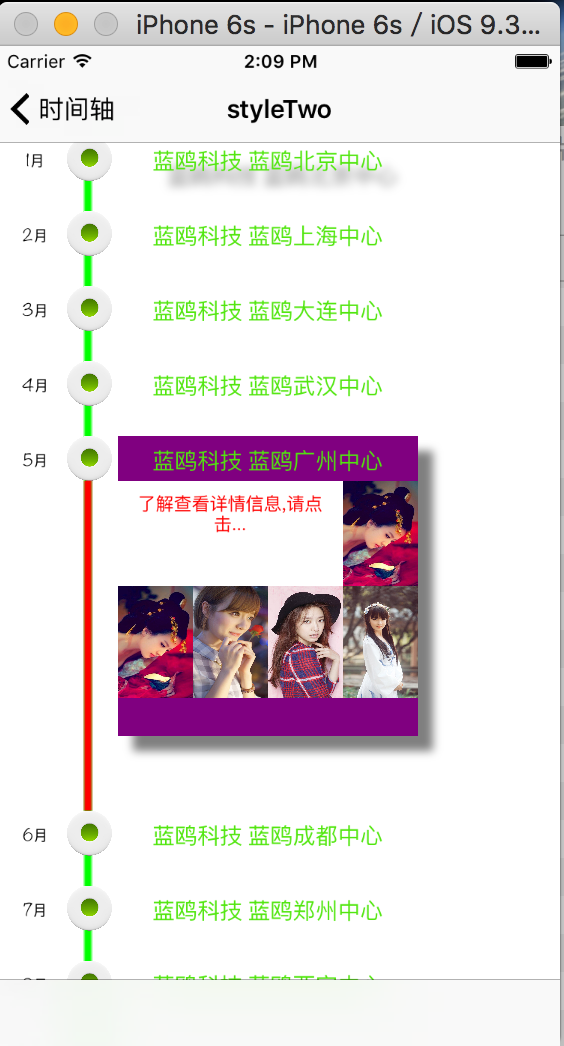
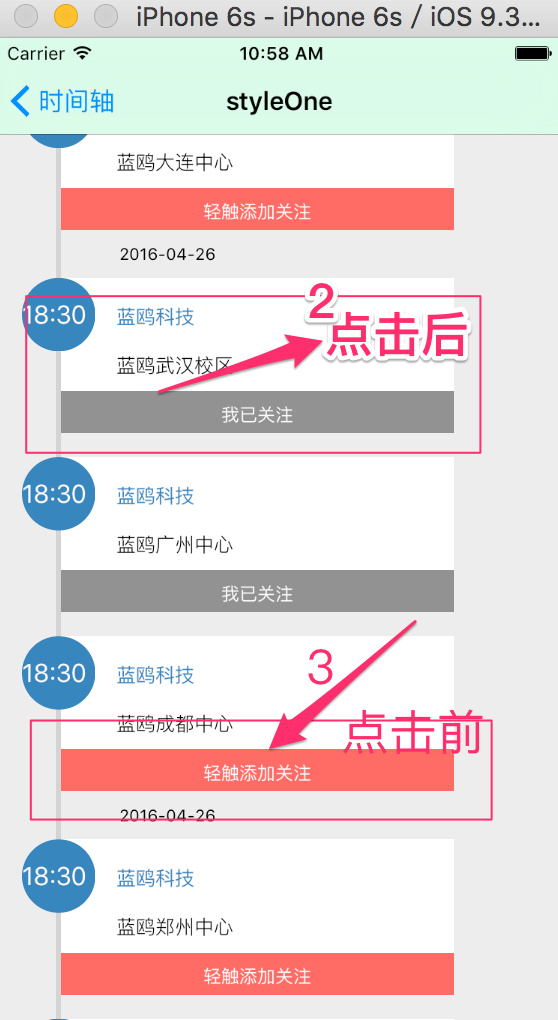
看完整体效果後,相信大家都很好奇這三種風格具體如何實現,下面就逐一介紹設計思路。
01 StyleOne 時間軸
自定義 cell
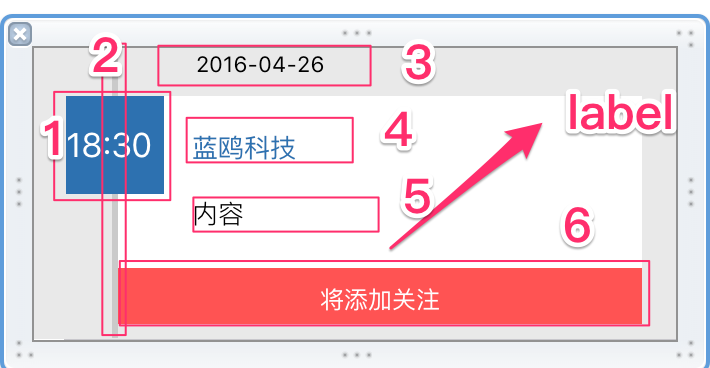
cell 設定好後,來看看其中關鍵技術點的實作。
自定義 cell 關鍵程式碼
TimeCourseTableViewCell.m
/*去掉上面的日期*/ - (void)deleteDate{ lbDate.hidden = YES; CGRect timeTemp = lbTime.frame; timeTemp.origin = CGPointMake(timeTemp.origin.x, 8); lbTime.frame = timeTemp; CGRect infoViewTemp = infoView.frame; infoViewTemp.origin = CGPointMake(infoViewTemp.origin.x, 8); infoView.frame = infoViewTemp; } /*設置顯示的文本高度,以確定整個tableViewCell的高度,最後返回cell高度*/ - (CGFloat)setCellHeight:(NSString *)strInfo isSameDay:(BOOL)isSame{ if (isSame) { [self deleteDate]; } [lbInfoContent setNumberOfLines:0]; NSString *labelText = strInfo; NSMutableAttributedString *attributedString = [[NSMutableAttributedString alloc] initWithString:labelText]; NSMutableParagraphStyle *paragraphStyle = [[NSMutableParagraphStyle alloc] init]; [paragraphStyle setLineSpacing:5.0f]; [attributedString addAttribute:NSParagraphStyleAttributeName value:paragraphStyle range:NSMakeRange(0, [labelText length])]; lbInfoContent.attributedText = attributedString; [lbInfoContent sizeToFit]; CGRect infoContentViewTemp = infoContentView.frame; infoContentViewTemp.size = CGSizeMake(212, lbInfoContent.frame.size.height); infoContentView.frame = infoContentViewTemp; CGRect btnTemp = receiveView.frame; btnTemp.origin = CGPointMake(0, infoContentView.frame.origin.y + infoContentView.frame.size.height + 8 ); receiveView.frame = btnTemp; CGRect viewTemp = infoView.frame; viewTemp.size = CGSizeMake(viewTemp.size.width, receiveView.frame.origin.y + receiveView.frame.size.height); infoView.frame = viewTemp; lbSegment.frame = CGRectMake(lbSegment.frame.origin.x, 0, 3, infoView.frame.origin.y + infoView.frame.size.height + 8); return infoView.frame.origin.y + infoView.frame.size.height + 8; } /*設置圓形*/ - (void)setRidues{ lbTime.layer.cornerRadius = lbTime.frame.size.width / 2; [lbTime.layer setMasksToBounds:YES]; } /*設置點擊閱讀樣式*/ - (void)setClick{ CGFloat R = (CGFloat) 128/255.0; CGFloat G = (CGFloat) 128/255.0; CGFloat B = (CGFloat) 128/255.0; CGFloat alpha = (CGFloat) 1.0; UIColor *ColorRGB = [ UIColor colorWithRed: R green: G blue: B alpha: alpha ]; receiveView.backgroundColor = ColorRGB; lbReceive.text = @"我已關注"; } /*設置未點擊閱讀樣式*/ - (void)setNotClick{ CGFloat R = (CGFloat) 255/255.0; CGFloat G = (CGFloat) 83/255.0; CGFloat B = (CGFloat) 83/255.0; CGFloat alpha = (CGFloat) 1.0; UIColor *ColorRGB = [ UIColor colorWithRed: R green: G blue: B alpha: alpha ]; receiveView.backgroundColor = ColorRGB; lbReceive.text = @"輕觸添加關注"; }
方法的調用
cell 設定好後,來看看控制器如何呼叫它。
#import "StyleOneViewController.h" #import "TimeCourseTableViewCell.h" @interface StyleOneViewController () @property (weak, nonatomic) IBOutlet UITableView *messageTableView; @property(nonatomic,assign)int messageSum; @property(nonatomic,strong) NSArray *infoArray; @property (nonatomic,strong)NSMutableArray *clickArray; @end @implementation StyleOneViewController - (void)viewDidLoad { [super viewDidLoad]; self.messageTableView.delegate = self; self.messageTableView.dataSource = self; [self setTableViewStyle]; self.messageSum = 10; self.infoArray = @[@"藍鷗北京中心", @"藍鷗上海中心", @"藍鷗大連中心", @"藍鷗武漢校區", @"藍鷗廣州中心", @"藍鷗成都中心", @"藍鷗鄭州中心", @"藍鷗西安中心", @"藍鷗科技", @"啦啦啦"]; self.clickArray = [@[@"1", @"1", @"1", @"1", @"1", @"1", @"1", @"1", @"1", @"1"]mutableCopy]; } - (void)setTableViewStyle{ self.messageTableView.separatorStyle = UITableViewCellSeparatorStyleNone; CGFloat R = (CGFloat) 237/255.0; CGFloat G = (CGFloat) 237/255.0; CGFloat B = (CGFloat) 237/255.0; CGFloat alpha = (CGFloat) 1.0; UIColor *ColorRGB = [ UIColor colorWithRed: R green: G blue: B alpha: alpha ]; [self.messageTableView setBackgroundColor:ColorRGB]; } - (NSInteger)tableView:(UITableView *)tableView numberOfRowsInSection:(NSInteger)section{ return self.messageSum; } - (CGFloat)tableView:(UITableView *)tableView heightForRowAtIndexPath:(NSIndexPath *)indexPath{ TimeCourseTableViewCell *nib = [[[NSBundle mainBundle] loadNibNamed:@"TimeCourseTableViewCell" owner:self options:nil] lastObject]; if (indexPath.row == 0) { return [nib setCellHeight:[self.infoArray objectAtIndex:[indexPath row]] isSameDay:NO]; } else if (indexPath.row<3) { return [nib setCellHeight:[self.infoArray objectAtIndex:[indexPath row]] isSameDay:YES]; }else if (indexPath.row == 3){ return [nib setCellHeight:[self.infoArray objectAtIndex:[indexPath row]] isSameDay:NO]; }else if (indexPath.row < 6){ return [nib setCellHeight:[self.infoArray objectAtIndex:[indexPath row]] isSameDay:YES]; }else if (indexPath.row == 6){ return [nib setCellHeight:[self.infoArray objectAtIndex:[indexPath row]] isSameDay:NO]; }else if (indexPath.row > 6){ return [nib setCellHeight:[self.infoArray objectAtIndex:[indexPath row]] isSameDay:YES]; }else return 145; } - (UITableViewCell *)tableView:(UITableView *)tableView cellForRowAtIndexPath:(NSIndexPath *)indexPath{ static NSString *simpleIdentify = @"TimeCourse"; UITableViewCell *cell = [tableView dequeueReusableCellWithIdentifier:simpleIdentify]; TimeCourseTableViewCell *nib = [[[NSBundle mainBundle] loadNibNamed:@"TimeCourseTableViewCell" owner:self options:nil] lastObject]; [nib setTag:[indexPath row]]; if ([[self.clickArray objectAtIndex:[indexPath row]] isEqualToString:@"1"]) { [nib setNotClick]; }else [nib setClick]; [nib setRidues]; UITapGestureRecognizer *Tap = [[UITapGestureRecognizer alloc] initWithTarget:self action:@selector(tapGesture:)]; nib.receiveView.userInteractionEnabled = YES; [nib.receiveView addGestureRecognizer:Tap]; cell = nib; cell.selectionStyle = UITableViewCellSelectionStyleNone; return cell; } - (void)tapGesture:(UITapGestureRecognizer *)sender{ NSLog(@"接收通知"); UIView *view = sender.self.view; TimeCourseTableViewCell *cell = (TimeCourseTableViewCell *)view.superview.superview.superview; UILabel *lb = view.subviews[0]; NSString *str = @"輕觸添加關注"; if ([lb.text isEqualToString:str]) { [cell setClick]; [self.clickArray setObject:@"0" atIndexedSubscript:cell.tag]; } }
效果展示
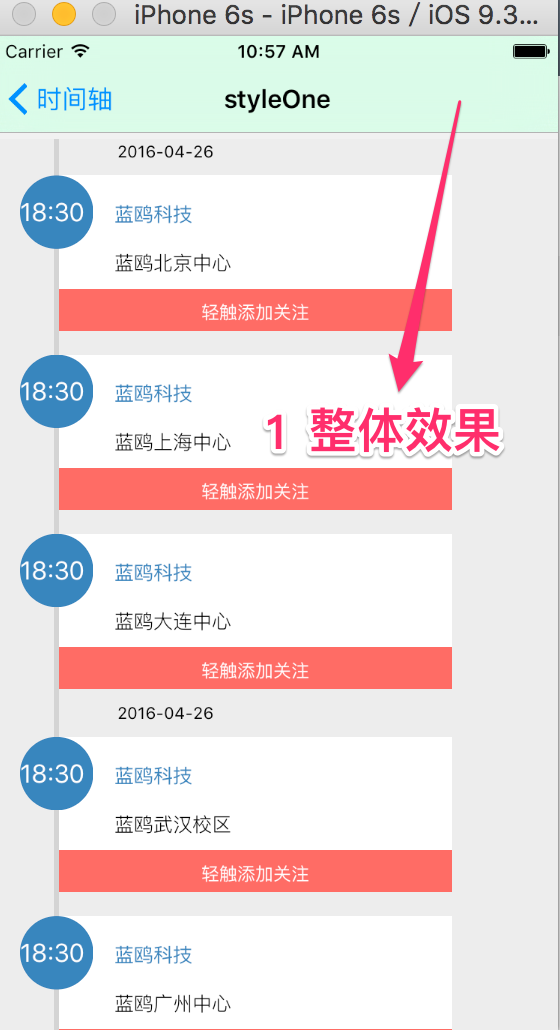
02 StyleTwo 時間軸
接著看看第二種時間軸如何實現。
關鍵程式碼實作
#import "StyleTwoViewController.h" #import "PlanLine.h" #import #import "ViewController.h" @interface StyleTwoViewController () @end @implementation StyleTwoViewController - (id)initWithNibName:(NSString *)nibNameOrNil bundle:(NSBundle *)nibBundleOrNil { self = [super initWithNibName:nibNameOrNil bundle:nibBundleOrNil]; if (self) { self.title = @"時間軸"; } return self; } - (void)viewDidLoad { [super viewDidLoad]; [self.navigationController setToolbarHidden:NO]; self.navigationController.navigationBar.tintColor = [UIColor blackColor]; self.navigationController.toolbar.tintColor = [UIColor blackColor]; self.a = 0; self.y = 0; self.photoImageViewArray = [[NSMutableArray alloc]initWithCapacity:10]; self.array = [[NSMutableArray alloc]initWithCapacity:10]; NSArray *array1 = [NSArray arrayWithObjects:@"1.jpg",@"2.jpg",@"3.jpg",@"4.jpg", nil]; for (int i = 0; i < array1.count; i++){ UIImage *image = [UIImage imageNamed:[array1 objectAtIndex:i]]; [self.array addObject:image]; } NSArray *array4 = @[@"1月",@"2月",@"3月",@"4月",@"5月",@"6月",@"7月",@"8月",@"9月",@"10月",@"11月",@"12月"]; self.arrayMonths = [array4 copy]; int number = (int)[self.arrayMonths count]; UIImageView *backgroundImageView = [[UIImageView alloc]initWithFrame:CGRectMake(0, 0, self.view.bounds.size.width, self.view.bounds.size.height)]; [self.view addSubview:backgroundImageView]; [self makeScrollView:number]; self.imageView = [[UIImageView alloc]init]; self.imageView.frame = CGRectMake(0, 0, self.scrollView.bounds.size.width, self.scrollView.contentSize.height); [self.scrollView addSubview:self.imageView]; self.view.backgroundColor = [UIColor whiteColor]; PlanLine *plan = [[PlanLine alloc]init]; plan.delegate = self; [plan setImageView:self.imageView setlineWidth:5.0 setColorRed:0 ColorBlue:1 ColorGreen:0 Alp:1 setBeginPointX:60 BeginPointY:0 setOverPointX:60 OverPointY:self.scrollView.contentSize.height]; [self makeMonthButton:number]; [self makeView:number]; } -(void)makeScrollView:(int)number { self.scrollView = [[UIScrollView alloc]initWithFrame:CGRectMake(0, 60, self.view.bounds.size.width, self.view.bounds.size.height)]; self.scrollView.delegate = self; self.scrollView.backgroundColor = [UIColor clearColor]; self.scrollView.contentSize = CGSizeMake(self.view.bounds.size.width, number*50+200); [self.view addSubview:self.scrollView]; } -(void)makeMonthButton:(int)number { self.monthLabelArray = [[NSMutableArray alloc]initWithCapacity:10]; self.buttonArray = [[NSMutableArray alloc]initWithCapacity:10]; for (int i = 0; i < number; i++) { self.monthButton = [UIButton buttonWithType:UIButtonTypeCustom]; UIImage *image = [UIImage imageNamed:@"button.png"]; [self.monthButton setImage:image forState:UIControlStateNormal]; self.monthButton.frame = CGRectMake(46, i*50, 30, 30); self.monthButton.tag = i; [self.monthButton addTarget:self action:@selector(openMassage:) forControlEvents:UIControlEventTouchUpInside]; [self.scrollView addSubview:self.monthButton]; [self.buttonArray addObject:self.monthButton]; self.monthlabel = [[UILabel alloc]initWithFrame:CGRectMake(0, i*50, 40, 30)]; self.monthlabel.text = [self.arrayMonths objectAtIndex:i]; self.monthlabel.font = [UIFont fontWithName:@"Noteworthy-Light" size:10]; self.monthlabel.textAlignment = 1; self.monthlabel.backgroundColor = [UIColor clearColor]; [self.scrollView addSubview:self.monthlabel]; [self.monthLabelArray addObject:self.monthlabel]; } } -(void)makeView:(int)number { NSArray *infoArray = @[@"藍鷗北京中心", @"藍鷗上海中心", @"藍鷗大連中心", @"藍鷗武漢中心", @"藍鷗廣州中心", @"藍鷗成都中心", @"藍鷗鄭州中心", @"藍鷗西安中心", @"藍鷗科技"]; self.massageViewArray = [[NSMutableArray alloc]initWithCapacity:10]; for (int i = 0; i < number; i++) { self.massageView = [[UIView alloc]initWithFrame:CGRectMake(80, i*50, 200, 30)]; self.massageView.backgroundColor = [UIColor clearColor]; self.label = [[UILabel alloc]initWithFrame:CGRectMake(0, 0, self.massageView.bounds.size.width, 30)]; self.label.textAlignment= 1; NSString *str = [NSString stringWithFormat:@"藍鷗科技 %@",infoArray[i]]; [self.label setText:str]; self.label.textColor=[UIColor colorWithRed:0.3176 green:0.902 blue:0.0549 alpha:1.0]; self.label.font = [UIFont fontWithName:@"Noteworthy-Light" size:15]; self.label.backgroundColor = [UIColor clearColor]; [self.scrollView addSubview:self.massageView]; [self.massageView addSubview:self.label]; [self.massageViewArray addObject:self.massageView]; [self.massageView setUserInteractionEnabled:NO]; } }
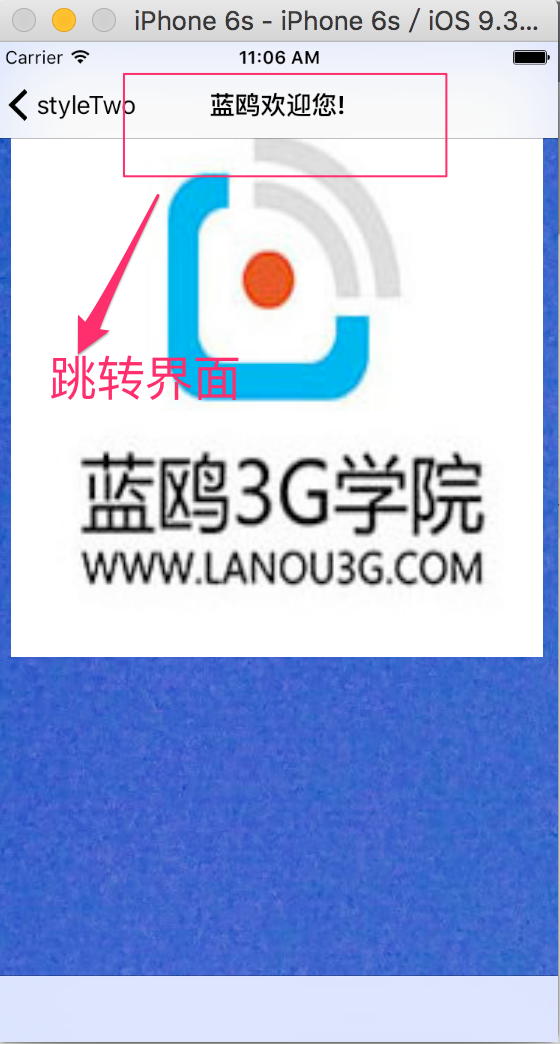
程式碼寫完後,來看看具體效果。
效果展示
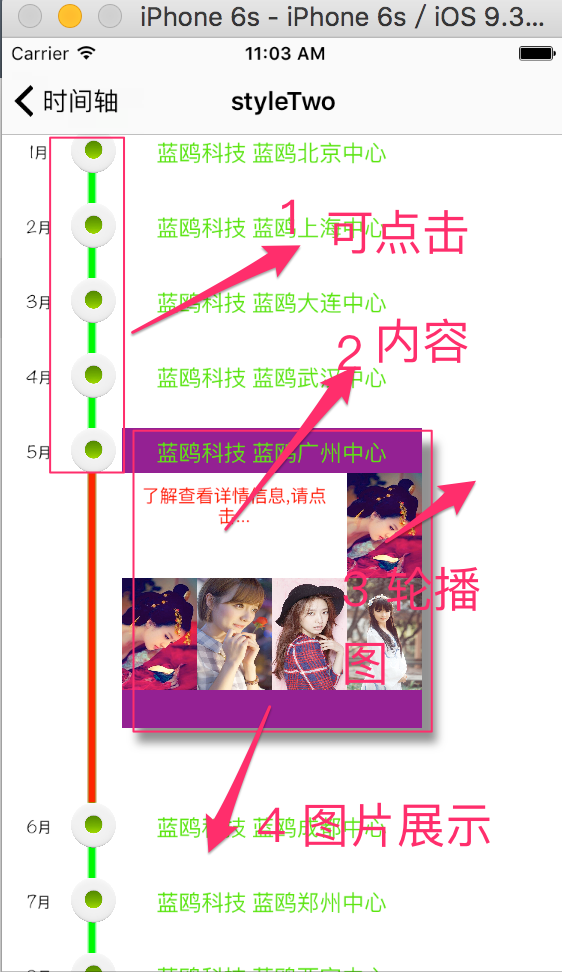
03 StyleThree 時間軸
樣式二完成後,來看看樣式三時間軸的實作。
自定義時間軸視圖的實作
myView.m
-(void)drawRect:(CGRect)rect{ CGContextRef ctf=UIGraphicsGetCurrentContext(); CGContextSetLineWidth(ctf, 1); CGContextSetRGBStrokeColor(ctf, 0, 0, 0, 1); CGPoint aPoints[2]; aPoints[0]=CGPointMake(WIDTH/2,SP_W(10)); aPoints[1]=CGPointMake(WIDTH/2, self.frame.size.height-SP_W(10)); CGContextAddLines(ctf, aPoints, 2); CGContextDrawPath(ctf, kCGPathStroke); CGContextAddArc(ctf, aPoints[0].x,SP_W(4),SP_W(4), 0, 2*M_PI, 0); CGContextSetRGBFillColor(ctf, 1, 1, 1, 1); CGContextDrawPath(ctf, kCGPathFillStroke); CGContextAddArc(ctf, aPoints[0].x,self.frame.size.height-SP_W(5),SP_W(5), 0, 2*M_PI, 0); CGContextSetRGBFillColor(ctf, 1, 1, 1, 1); CGContextDrawPath(ctf, kCGPathFillStroke); for(int i=0;i<_msgModelArray.count;i++){ MsgModel * model=[_msgModelArray objectAtIndex:i]; CGPoint startPoint; CGPoint endPoint; if(i%2==0){ CGContextMoveToPoint(ctf, WIDTH/2, SP_W(60)+SP_W(60)*i); CGContextAddLineToPoint(ctf, WIDTH/2-(WIDTH/2-SP_W(50)), SP_W(60)+SP_W(60)*i); CGContextSetLineWidth(ctf, 1); CGContextSetRGBStrokeColor(ctf, 0, 0, 0, 1); CGContextDrawPath(ctf, kCGPathStroke); startPoint.x=WIDTH/2; startPoint.y=SP_W(60)+SP_W(60)*i; endPoint.x=WIDTH/2-(WIDTH/2-SP_W(50)); endPoint.y=SP_W(60)+SP_W(60)*i; NSString * imageStr1=[NSString stringWithFormat:@"%02d",i+1]; UIImageView * image=[[UIImageView alloc]initWithFrame:CGRectMake(endPoint.x-SP_W(20), endPoint.y-8, SP_W(15), SP_W(15))]; image.image=[UIImage imageNamed:imageStr1]; [self addSubview:image]; CGContextAddArc(ctf, endPoint.x, endPoint.y, SP_W(2), 0, 2*M_PI, 0); CGContextSetFillColorWithColor(ctf,model.color.CGColor); CGContextDrawPath(ctf, kCGPathFill); CGContextAddArc(ctf, WIDTH/2, SP_W(60)+SP_W(60)*i, SP_W(4), 0, 2*M_PI, 0); CGContextSetRGBFillColor(ctf, 1, 1, 1, 1); CGContextDrawPath(ctf, kCGPathFillStroke); CGContextAddArc(ctf, WIDTH/2, SP_W(60)+SP_W(60)*i, SP_W(3), 0, 2*M_PI, 0); UIColor * color=[_colorArray objectAtIndex:i]; CGContextSetFillColorWithColor(ctf,color.CGColor); CGContextDrawPath(ctf, kCGPathFill); } } } -(instancetype)initWithFrame:(CGRect)frame{ self=[super initWithFrame:frame]; if(self){ self.backgroundColor=[UIColor clearColor]; _colorArray=[NSArray arrayWithObjects:[UIColor colorWithPatternImage:[UIImage imageNamed:@"圓線01"]], [UIColor colorWithPatternImage:[UIImage imageNamed:@"圓線02"]], nil]; } return self; } @end
方法調用
StyleThreeViewController.m
- (void)viewDidLoad { [super viewDidLoad]; [self initData]; } -(void)initData{ NSDateFormatter* dateFormat = [[NSDateFormatter alloc] init]; [dateFormat setDateFormat:@"yyyy-MM-dd HH:mm"]; NSString *dataString = [dateFormat stringFromDate:[NSDate date]]; myView=[[MyView alloc]init]; MsgModel * model=[[MsgModel alloc]init]; model.address=@"藍鷗科技"; model.motive=@"藍鷗廣州中心"; model.date=dataString; model.color=[UIColor redColor]; myView.msgModelArray=@[model,model,model,model]; } -(void)viewWillAppear:(BOOL)animated{ scrollView=[[UIScrollView alloc]initWithFrame:CGRectMake(0, -70, WIDTH, HEIGHT)]; scrollView.backgroundColor=RGBACOLOR(240, 240, 240, 1); dataPiker=[[UIView alloc]initWithFrame:CGRectMake(0, 0, WIDTH, SP_W(60))]; myView.frame=CGRectMake(0,SP_W(65), WIDTH, SP_W(60)*myView.msgModelArray.count+65); scrollView.contentSize=CGSizeMake(0, SP_W(60)*(myView.msgModelArray.count+2)+SP_W(30)); [scrollView addSubview:dataPiker]; [scrollView addSubview:myView]; [self.view addSubview:scrollView]; }
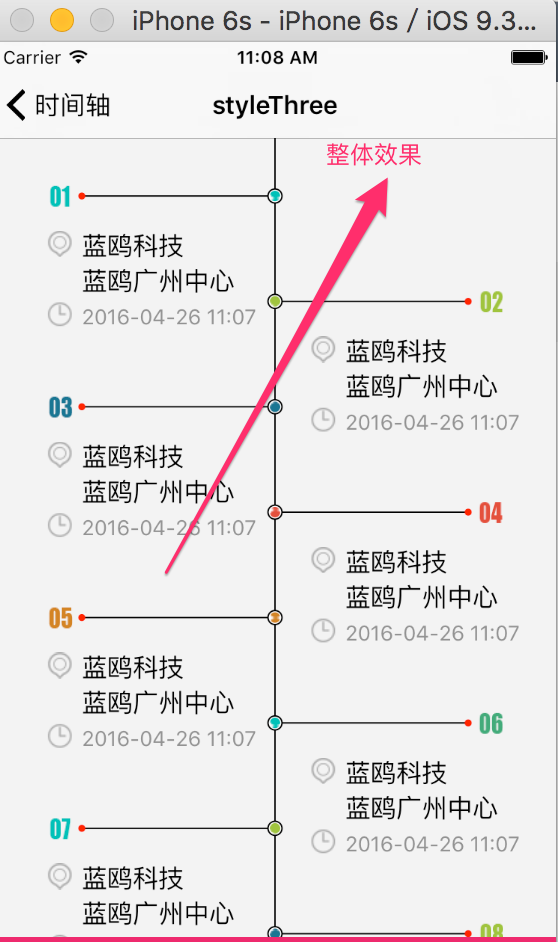
效果展示
總結
其實打造時間軸並不難,用到的知識都在我們熟悉的範圍之內,例如繪圖與自定義 cell 等。掌握這些基礎,再靈活組合,就能實現各種風格的時間軸。
- 上一篇文章: 深入解析 iOS 中的 MVC 設計模式
- 下一篇文章: Swift 基本語法詳解:可選類型、函數、枚舉、結構體與類