
用 CMPopTipView 實現微信風格氣泡菜單:任意角度、任意位置彈出
很多 App 都有這樣的需求:點擊導航欄右上角或某個按鈕,不跳轉新頁面,而是在旁邊「啵」地彈出一個帶小尖角的气泡面板,裡面放列表、圖片或說明文字——微信右上角的「+」菜單就是典型代表。
自己從零封裝這類控件並不輕松:尖角要指向正確的坐標,屏幕邊緣要自動翻轉方向,還要處理陰影、圓角、進出動畫。這種通用性強的基礎組件,通常開源社區早就做過了。本文介紹 CMPopTipView,並給出完整集成示例與源碼級定制方法。
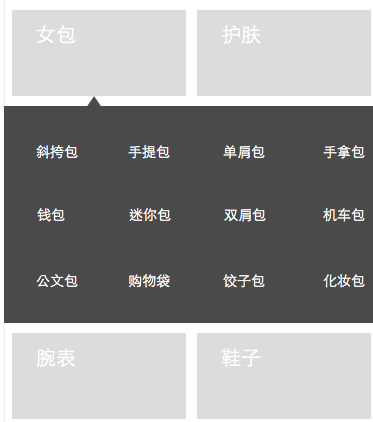
它支持在 UIButton、UINavigationBar 的 BarButtonItem、UITableViewCell、UILabel、UIImageView 等任意 UIView 上彈出,自定義內容視圖也完全沒問題。

一、集成與基本屬性
新建工程,通過 CocoaPods 引入 CMPopTipView,然後在需要的位置建立按鈕與點擊事件。頭文件中需要聲明的屬性大致如下:
@interface ViewController () <CMPopTipViewDelegate, UICollectionViewDelegate, UICollectionViewDataSource, UICollectionViewDelegateFlowLayout, UITableViewDelegate, UITableViewDataSource>

@property (nonatomic, strong) CMPopTipView *roundRectButtonPopTipView;
@property (nonatomic, strong) NSMutableArray *dataSource;          //!< collectionView 的數據源
@property (nonatomic, strong) GroupList *list;                     //!< 請求回來的數據
@property (nonatomic, strong) UICollectionView *collectionView;
@property (nonatomic, strong) UIImageView *imageView;
@property (nonatomic, strong) UIImageView *imageView1;
@property (weak, nonatomic) IBOutlet UILabel *middleLabel;
@property (nonatomic, strong) NSMutableArray *visiblePopTipViews;   //!< 當前可見的氣泡
@property (nonatomic, strong) id currentPopTipViewTarget;           //!< 觸發氣泡的控件
@property (nonatomic, strong) UITableView *tableView;
@property (nonatomic, strong) NSMutableArray *tableDataSource;
@property (nonatomic, strong) UIButton *gotoCartButton;             // 導航欄按鈕
@end
二、點擊事件中彈出氣泡
核心思路是:先關閉所有已存在的氣泡,再根據按鈕 tag 決定彈出什麼內容。這裡有一個實用技巧——CollectionView 的理論高度可以直接從布局對象上取得,不必手動計算:
height = self.collectionView.collectionViewLayout.collectionViewContentSize.height;
- (IBAction)click:(UIButton *)sender {
    // 先 dismiss 之前的所有 popView
    [self dismissAllPopTipViews];

    // 如果點擊的是同一個按鈕,說明用戶想收起,直接清空記錄
    if (sender == self.currentPopTipViewTarget) {
        self.currentPopTipViewTarget = nil;
        return;
    }

    // 準備數據源並計算高度
    CGFloat height = 0;
    if (sender.tag == 1000) {
        self.dataSource = [[NSMutableArray alloc] initWithArray:self.list.data.role];
        [self.collectionView reloadData];
    } else if (sender.tag == 1003) {
        self.dataSource = [[NSMutableArray alloc] initWithArray:self.list.data.list];
        [self.collectionView reloadData];
    }
    height = self.collectionView.collectionViewLayout.collectionViewContentSize.height;

    NSString *title = nil;
    NSString *msg = nil;
    CMPopTipView *popView;

    switch (sender.tag) {
        case 1000:  // 自定義 View:CollectionView
            self.collectionView.frame = CGRectMake(0, 0, 300, height);
            self.collectionView.alwaysBounceVertical = YES;
            popView = [[CMPopTipView alloc] initWithCustomView:self.collectionView];
            break;
        case 1001:  // 標題 + 描述
            title = @"提示標題";
            msg = @"這是一個簡單的示例,希望能幫助你把效果用到自己的項目裡";
            popView = [[CMPopTipView alloc] initWithTitle:title message:msg];
            break;
        case 1002:  // 自定義 View:UIImageView
            self.imageView.frame = CGRectMake(0, 0, 350, 300);
            popView = [[CMPopTipView alloc] initWithCustomView:self.imageView];
            break;
        case 1003:  // 自定義 View:CollectionView(限制最大高度)
            self.collectionView.frame = CGRectMake(0, 0, 300, height > 400 ? 400 : height);
            self.collectionView.alwaysBounceVertical = YES;
            popView = [[CMPopTipView alloc] initWithCustomView:self.collectionView];
            break;
        case 1004:
            title = @"另一種樣式";
            msg = @"With groups, Xcode stores in the project a reference to each individual file.";
            popView = [[CMPopTipView alloc] initWithTitle:title message:msg];
            break;
        case 1005:
            self.imageView1.frame = CGRectMake(0, 0, 350, 300);
            popView = [[CMPopTipView alloc] initWithCustomView:self.imageView1];
            break;
        default:
            return;
    }

    popView.delegate = self;
    popView.cornerRadius = 5;              // 圓角半徑,不需要可設為 0
    // popView.hasShadow = YES;            // 是否顯示陰影
    // popView.hasGradientBackground = NO; // 是否使用漸變背景
    popView.backgroundColor = [UIColor colorWithRed:arc4random() % 256 / 255.0
                                             green:arc4random() % 256 / 255.0
                                              blue:arc4random() % 256 / 255.0
                                             alpha:1];
    popView.textColor = [UIColor whiteColor];
    popView.animation = 0;                 // 0 = Slide,1 = Pop(Fade 舊版本有問題,建議只用前兩種)
    popView.has3DStyle = YES;              // 立體效果,默認開啟
    // popView.dismissTapAnywhere = YES;   // 點擊任意位置即關閉
    // [popView autoDismissAnimated:YES atTimeInterval:5.0]; // 定時自動關閉

    [popView presentPointingAtView:sender inView:self.view animated:YES];
    [self.visiblePopTipViews addObject:popView];
    self.currentPopTipViewTarget = sender;
}
三、統一關閉與代理回調
// 關閉所有氣泡
- (void)dismissAllPopTipViews {
    while ([self.visiblePopTipViews count] > 0) {
        CMPopTipView *popTipView = [self.visiblePopTipViews objectAtIndex:0];
        [popTipView dismissAnimated:YES];
        [self.visiblePopTipViews removeObjectAtIndex:0];
    }
}

// 用戶主動關閉氣泡時的回調
- (void)popTipViewWasDismissedByUser:(CMPopTipView *)popTipView {
    [self dismissAllPopTipViews];
    self.currentPopTipViewTarget = nil;
    self.roundRectButtonPopTipView = nil;
}
四、可定制的初始化參數
組件的默認值集中在 initWithFrame: 中,按需修改即可:
// 默認配置
// self.opaque = NO;
// _topMargin = 2.0;
// _pointerSize = 12.0;        // 尖角尺寸
// _sidePadding = 2.0;
// _borderWidth = 1.0;
// self.textFont = [UIFont boldSystemFontOfSize:14.0];
// self.textColor = [UIColor whiteColor];
// self.textAlignment = NSTextAlignmentCenter;
// self.backgroundColor = [UIColor colorWithRed:62.0/255.0 green:60.0/255.0 blue:154.0/255.0 alpha:1.0];
// self.has3DStyle = YES;
// self.borderColor = [UIColor blackColor];
// self.hasShadow = YES;
// self.animation = CMPopTipAnimationSlide;
// self.dismissTapAnywhere = NO;
// self.preferredPointDirection = PointDirectionAny;
// self.hasGradientBackground = YES;
// self.cornerRadius = 10.0;
五、從 UINavigationBar 的 BarButtonItem 彈出
邏輯與普通按鈕一致,只是最後的呈現方法換成 presentPointingAtBarButtonItem:animated::
- (void)gotoCart:(UIButton *)sender {
    [self dismissAllPopTipViews];
    if (sender == self.currentPopTipViewTarget) {
        self.currentPopTipViewTarget = nil;
        return;
    }

    [self.tableView reloadData];
    CGFloat height = self.tableView.contentSize.height;
    self.tableView.frame = CGRectMake(0, 0, 100, height);
    self.tableView.backgroundColor = [UIColor blackColor];
    self.tableView.alwaysBounceVertical = YES;

    CMPopTipView *popView = [[CMPopTipView alloc] initWithCustomView:self.tableView];
    popView.delegate = self;
    popView.cornerRadius = 5;
    popView.backgroundColor = [UIColor blackColor];
    popView.textColor = [UIColor whiteColor];
    popView.animation = arc4random() % 1;
    popView.has3DStyle = arc4random() % 1;

    [popView presentPointingAtView:sender inView:self.view animated:YES];
    // 如果傳入的是原生 UIBarButtonItem,改用:
    // [popView presentPointingAtBarButtonItem:barButtonItem animated:YES];

    [self.visiblePopTipViews addObject:popView];
    self.currentPopTipViewTarget = sender;
}
六、源碼級定制:把尖角改成等腰三角形
跑一遍示例你會發現,默認的尖角是個正三角形,底邊與高相等,視覺上顯得矮胖。想要更修長的效果,需要改動繪制邏輯。

這類自繪控件的圖形在 drawRect: 中完成,只需調整尖角部分的 X 坐標——把原本的水平偏移量改為 _pointerSize / 2,即可讓三角形變成等腰:
CGRect bubbleRect = [self bubbleFrame];
CGContextRef c = UIGraphicsGetCurrentContext();
CGContextSetRGBStrokeColor(c, 0.0, 0.0, 0.0, 1.0);
CGContextSetLineWidth(c, self.borderWidth);
CGMutablePathRef bubblePath = CGPathCreateMutable();

if (_pointDirection == PointDirectionUp) {
    // 原點是尖角頂點
    CGPathMoveToPoint(bubblePath, NULL, _targetPoint.x + _sidePadding, _targetPoint.y);
    // X 軸加上 _pointerSize/2,讓三角形變成等腰
    CGPathAddLineToPoint(bubblePath, NULL,
                         _targetPoint.x + _sidePadding + _pointerSize / 2,
                         _targetPoint.y + _pointerSize);
    CGPathAddArcToPoint(bubblePath, NULL,
                        bubbleRect.origin.x + bubbleRect.size.width, bubbleRect.origin.y,
                        bubbleRect.origin.x + bubbleRect.size.width, bubbleRect.origin.y + _cornerRadius,
                        _cornerRadius);
    CGPathAddArcToPoint(bubblePath, NULL,
                        bubbleRect.origin.x + bubbleRect.size.width, bubbleRect.origin.y + bubbleRect.size.height,
                        bubbleRect.origin.x + bubbleRect.size.width - _cornerRadius, bubbleRect.origin.y + bubbleRect.size.height,
                        _cornerRadius);
    CGPathAddArcToPoint(bubblePath, NULL,
                        bubbleRect.origin.x, bubbleRect.origin.y + bubbleRect.size.height,
                        bubbleRect.origin.x, bubbleRect.origin.y + bubbleRect.size.height - _cornerRadius,
                        _cornerRadius);
    CGPathAddArcToPoint(bubblePath, NULL,
                        bubbleRect.origin.x, bubbleRect.origin.y,
                        bubbleRect.origin.x + _cornerRadius, bubbleRect.origin.y,
                        _cornerRadius);
    // 收尾也要同步改,否則自動關閉時又變回正三角形
    CGPathAddLineToPoint(bubblePath, NULL,
                         _targetPoint.x + _sidePadding - _pointerSize / 2,
                         _targetPoint.y + _pointerSize);
} else {
    // 向下指的情況,改動方向相反
    CGPathMoveToPoint(bubblePath, NULL, _targetPoint.x + _sidePadding, _targetPoint.y);
    CGPathAddLineToPoint(bubblePath, NULL,
                         _targetPoint.x + _sidePadding - _pointerSize / 2,
                         _targetPoint.y - _pointerSize);
    CGPathAddArcToPoint(bubblePath, NULL,
                        bubbleRect.origin.x, bubbleRect.origin.y + bubbleRect.size.height,
                        bubbleRect.origin.x, bubbleRect.origin.y + bubbleRect.size.height - _cornerRadius,
                        _cornerRadius);
    CGPathAddArcToPoint(bubblePath, NULL,
                        bubbleRect.origin.x, bubbleRect.origin.y,
                        bubbleRect.origin.x + _cornerRadius, bubbleRect.origin.y,
                        _cornerRadius);
    CGPathAddArcToPoint(bubblePath, NULL,
                        bubbleRect.origin.x + bubbleRect.size.width, bubbleRect.origin.y,
                        bubbleRect.origin.x + bubbleRect.size.width, bubbleRect.origin.y + _cornerRadius,
                        _cornerRadius);
    CGPathAddArcToPoint(bubblePath, NULL,
                        bubbleRect.origin.x + bubbleRect.size.width, bubbleRect.origin.y + bubbleRect.size.height,
                        bubbleRect.origin.x + bubbleRect.size.width - _cornerRadius, bubbleRect.origin.y + bubbleRect.size.height,
                        _cornerRadius);
    CGPathAddLineToPoint(bubblePath, NULL,
                         _targetPoint.x + _sidePadding + _pointerSize / 2,
                         _targetPoint.y - _pointerSize);
}
CGPathCloseSubpath(bubblePath);
CGContextSaveGState(c);
CGContextAddPath(c, bubblePath);
CGContextClip(c);
改動很小,視覺提升卻很明顯。關鍵在於:只要修改了一個方向的閉合路徑,另一個方向也必須同步調整,否則氣泡在自動翻轉時會出現形狀不一致的問題。
完整 Demo 地址:https://github.com/DeftMKJ/Pop,有興趣的同學可以下載下來嘗試更多彈窗樣式。