
iOS 開源加密相冊 Agony 的實現(二)——登錄與註冊界面
簡介
市面上雖有一些不錯的加密相冊 App,但往往內置廣告,或對上傳張數有所限制。本文介紹一款加密相冊的製作過程,它將具備多密碼(輸入不同密碼進入不同空間,可掩人耳目)、WiFi 傳圖、照片檔案加密等功能。專案與文章同步推進,原始碼可在 GitHub 下載。
概述
本篇將透過工具類,實現登錄與註冊的交互界面。
登錄控制器與視圖設計
自定義控制器視圖
為了分離視圖邏輯與業務邏輯,控制器視圖用一個自定義類管理,並在控制器的 loadView 中指定為控制器視圖。檔案結構如下:
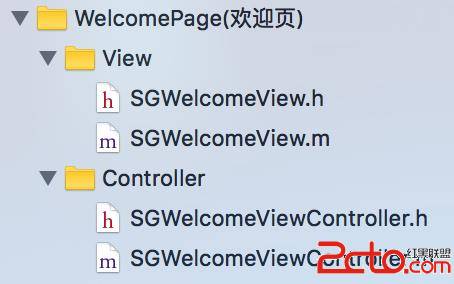
指定自定義視圖為控制器視圖的方法如下。由於要使用 SGWelcomeView 的 API,需先將其引用,否則透過 view 取得時還要型別轉換。
@interface SGWelcomeViewController ()
@property (nonatomic, weak) SGWelcomeView *welcomeView;
@end
@implementation SGWelcomeViewController
- (void)loadView {
    SGWelcomeView *view = [SGWelcomeView new];
    self.view = view;
    self.welcomeView = view;
}
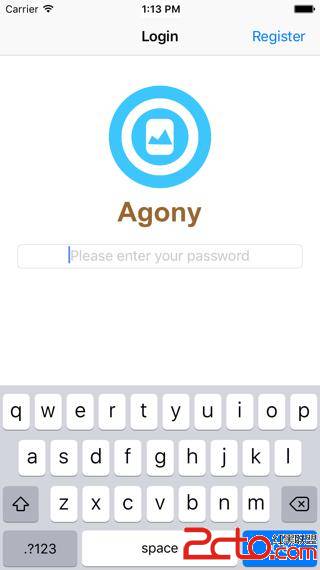
登錄界面設計
登錄界面如下圖。
嘗試 Touch ID 登錄
若設備支援 Touch ID,會先嘗試指紋驗證,失敗則要求輸入密碼。在登錄控制器出現時,先清空已登錄帳戶並嘗試 Touch ID:
- (void)viewDidAppear:(BOOL)animated {
    [super viewDidAppear:animated];
    [SGAccountManager sharedManager].currentAccount = nil;
    [self handleTouchIDLogin];
}
- (void)handleTouchIDLogin {
    LAContext *context = [LAContext new];
    if([context canEvaluatePolicy:LAPolicyDeviceOwnerAuthenticationWithBiometrics error:nil]) {
        [context evaluatePolicy:LAPolicyDeviceOwnerAuthenticationWithBiometrics localizedReason:@"Agony need your Touch ID to login" reply:^(BOOL success, NSError * _Nullable error) {
            if (success) {
                SGAccount *account = [[SGAccountManager sharedManager] getTouchIDAccount];
                [self loginWithAccount:account];
            } else {
                [self handleCommonLogin];
            }
        }];
    } else {
        [self handleCommonLogin];
    }
}
Touch ID 驗證透過 LAContext 實現,成功則用綁定的密碼登錄,失敗則走密碼登錄。注意 Touch ID 的回呼是在子執行緒,若涉及 UI 操作,別忘了切回主執行緒。
密碼登錄
密碼登錄透過 handleCommonLogin 實現,它指定登錄 view 的 block 回呼,並讓密碼輸入框成為第一響應者。
- (void)handleCommonLogin {
    WS(); // 定義 weakSelf 的宏
    [self.welcomeView setWelcomeHandler:^(SGAccount *account) {
        [weakSelf loginWithAccount:account];
    }];
}
當用戶輸入完密碼按下 Return,便回呼該 block 執行登錄。Touch ID 與密碼登錄最後都呼叫 loginWithAccount::
- (void)loginWithAccount:(SGAccount *)account {
    dispatch_async(dispatch_get_main_queue(), ^{
        if (!account) {
            [MBProgressHUD showError:@"Password Error"];
            return;
        }
        [SGAccountManager sharedManager].currentAccount = account;
        AppDelegate *app = [UIApplication sharedApplication].delegate;
        app.window.rootViewController = [[UINavigationController alloc] initWithRootViewController:[SGHomeViewController new]];
    });
}
之所以用 GCD,是因為 Touch ID 回呼在子執行緒。密碼驗證成功會回傳帳戶物件、失敗回傳空,因此可藉帳戶是否為空判斷登錄是否完成,成功後保存到帳戶管理單例並切換根控制器。
登錄視圖的細節
對螢幕較小的機型,鍵盤可能遮擋輸入框,因此要監聽鍵盤顯示與隱藏,判斷是否需上移視圖。登錄界面包含圖標、文字與輸入框,透過約束定位在父視圖 SGWelcomeView 上;位移時為方便起見,將整個父視圖上移,透過 transform 實現。
註冊與注銷通知
視圖以程式碼建立,一定會呼叫 initWithFrame:,在其中註冊通知:
[[NSNotificationCenter defaultCenter] addObserver:self selector:@selector(keyboardShow:) name:UIKeyboardWillShowNotification object:nil];
[[NSNotificationCenter defaultCenter] addObserver:self selector:@selector(keyboardHide:) name:UIKeyboardWillHideNotification object:nil];
在 dealloc 中注銷:
- (void)dealloc {
    [[NSNotificationCenter defaultCenter] removeObserver:self];
}
處理鍵盤顯示
由於監聽的是鍵盤即將動作的事件,最終位置應透過 endFrame 取得。判斷鍵盤是否遮擋輸入框,關鍵是看鍵盤 topY 是否小於輸入框 bottomY;若是,則上移 bottomY-topY(為美觀再多移一個間距)。條件中還判斷了視圖是否已做過變換,因為變換針對整個父視圖,而輸入框座標相對父視圖不受影響,且鍵盤顯示可能被多次觸發,需避免重複上移。
- (void)keyboardShow:(NSNotification *)nof {
    CGRect endFrame = [nof.userInfo[UIKeyboardFrameEndUserInfoKey] CGRectValue];
    CGFloat endY = endFrame.origin.y;
    CGFloat deltaY = endY - CGRectGetMaxY(self.pwdFiled.frame) - 10;
    if (deltaY < 0 && CGAffineTransformEqualToTransform(self.transform, CGAffineTransformIdentity)) {
        self.transform = CGAffineTransformTranslate(self.transform, 0, deltaY);
    }
}
處理鍵盤隱藏
鍵盤隱藏時只需復原變換:
- (void)keyboardHide:(NSNotification *)nof {
    self.transform = CGAffineTransformIdentity;
}
若想讓鍵盤的出現、消失與視圖位移同步,可從通知物件取得鍵盤動畫的 duration,把變換寫進 UIView 動畫 block。
註冊控制器與視圖設計
註冊控制器的設計與登錄一致,檔案結構如下:
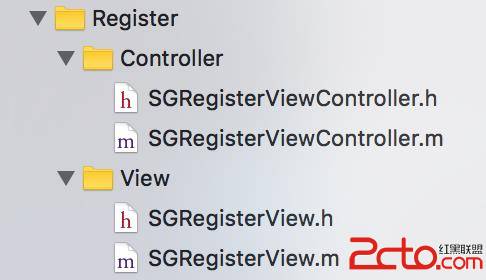
界面如下:
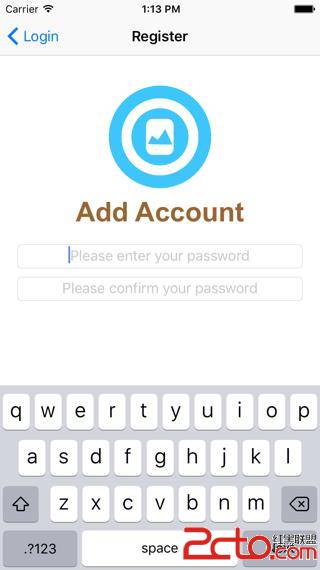
註冊頁同樣透過 block 回呼到控制器。由於每個密碼對應一個儲存空間,註冊時密碼不可與既有帳戶重複。輸入確認密碼並按下 Return 後透過 block 回呼,傳回密碼與確認密碼,控制器處理如下:
- (void)handleRegisterWithPassword:(NSString *)password confirm:(NSString *)confirm {
    // 密碼與確認密碼必須一致且不為空
    if (![password isEqualToString:confirm]) {
        [MBProgressHUD showError:@"Passwords Do Not Match"];
        return;
    } else if (!password.length) {
        [MBProgressHUD showError:@"Password Cannot be Empty"];
        return;
    }
    // 使用帳戶管理對象處理註冊業務邏輯
    SGAccountManager *mgr = [SGAccountManager sharedManager];
    NSString *errorMessage = nil;
    [mgr registerAccountWithPassword:password errorMessage:&errorMessage];
    if (errorMessage == nil) {
        // 註冊成功則回到登錄頁
        [MBProgressHUD showSuccess:@"Register Succeeded"];
        [self.navigationController popViewControllerAnimated:YES];
    } else {
        [MBProgressHUD showError:errorMessage];
    }
}
總結
本篇介紹了登錄與註冊界面的實現細節,歡迎關注專案後續,下載地址可見文章開頭。