
打造加密相簿 App(三):相簿頁面的 MVC 設計與檔案系統實作
專案背景
市面上雖然有一些不錯的加密相簿 App,但要不是內建廣告,就是對上傳張數設限。這個專案要做一個自己用的加密相簿,規劃的功能包含:多重密碼(輸入不同密碼進入不同空間,可掩人耳目)、WiFi 傳圖、以及照片檔案加密。專案與文章同步推進,原始碼可在 GitHub 取得。
前一篇完成了照片瀏覽器,本篇來談相簿列表頁的設計與實作。
互動設計
主界面是一個網格式的相簿列表:
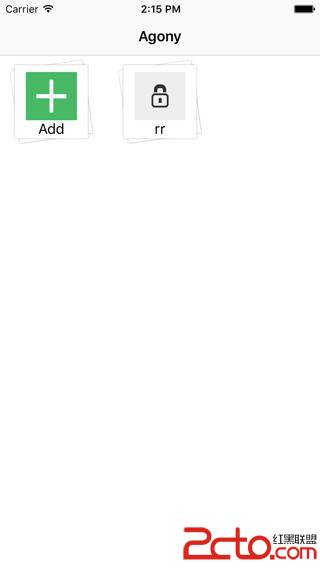
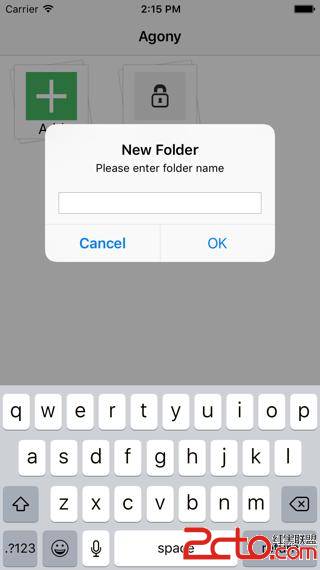
點擊 Add 按鈕可以新增相簿資料夾,透過跳出的 AlertView 命名:
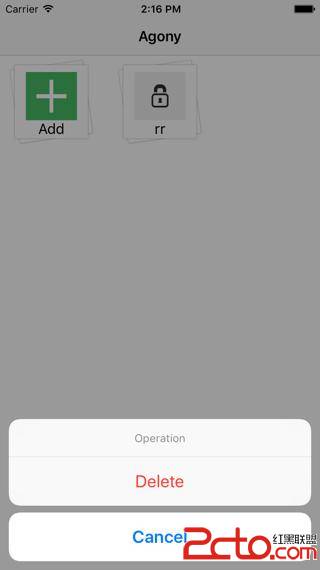
長按既有相簿可以刪除:
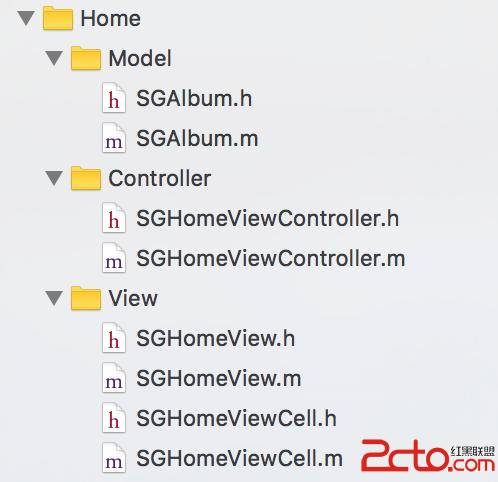
檔案結構
採用 MVC 模式。為了排版方便,列表用 UICollectionView 實作。
模型 SGAlbum
每個模型對應一個相簿,保存名稱、儲存路徑、封面圖路徑。由於「Add 按鈕」在視覺上也是一個 cell,因此模型裡加了一個 type 屬性來區分。
typedef NS_OPTIONS(NSInteger, SGAlbumType) {
    SGAlbumButtonTypeCommon = 0,
    SGAlbumButtonTypeAddButton
};

@interface SGAlbum : NSObject
@property (nonatomic, copy) NSString *name;
@property (nonatomic, copy) NSString *path;
@property (nonatomic, copy) NSString *coverImageURL;
@property (nonatomic, assign) SGAlbumType type;
@end
Cell 設計
每個 cell 都是 UICollectionViewCell 的子類,包含背景圖、封面圖、名稱標籤三個子檢視。
@interface SGHomeViewCell ()
@property (nonatomic, weak) UIImageView *backgroundImageView;
@property (nonatomic, weak) UIImageView *thumbImageView;
@property (nonatomic, weak) UILabel *nameLabel;
@end
長按刪除的事件鏈
長按手勢加在 cell 的 contentView 上,但事件最終要交給 collectionView 處理:collectionView 收到後彈出 UIActionSheet 讓使用者確認,確認後刪除相簿資料夾,再把訊息繼續往上傳給控制器重新載入檔案。
這裡有個實作細節值得注意:直接對 block 屬性賦值時,Xcode 無法提供智能補全提示。解法是把 block 宣告為私有屬性,另外寫一個 setter 對外開放。
// 對外提供的 block setter
- (void)setAction:(SGHomeViewCellActionBlock)actionBlock;

// 私有的 block 屬性
@property (nonatomic, copy) SGHomeViewCellActionBlock actionBlock;

// 加入長按手勢
UILongPressGestureRecognizer *press =
    [[UILongPressGestureRecognizer alloc] initWithTarget:self action:@selector(press:)];
press.minimumPressDuration = 0.5f;
[self.contentView addGestureRecognizer:press];

// 手勢處理
- (void)press:(UILongPressGestureRecognizer *)ges {
    if (ges.state != UIGestureRecognizerStateBegan) return;

    // 第一個是「Add 按鈕」,不處理刪除
    if (self.album.type == SGAlbumButtonTypeCommon) {
        if (self.actionBlock) {
            self.actionBlock();
        }
    }
}
用 setter 監聽模型傳入
重寫 album 的 setter,在模型傳進來時用它的資料渲染視圖;若沒有封面圖,就用預設佔位圖。
- (void)setAlbum:(SGAlbum *)album {
    _album = album;

    if (album.type == SGAlbumButtonTypeAddButton) {
        self.thumbImageView.image = [UIImage imageNamed:@"AlbumAddButton"];
        self.nameLabel.text = @"Add";
    } else {
        UIImage *thumb = [UIImage imageNamed:album.coverImageURL ?: @"AlbumCover_placeholder"];
        self.thumbImageView.image = thumb;
        self.nameLabel.text = album.name;
    }
}
把建立與重用的邏輯收進 Cell
這樣做能大幅減少 collectionView 的程式碼量。
+ (instancetype)cellWithCollectionView:(UICollectionView *)collectionView
                         forIndexPath:(NSIndexPath *)indexPath {
    static NSString *ID = @"SGHomeViewCell";

    // register 保證了 dequeue 在無可重用時會自動建立新的 cell
    [collectionView registerClass:[SGHomeViewCell class] forCellWithReuseIdentifier:ID];

    return [collectionView dequeueReusableCellWithReuseIdentifier:ID forIndexPath:indexPath];
}
CollectionView 設計
collectionView 自己擔任 data source,同時負責接收 cell 的長按事件、刪除相簿,並把事件繼續往控制器傳。它需要的資料由控制器讀取沙盒檔案提供。
@interface SGHomeView : UICollectionView

// 資料來源,由控制器負責載入
@property (nonatomic, strong) NSArray<SGAlbum *> *albums;

// 向控制器二次傳遞 cell 的長按事件
- (void)setAction:(SGHomeViewNeedReloadActionBlock)actionBlock;

@end
- (__kindof UICollectionViewCell *)collectionView:(UICollectionView *)collectionView
                           cellForItemAtIndexPath:(NSIndexPath *)indexPath {

    SGHomeViewCell *cell = [SGHomeViewCell cellWithCollectionView:collectionView
                                                    forIndexPath:indexPath];
    SGAlbum *album = self.albums[indexPath.row];
    cell.album = album;

    WS();   // 建立 weakSelf 的巨集,避免循環引用

    [cell setAction:^{
        UIActionSheet *ac = [[UIActionSheet alloc] initWithTitle:@"Operation"
                                                       delegate:self
                                              cancelButtonTitle:@"Cancel"
                                         destructiveButtonTitle:@"Delete"
                                              otherButtonTitles:nil];
        [ac showInView:self.superview];

        // 記錄當前相簿,供 actionSheet 回呼時刪除
        weakSelf.currentSelectAlbum = album;
    }];

    return cell;
}
因為模型已經保存了儲存路徑,刪除就變得很簡單,刪完再把事件繼續傳給控制器:
- (void)actionSheet:(UIActionSheet *)actionSheet clickedButtonAtIndex:(NSInteger)buttonIndex {
    if (buttonIndex == 0) {
        [[NSFileManager defaultManager] removeItemAtPath:self.currentSelectAlbum.path error:nil];
        if (self.actionBlock) {
            self.actionBlock();
        }
    }
}
檔案系統設計
控制器主要負責檔案的載入。相簿在沙盒中的結構如下:
- 根目錄為 Documents,這個目錄的內容會被 iCloud 備份,可避免資料遺失
- 為了區分不同密碼對應的不同帳號,以每個密碼加密後的名稱作為資料夾名稱,這些資料夾就是各帳號的相簿根目錄
- 每個帳號下建立的相簿,都以實體資料夾形式存在於各自的根目錄
- 每個相簿內再分 Photo 與 Thumb 兩個目錄,分別存原圖與縮圖
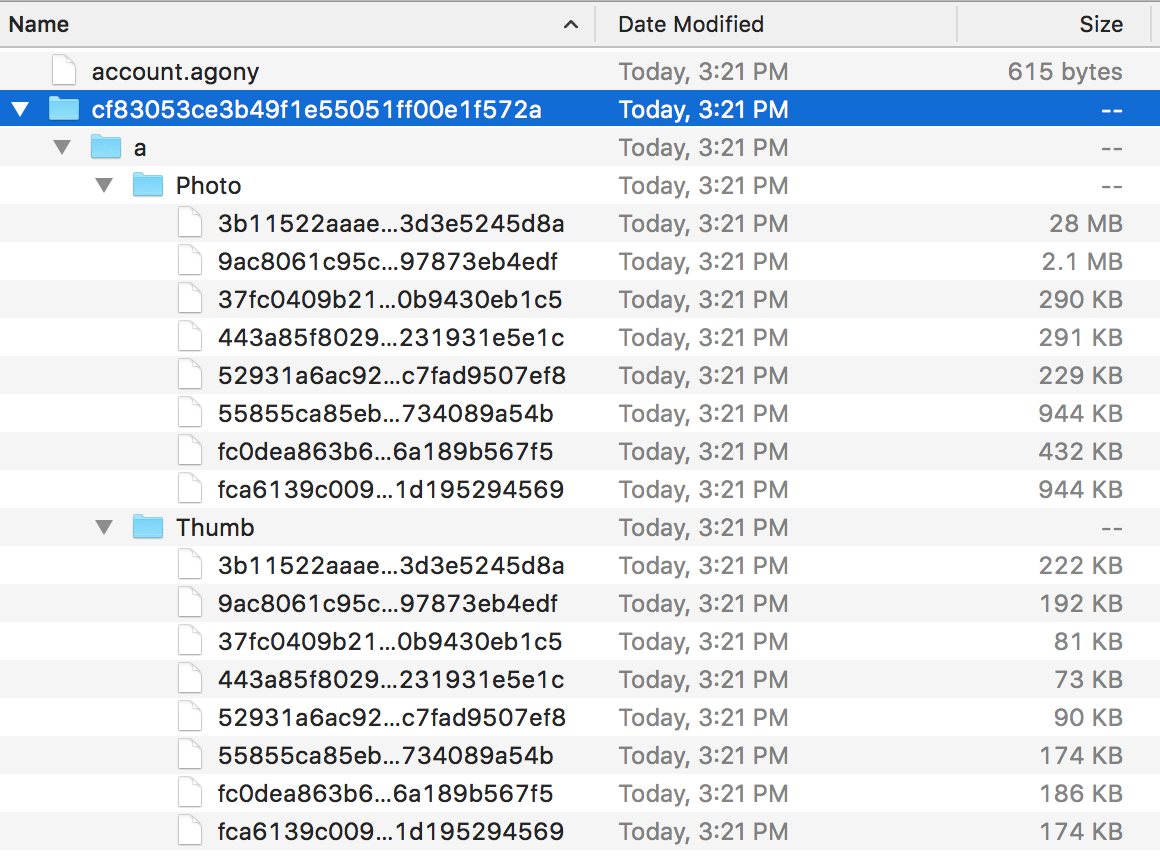
為此建立一個檔案工具類:
@interface SGFileUtil : NSObject
@property (nonatomic, strong) SGAccount *account;
@property (nonatomic, copy, readonly) NSString *rootPath;
+ (instancetype)sharedUtil;
@end
重寫 account 的 setter,讓 rootPath 跟著當前帳號變化;若該資料夾不存在就建立它:
- (void)setAccount:(SGAccount *)account {
    _account = account;
    _rootPath = [DocumentPath stringByAppendingPathComponent:account.password];

    NSFileManager *mgr = [NSFileManager defaultManager];
    if (![mgr fileExistsAtPath:_rootPath isDirectory:nil]) {
        [mgr createDirectoryAtPath:_rootPath withIntermediateDirectories:NO
                       attributes:nil error:nil];
    }
}
控制器業務邏輯
視圖載入時,先把 collectionView 加上去並設定好 block 回呼,接著載入檔案。
- (void)viewDidLoad {
    [super viewDidLoad];
    [self setupView];
    [self loadFiles];
}

- (void)setupView {
    self.title = @"Agony";

    UICollectionViewFlowLayout *layout = [UICollectionViewFlowLayout new];
    [layout setScrollDirection:UICollectionViewScrollDirectionVertical];

    SGHomeView *view = [[SGHomeView alloc]
        initWithFrame:(CGRect){0, 0, [UIScreen mainScreen].bounds.size}
        collectionViewLayout:layout];
    view.alwaysBounceVertical = YES;
    view.delegate = self;

    WS();
    // 接收 cell 長按事件的回傳
    [view setAction:^{
        [weakSelf loadFiles];
    }];

    self.homeView = view;
    [self.view addSubview:view];
}

- (void)loadFiles {
    SGFileUtil *util = [SGFileUtil sharedUtil];
    NSString *rootPath = util.rootPath;
    NSFileManager *mgr = [NSFileManager defaultManager];

    NSMutableArray<SGAlbum *> *albums = @[].mutableCopy;

    // 第一個項目固定是「Add 按鈕」
    SGAlbum *addBtnAlbum = [SGAlbum new];
    addBtnAlbum.type = SGAlbumButtonTypeAddButton;
    [albums addObject:addBtnAlbum];

    // 其餘相簿從當前帳號的根目錄掃描
    NSArray *fileNames = [mgr contentsOfDirectoryAtPath:rootPath error:nil];
    for (NSUInteger i = 0; i < fileNames.count; i++) {
        NSString *fileName = fileNames[i];
        SGAlbum *album = [SGAlbum new];
        album.name = fileName;
        album.path = [rootPath stringByAppendingPathComponent:fileName];
        [albums addObject:album];
    }

    self.homeView.albums = albums;
    [self.homeView reloadData];
}
控制器同時擔任 collectionView 的代理,處理尺寸與點擊:
- (CGSize)collectionView:(UICollectionView *)collectionView
                  layout:(UICollectionViewLayout *)collectionViewLayout
  sizeForItemAtIndexPath:(NSIndexPath *)indexPath {
    return CGSizeMake(100, 100);
}

- (UIEdgeInsets)collectionView:(UICollectionView *)collectionView
                        layout:(UICollectionViewLayout *)collectionViewLayout
  insetForSectionAtIndex:(NSInteger)section {
    return UIEdgeInsetsMake(5, 10, 5, 10);
}

- (void)collectionView:(UICollectionView *)collectionView
didSelectItemAtIndexPath:(NSIndexPath *)indexPath {

    SGAlbum *album = self.homeView.albums[indexPath.row];

    if (album.type == SGAlbumButtonTypeAddButton) {
        // 新增相簿:彈出輸入框
        UIAlertView *alertView = [[UIAlertView alloc]
            initWithTitle:@"New Folder"
                  message:@"Please enter folder name"
                 delegate:self
        cancelButtonTitle:@"Cancel"
        otherButtonTitles:@"OK", nil];
        alertView.alertViewStyle = UIAlertViewStylePlainTextInput;
        [alertView show];
    } else {
        // 進入照片瀏覽器(下一篇中介紹)
        SGPhotoBrowserViewController *browser = [SGPhotoBrowserViewController new];
        browser.rootPath = album.path;
        [self.navigationController pushViewController:browser animated:YES];
    }
}
在 alertView 的回呼中處理資料夾建立。這裡做了兩層檢查:名稱不可為空,且不可重複。
- (void)alertView:(UIAlertView *)alertView clickedButtonAtIndex:(NSInteger)buttonIndex {
    if (buttonIndex == 1) {
        NSString *folderName = [alertView textFieldAtIndex:0].text;

        if (!folderName.length) {
            [MBProgressHUD showError:@"Folder Name Cannot be Empty"];
            return;
        }

        NSFileManager *mgr = [NSFileManager defaultManager];
        NSString *folderPath = [[SGFileUtil sharedUtil].rootPath
                                stringByAppendingPathComponent:folderName];

        if ([mgr fileExistsAtPath:folderPath isDirectory:nil]) {
            [MBProgressHUD showError:@"Folder Exists"];
            return;
        }

        [mgr createDirectoryAtPath:folderPath withIntermediateDirectories:NO
                        attributes:nil error:nil];
        [self loadFiles];
    }
}
本篇回顧
這一頁的設計重點其實不在 API,而在資料流的方向:Cell 只負責呈現與把事件往上丟,CollectionView 負責協調與刪除,控制器負責檔案系統與資料來源。三層各司其職,後續要加搜尋、排序或縮圖非同步載入,都不必大改結構。