
《Motion Design for iOS》第四十五回:漢堡按鈕變成 X
編輯:iOS 開發綜合
剩下兩個動畫比較有份量,需要多思考一下。目標是讓上方那條線順時針旋轉 45 度(右端朝下傾斜),下方那條線逆時針旋轉 45 度(右端朝上傾斜)。逆時針代表負值,也就是 -45 度。要注意動畫 API 吃的是弧度而非角度,45 度對應 M_PI/4。
// 旋轉頂部的線來構成X
POPSpringAnimation *topRotate = [self.top.layer pop_animationForKey:@"topRotate"];
if (topRotate) {
    topRotate.toValue = @(-M_PI/4);
} else {
    topRotate = [POPSpringAnimation animationWithPropertyNamed:kPOPLayerRotation];
    topRotate.toValue = @(-M_PI/4);
    topRotate.springBounciness = 11;
    topRotate.springSpeed = 18.0f;
    [self.top.layer pop_addAnimation:topRotate forKey:@"topRotate"];
}

// 旋轉底部的線來構成X
POPSpringAnimation *bottomRotate = [self.bottom.layer pop_animationForKey:@"bottomRotate"];
if (bottomRotate) {
    bottomRotate.toValue = @(M_PI/4);
} else {
    bottomRotate = [POPSpringAnimation animationWithPropertyNamed:kPOPLayerRotation];
    bottomRotate.toValue = @(M_PI/4);
    bottomRotate.springBounciness = 11;
    bottomRotate.springSpeed = 18.0f;
    [self.bottom.layer pop_addAnimation:bottomRotate forKey:@"bottomRotate"];
}
Pop 的旋轉動畫是加在 layer 上的(看 kPOPLayerRotation 就知道了),所以動畫要掛到承載這些視圖的 layer。
一根線往上轉、一根往下轉,理應在中間交叉成 X 才對。來看看實際結果:
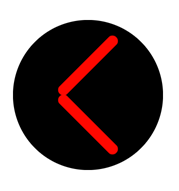
嗯,這顯然不是我們要的樣子。原因在於兩條線都是繞著各自 layer 的中心旋轉,於是它們像蹺蹺板一樣翹了起來,而不是在正中央交叉。理論上可以改 layer 的錨點(anchorPoint),但那麼做會連帶重定位 layer,還得回頭修正 frame,麻煩且容易出錯。更省事的做法是:把頂部的線下移一點、底部的線上移一點,讓它們重疊之後再旋轉。
// 重定位頂部的線到按鈕的中間
POPSpringAnimation *topPosition = [self.top.layer pop_animationForKey:@"topPosition"];
if (topPosition) {
    topPosition.toValue = @(29);
} else {
    topPosition = [POPSpringAnimation animationWithPropertyNamed:kPOPLayerTranslationY];
    topPosition.toValue = @(29);
    topPosition.springBounciness = 0;
    topPosition.springSpeed = 18.0f;
    [self.top.layer pop_addAnimation:topPosition forKey:@"topPosition"];
}

// 重定位底部的線到按鈕的中間
POPSpringAnimation *bottomPosition = [self.bottom.layer pop_animationForKey:@"bottomPosition"];
if (bottomPosition) {
    bottomPosition.toValue = @(-29);
} else {
    bottomPosition = [POPSpringAnimation animationWithPropertyNamed:kPOPLayerTranslationY];
    bottomPosition.toValue = @(-29);
    bottomPosition.springBounciness = 0;
    bottomPosition.springSpeed = 18.0f;
    [self.bottom.layer pop_addAnimation:bottomPosition forKey:@"bottomPosition"];
}
經過幾次測試與錯誤嘗試,我決定頂部的線下移 29 px、底部的線上移 29 px,這樣兩者重疊得最漂亮。你也可以用三角函數算出這個值。這裡改用 kPOPLayerTranslationY,讓位移與旋轉分開控制。
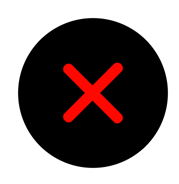
成了!點擊按鈕,三條線收攏成兩條並交叉成 X。可是再點一次呢?什麼都不會發生——因為我們還沒寫把 X 變回漢堡的邏輯。幸好這部分幾乎是複製貼上,只要把 toValue 換回初始值:兩條線都旋轉回 0 度、位移歸零、顏色改回白色,中間那條線淡入回 100% 不透明度。這樣就得到一個完整的漢堡按鈕了。
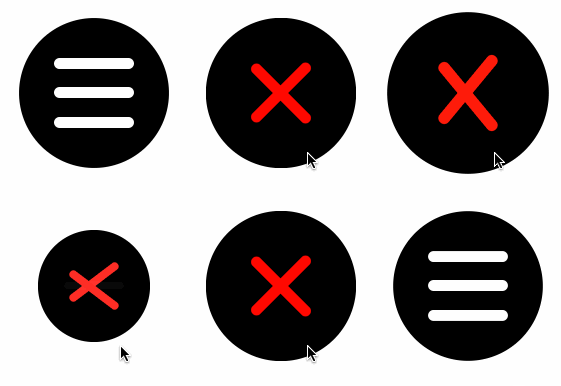
完整合集:https://github.com/Cloudox/Motion-Design-for-iOS
- 上一篇文章: iOS Quartz2D 實戰:手把手做手勢解鎖
- 下一篇文章: iOS 代碼規範:命名、排版與專案約定