
App 適配 iPhone 6 與 iOS 8 的十個關鍵要點
(原文:raywenderlich 作者:Jack Wu 譯者:@TurtleFromMars)

Keynote 前夜,無人知曉新 API 能否登場;Siri 的期待、Touch ID 的希望,而 iOS 8 一出震驚全場——Extensions、Swift、Metal 整整一籮筐,通用 Storyboard 又有誰曾料想。歡呼聲中也有人開始迷惘:現有這些 App 的適配問題實在堪憂。別擔心,這篇要談的就是新的 API 與螢幕尺寸,助你的 App 煥發容光。
開始之前
你可能想:「我在 iPhone 6 Plus 上跑過自己的 App,看起來沒什麼問題。」的確,它應該還能跑,但這不代表可以收工。
讓現有 App 在放大模式(Scale Mode)下執行,Apple 做得不錯:畫面整體被放大以填滿更大的螢幕。掃一眼似乎還行,但狀態列也跟著變大了。你真正想要的顯然是全螢幕模式:
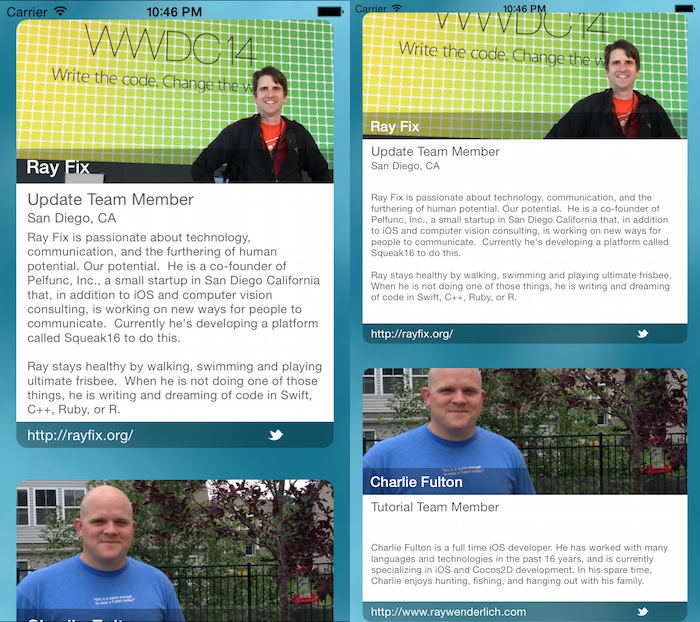
全螢幕模式能在同樣的螢幕空間裡顯示更多內容,狀態列尺寸也回歸正常。圖中文字看起來偏小,但在 Retina HD 螢幕上剛好合適。
那麼問題來了:要放棄支援 iOS 7 嗎?這終究是你的決定,但可以參考幾點:
- iOS 7 使用者依然能在 App Store 下載當前版本。
- iPhone 6 與 6 Plus 出廠即為 iOS 8。
- iOS 8 的採用率雖略低於去年同期 iOS 7,但已超過 60%。
- 還有那堆酷炫的新 API。
第一節:支援新的螢幕尺寸
1. 採用自適應佈局與通用 Storyboard
若你的 App 已使用 Storyboard 與 Auto Layout,適配會輕鬆很多;若還沒有,那更待何時?Size Class 依賴 Auto Layout 與通用 Storyboard,Apple 已經清楚表態 Storyboard 是未來的中心。何況最新的 WatchKit 根本離不開它。
raywenderlich.com 上有幾篇不錯的 Swift Storyboard 與 Auto Layout 教學可以參考。
第一步是把現有 Storyboard 轉為通用 Storyboard。打開 Storyboard,在 Info Panel(Command + Option + 1)中勾選 Use Size Classes:
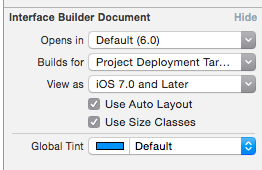
你會發現視圖變成正方形。別激動,這不代表你的 App 現在能支援黑莓 Passport,它只是代表「Any」尺寸。所有約束都原樣保留,此時尚無實質變化——可以用 Assistant Editor 的 Preview 模式確認。
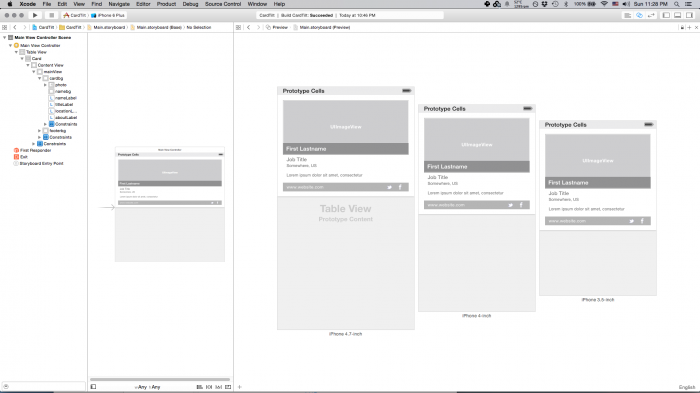
接著就能為不同尺寸類別分別設定約束了。
如果你的 App 是 Universal App,有兩條路:一是繼續使用各自的 Storyboard,只把 iPhone 那份(或全部)轉為通用 Storyboard 後分別適配;二是合併成單一通用 Storyboard,之後只需維護一份,但重構工作量可觀,Xcode 目前也沒有自動化工具可協助。
2. 用啟動畫面 Storyboard 開啟全螢幕模式
Apple 的說法:執行時系統會尋找 Storyboard launch screen file。若 App Bundle 中包含這樣的檔案,系統便認定你的 App 已明確適配 iPhone 6 與 6 Plus,並在全螢幕模式下執行。
也就是說——你再也不用準備一堆不同尺寸的啟動圖了。
用 New File 新增檔案,在 iOS > User Interface 中找到新的檔案類型 Launch Screen。Xcode 產生的預設啟動畫面確實有點寒磣:
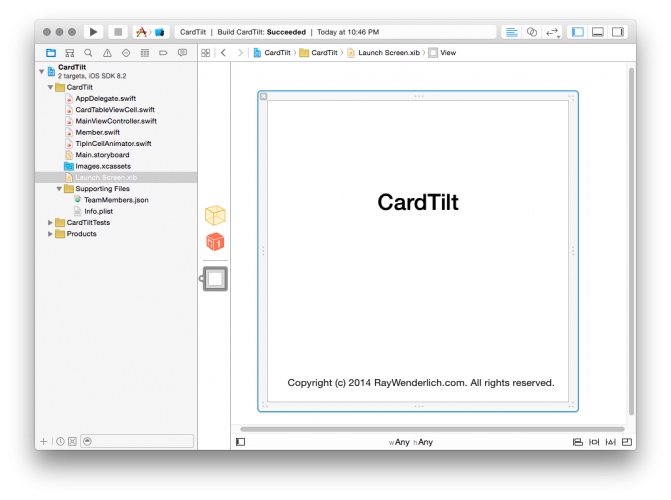
打開這個 xib,刪掉那几个醜 label,裝扮成你喜歡的樣子。想維持原貌的話,放一個顯示啟動圖的 UIImageView 即可。
最後到 General Settings 中把它設為 Launch Screen File:
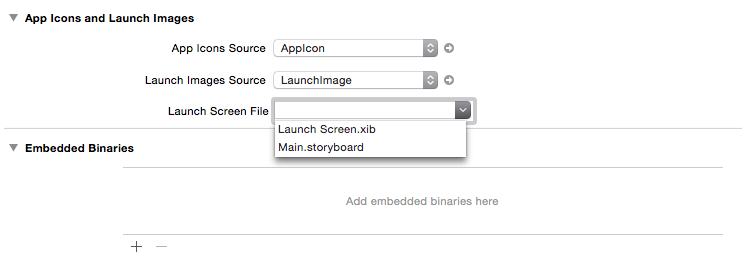
重新編譯並在 iPhone 6 Plus 模擬器執行,就能享受新啟動畫面與全螢幕模式。
若要支援 iOS 7 或更早版本,仍需提供 4 吋啟動圖,否則 App 會以 3.5 吋模式顯示。
3. Retina HD 與 @3x 圖片
iPhone 6 Plus 配備 401 PPI 的新一代 Retina HD 螢幕,需要提供 3 倍解析度的圖片資源。做法與 @2x 相同:準備 @3x 檔案,iOS 會自動挑選正確的版本。(iPhone 6 雖也是 Retina HD,但像素密度與前代相同,仍使用 @2x 資源。)
第二節:權限機制的變動
使用者一定會喜歡 iOS 8 在隱私設定上的改進;但若處理不當,你的 App 可能直接當掉。
4. 修正定位權限
iOS 8 把定位權限拆成兩種:僅在 App 執行時接收更新,以及即使在背景也能接收更新。以往開始監聽位置時系統會自動跳出詢問,現在必須明確請求。做法是在 startUpdatingLocation 之前,於狀態未定時呼叫 requestWhenInUseAuthorization 或 requestAlwaysAuthorization:
self.locationManager = [[CLLocationManager alloc] init];
self.locationManager.delegate = self;

if ([CLLocationManager authorizationStatus] == kCLAuthorizationStatusNotDetermined) {
    [self.locationManager requestWhenInUseAuthorization];
}

[self.locationManager startUpdatingLocation];
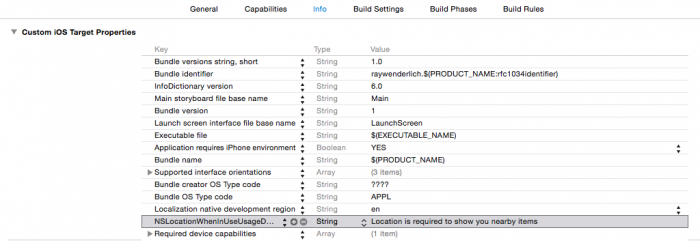
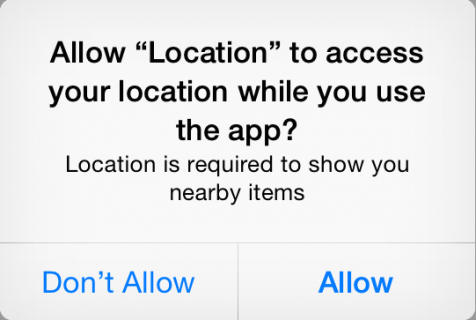
最後在 info.plist 加入 NSLocationWhenInUseUsageDescription 或 NSLocationAlwaysUsageDescription,並填入向使用者說明的文字,例如「顯示附近的物品需要取得您的位置」。
5. 修正通知註冊
為了支援可操作通知,iOS 8 的通知權限分成兩層:App 必須先請求「顯示特定類型通知」的許可,取得同意後才能請求「接收遠端通知」。舊的 -registerForRemoteNotificationTypes: 寫法在 iOS 8 下不會觸發 delegate。
- (BOOL)application:(UIApplication *)application didFinishLaunchingWithOptions:(NSDictionary *)launchOptions {
    // 1
    UIUserNotificationSettings *settings =
        [UIUserNotificationSettings settingsForTypes:UIUserNotificationTypeAlert
                                         | UIUserNotificationTypeBadge
                                         | UIUserNotificationTypeSound
                                          categories:nil];
    // 2
    [application registerUserNotificationSettings:settings];

    return YES;
}

- (void)application:(UIApplication *)application
    didRegisterUserNotificationSettings:(UIUserNotificationSettings *)notificationSettings {
    // 3
    if (notificationSettings.types != UIUserNotificationTypeNone) {
        // 4
        [application registerForRemoteNotifications];
    }
}

// 5
- (void)application:(UIApplication *)application
    didRegisterForRemoteNotificationsWithDeviceToken:(NSData *)deviceToken {
    // ...(無需變更)
}

- (void)application:(UIApplication *)application
    didFailToRegisterForRemoteNotificationsWithError:(NSError *)error {
    // ...(無需變更)
}
步驟說明:
- 建立 UIUserNotificationSettings,定義 App 要顯示的通知類型,其中也包含動作的類別。
- 呼叫
-registerUserNotificationSettings:向使用者請求許可。 - 使用者回應後觸發新的 delegate 方法。此處傳入的 notificationSettings 未必與步驟 2 相同,它只反映使用者「實際允許」的項目,可用 types 驗證。
- 取得許可後才呼叫
-registerForRemoteNotifications,此方法已不再需要參數。 - 之後仍照舊透過相同回呼取得 device token。
6. 友善的二次請求
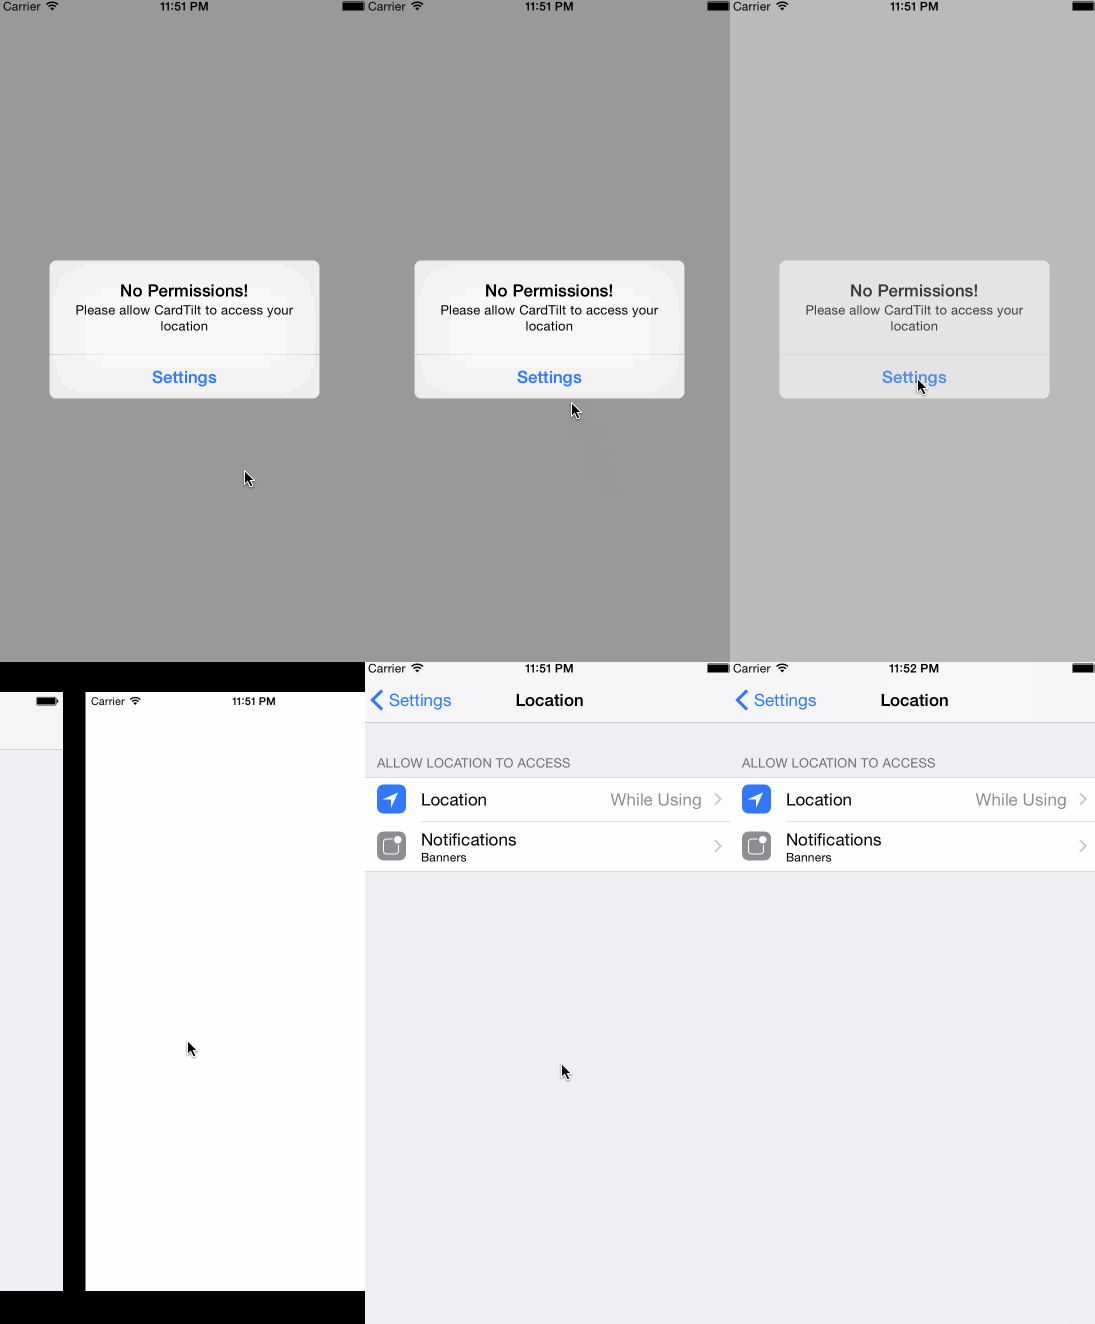
使用者一旦在首次詢問時拒絕,之後就不會再跳提示。若該權限是必要條件,傳統做法是顯示錯誤頁或一段「請到設定中開啟」的說明,體驗相當糟,也常换来負評。
iOS 8 提供了 UIApplicationOpenSettingsURLString,傳入 -openURL: 就能直接跳到該 App 的設定頁:
[[UIApplication sharedApplication] openURL:[NSURL URLWithString:UIApplicationOpenSettingsURLString]];
第三節:適配之後
7. 擁抱 Swift
使用 Swift 最直接的收益是檔案數與程式碼行數的減少。你不需要重寫任何既有程式碼,甚至可以直接在現有專案的新檔案裡開始寫 Swift。讓兩者和平共處的幾個要點:
- 首次加入 Swift 檔案時,Xcode 會建立橋接標頭檔(bridging header),讓它建就好。
- 想在 Swift 中使用 Objective-C 類別,把對方的標頭檔用標準
#import寫進橋接標頭。 - 想在 Objective-C 中使用 Swift 類別,於對應的 .m 檔匯入
ProductModuleName-Swift.h,其中 ProductModuleName 即模組名(通常是專案名,仍建議到設定中確認)。 - 確保 Swift 類別要嘛繼承自某個 Objective-C 類別(如 NSObject),要嘛用
@objc標註類別與方法。
8. 重要的 API 遞嬗
iOS 8 更新了 Cocoa Touch 的幾個基本元件。UIAlertView、UIActionSheet 與 UISearchDisplayController 都有了更好用的替代品,而 UIPresentationController 則在視圖控制器呈現流程中扮演吃重角色。
UIAlertController 取代前兩者,提供基於 block 回呼的優雅介面:
UIAlertController * alert =
    [UIAlertController alertControllerWithTitle:@"Are you sure?"
                                        message:@"Once deleted this item cannot be recovered."
                                 preferredStyle:UIAlertControllerStyleAlert];

[alert addAction:[UIAlertAction actionWithTitle:@"OK"
                                         style:UIAlertActionStyleDefault
                                       handler:^(UIAlertAction * action) {
                                           [self deleteItem];
                                       }]];

[alert addAction:[UIAlertAction actionWithTitle:@"Cancel"
                                         style:UIAlertActionStyleCancel
                                       handler:{}]];

[self presentViewController:alert animated:YES completion:nil];
不必再指定 delegate,想呈現就呼叫 -presentViewController:。它同時支援多按鈕與文字輸入框的簡易配置。
UIPresentationController 讓你在呈現視圖控制器時擁有完全的掌控權,能以優雅且可重複使用的方式調整呈現的色調、位置與動畫。
9. 全新的視覺效果 API
模糊效果是 iOS 7 廣受好評的特性,而 Apple 終於在 iOS 8 公開了 API:全新的 UIVisualEffectView 與 UIVibrancyEffectView。
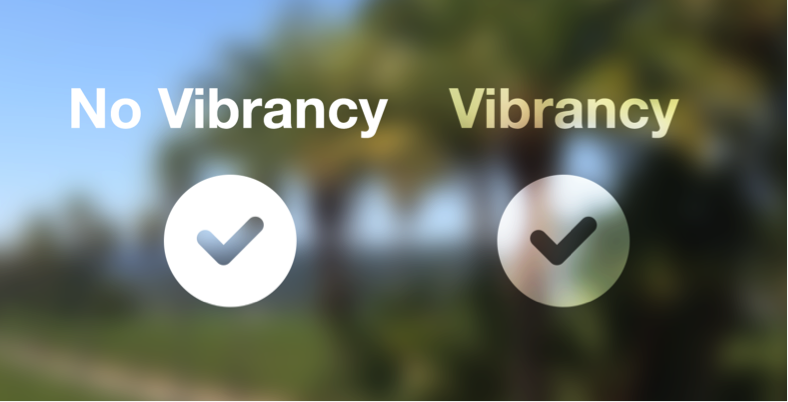
UIVisualEffectView 適合弱化背景,UIVibrancyEffectView 則讓前景更加鮮明。兩者都經過效能優化,但濫用仍會拖慢 App,務必謹慎評估使用時機。
10. 更多新選擇
讓 App 跑在 iOS 8 上只是起點。iOS 8 提供了大量擴充 App 能力的方式,把過去的不可能變成可能:
- 用 WatchKit 為 App 打造手錶擴充。
- 建立 Today Extension,讓使用者在通知中心掌握資訊。
- 用 Document Provider 實現應用間的檔案共享。
- 在通知中加入 Action 操作。
- 整合 Touch ID 做身份驗證。
接下來呢?
iOS 8 前所未有地為更多功能敞開大門。帶著這些新工具,彷彿又迎來一個新的起點。希望這十個要點能幫上你的忙——繼續前進,用程式碼創造歡聲笑語。
(本文由 CocoaChina 組織翻譯,譯文權利歸譯者所有,未經允許禁止轉載。)