
動手復刻「手機QQ」側滑菜單(上):從零打造側滑手勢
在這個系列裡,我們將一起動手復刻手機QQ那套經典的側滑菜單,力求在細節上盡可能貼近手Q的真實體驗。本篇會先打好地基,利用 Auto Layout 搭建左側菜單,並讓它與主視圖產生連動,為後續的高仿效果做好鋪墊。
完整代碼可參考:https://github.com/johnlui/SwiftSideslipLikeQQ
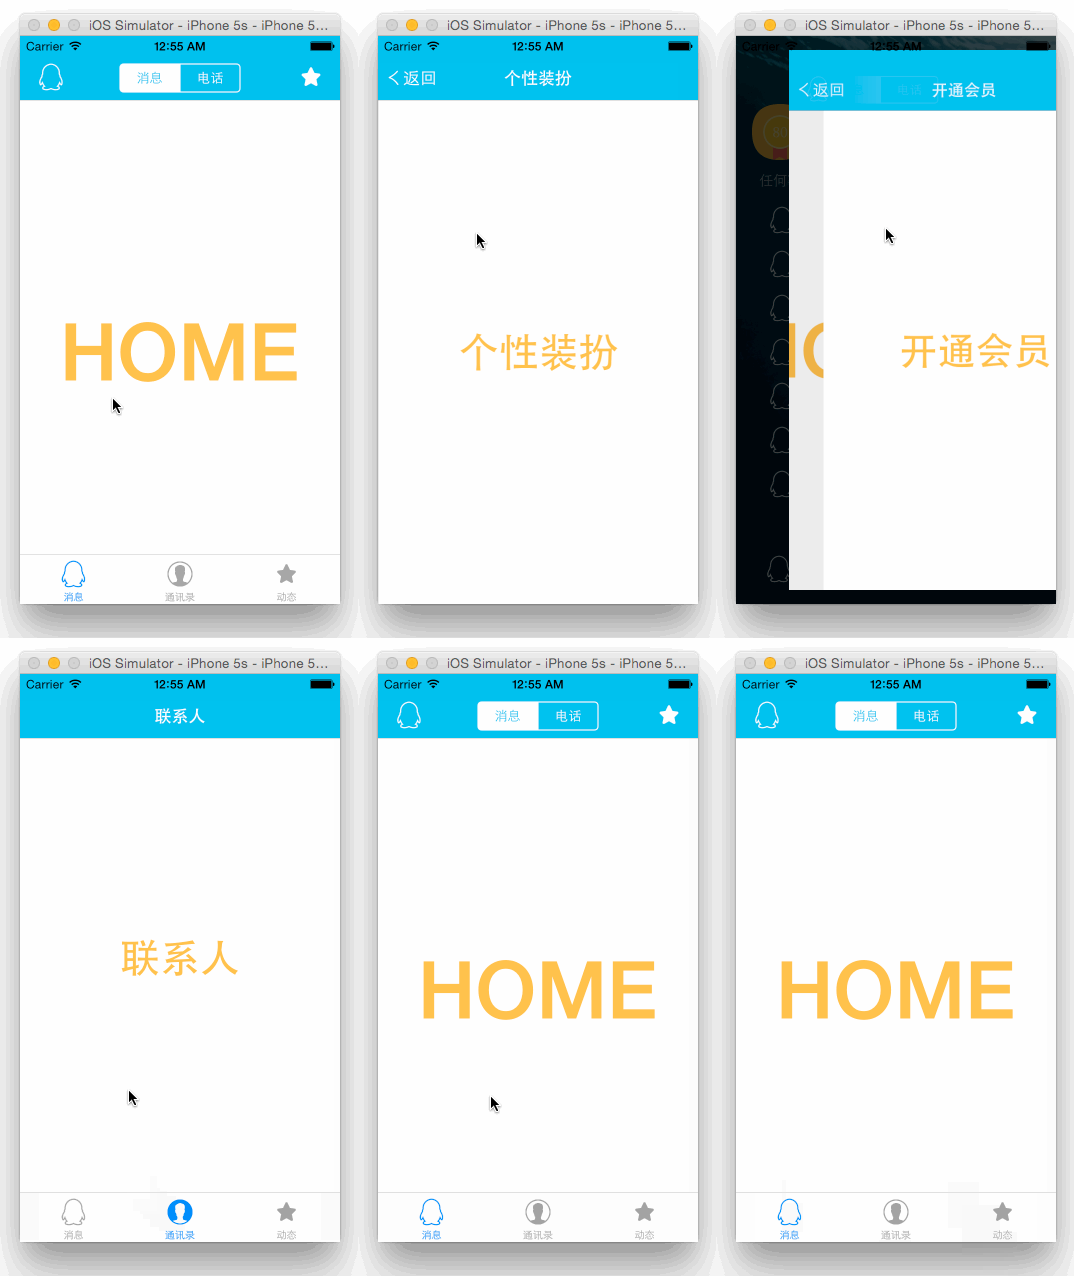
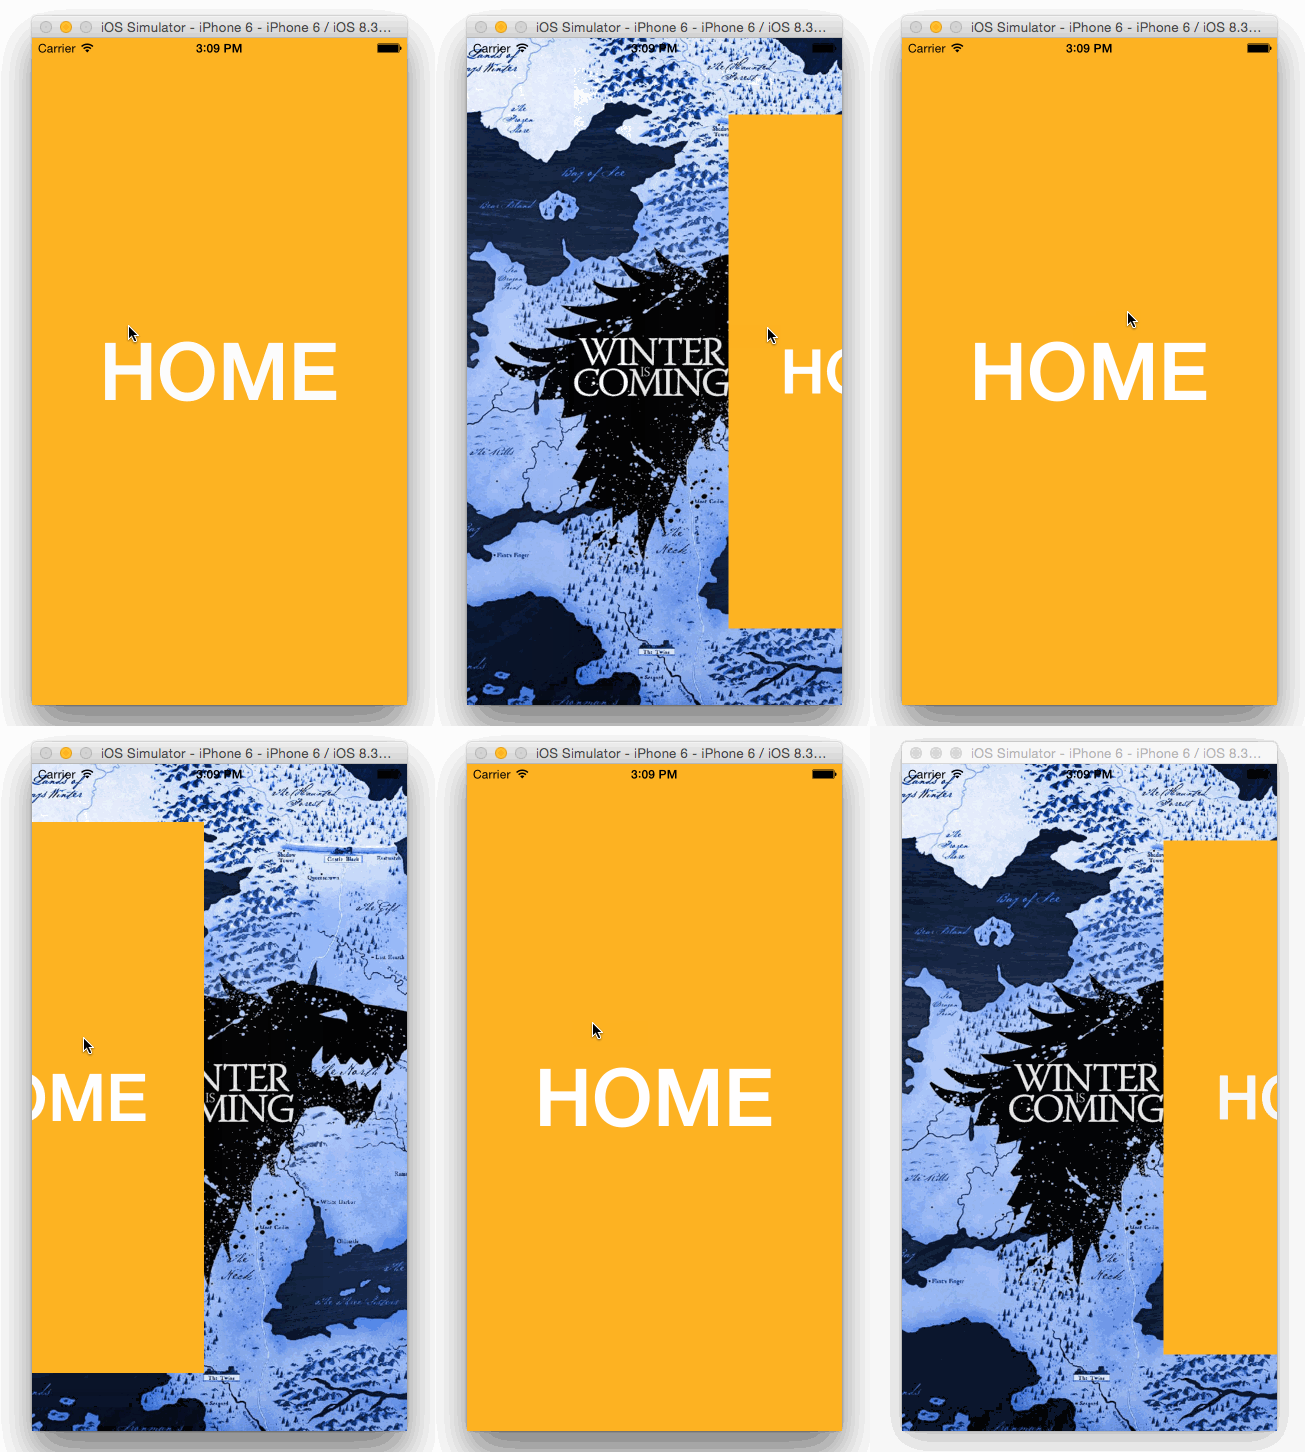
最終呈現的效果如下:
開發環境
本系列文章使用的開發環境為:
OS X 10.10.3
Xcode Version 6.3 (6D570)
動手采集關鍵數據
一番試玩下來可以判斷,手Q採用的應該是線性動畫,也就是縮放比例等參數會隨手指滑動的距離以一次函數的形式平滑變化。當動畫推到最大幅度時,截圖如下(以 4.7 吋為例):
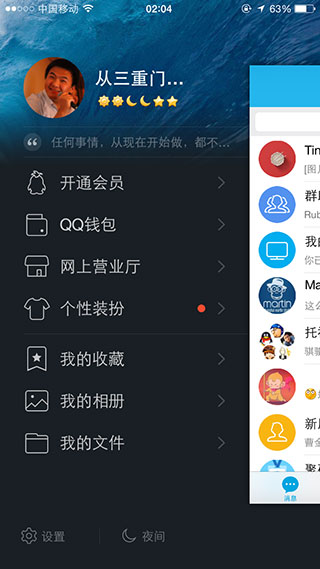
從截圖中我們可以提煉出兩個關鍵數據:
右側主視圖左邊界到屏幕左邊界的距離,佔屏幕寬度的比例約為:78%
右側主視圖的高度佔屏幕高度的比例約為:77%
推導線性關係
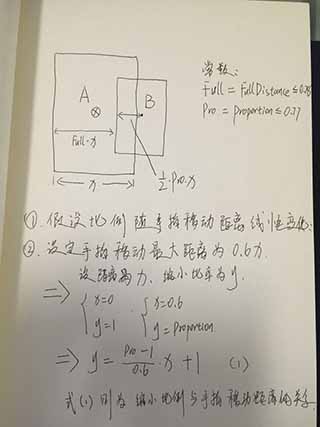
1. 比例與手指移動距離的關係
字寫得有點醜,敬請見諒 o(╯□╰)o。這裡要特別說明:式(1)中的 x 指的是「手指移動距離」這個變量,與上圖中代表屏幕寬度的 x 含義不同,切勿混淆。
2. 矩形中心右移的距離與手指移動距離相等
動手實現側滑
1. 新建項目:在 StoryBoard 中新增一個 View Controller,再建立一個名為 HomeViewController 的 UIViewController 類,並在 StoryBoard 裡完成綁定。
2. 給 HomeViewController 設置背景顏色以示區分。你也可以學著我放一個大大的 Label,讓區分效果更顯眼。
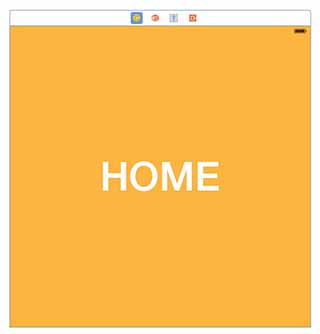
3. 為 HomeViewController 拖入一個 UIPanGestureRecognizer 並關聯到代碼。
從右下角拖一個 Pan Gesture Recognizer 到主窗體上,這一步會讓它自動與 HomeViewController.view 綁定。下圖展示的是第二步,即關聯到代碼。
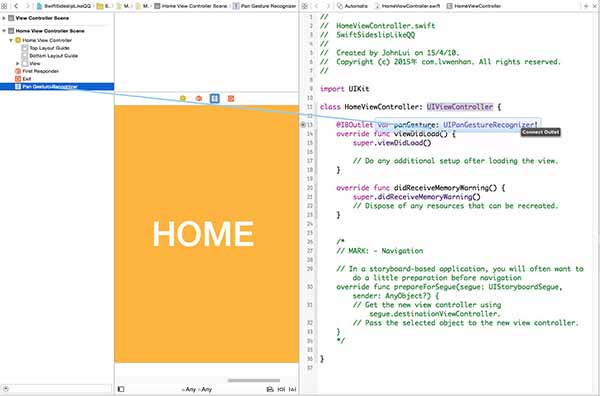
4. 編寫代碼實現效果:
新建 Common.swift,用來存儲屏幕的寬度與高度:
import UIKit struct Common { static let screenWidth = UIScreen.mainScreen().applicationFrame.maxX static let screenHeight = UIScreen.mainScreen().applicationFrame.maxY }接著改造 ViewController:
import UIKit class ViewController: UIViewController { var homeViewController: HomeViewController! var distance: CGFloat = 0 let FullDistance: CGFloat = 0.78 let Proportion: CGFloat = 0.77 override func viewDidLoad() { super.viewDidLoad() // 給主視圖設置背景 let imageView = UIImageView(image: UIImage(named: "back")) imageView.frame = UIScreen.mainScreen().bounds self.view.addSubview(imageView) // 通過 StoryBoard 取出 HomeViewController 的 view,放在背景視圖上面 homeViewController = UIStoryboard(name: "Main", bundle: nil).instantiateViewControllerWithIdentifier("HomeViewController") as! HomeViewController self.view.addSubview(homeViewController.view) // 綁定 UIPanGestureRecognizer homeViewController.panGesture.addTarget(self, action: Selector("pan:")) } override func didReceiveMemoryWarning() { super.didReceiveMemoryWarning() // Dispose of any resources that can be recreated. } // 響應 UIPanGestureRecognizer 事件 func pan(recongnizer: UIPanGestureRecognizer) { let x = recongnizer.translationInView(self.view).x let trueDistance = distance + x // 實時距離 // 如果 UIPanGestureRecognizer 結束,則激活自動停靠 if recongnizer.state == UIGestureRecognizerState.Ended { if trueDistance > Common.screenWidth * (Proportion / 3) { showLeft() } else if trueDistance < Common.screenWidth * -(Proportion / 3) { showRight() } else { showHome() } return } // 計算縮放比例 var proportion: CGFloat = recongnizer.view!.frame.origin.x >= 0 ? -1 : 1 proportion *= trueDistance / Common.screenWidth proportion *= 1 - Proportion proportion /= 0.6 proportion += 1 if proportion Void in self.homeViewController.view.center = CGPointMake(self.view.center.x + self.distance, self.view.center.y) self.homeViewController.view.transform = CGAffineTransformScale(CGAffineTransformIdentity, proportion, proportion) }, completion: nil) } }5. 檢視效果
下一篇:再造「手機QQ」側滑菜單(下)——高仿左視圖。
- 上一篇文章: 自己動手寫一個 iOS 網絡請求庫(二):封裝出好用的接口
- 下一篇文章: Chun 源碼閱讀筆記:一個 Swift 圖片緩存庫的實現思路