
從一道面試題理解 iOS 中的 Delegate 與頁面傳值

本文授權轉載:神獸 gcc(簡書)
繼上次用 Storyboard 完成簡單的頁面跳轉之後,我發現了不少問題。比如從第二個頁面回跳到第一個頁面,並不是正向跳轉那樣簡單模仿就行,實際運行時程序會報錯。這次我們結合一道經典題目,把頁面跳轉、逆向傳值以及鍵盤輸入的相關問題一次講清。題目出自《iOS 開發之美》,有興趣的朋友可以翻來看看,我在學習過程中補充了不少自己的理解與實踐記錄。原題如下:
有兩個場景 Scene A 和 Scene B。Scene A 上有一個 UIButton(Button A)和一個 UILabel(Label A);Scene B 上有一個 UITextField。單擊 Scene A 的 Button A 跳轉到 Scene B,在 Scene B 的 textField 中輸入文字,單擊鍵盤的「完成」按鈕後返回 Scene A,並在 Label A 上顯示剛才輸入的內容。
這是一個典型的場景跳轉加逆向傳值問題,看著簡單,暗藏玄機:既要用到 Storyboard,又要採用 Delegate 模式。
Delegate 是什麼
先別急著刨根問底。仔細分析題目,內容包括 Storyboard 應用、頁面跳轉、數據交互,似乎和 Delegate 沒什麼關係。這裡留個懸念——Delegate 是一種設計模式,並不容易用幾句話說清,我們在實際解決問題的過程中慢慢體會。
頁面間數據傳遞的常見方式
iOS 提供了多種手段實現頁面間傳值:
- 使用 SharedApplication,定義類似全局的變量傳遞
- 使用文件,或通過 NSUserDefaults 傳遞
- 通過單例類(SingleXX)傳遞
- 通過 Delegate 傳遞
而常見的數據存儲方式有五種:User Defaults、Property List、Object archives、SQLite、Core Data。
在本題中,Delegate 顯然是最合適的方案。
搭建界面
有了之前用 Storyboard 的經驗,界面搭建很快。先拋開所有 segue,把題目描述的結構擺出來再說。
新建名為 delegateSentValue 的工程,在原有 viewController 基礎上再新建一個,同時創建 viewController2 的 .h 與 .m 並建立關聯。然後往兩個 view 裡拖放控件並關聯到相應文件。這一步暫時不用管 Button 的響應事件,只把兩個 Label 和一個 textField 在 .h 中聲明為屬性即可。
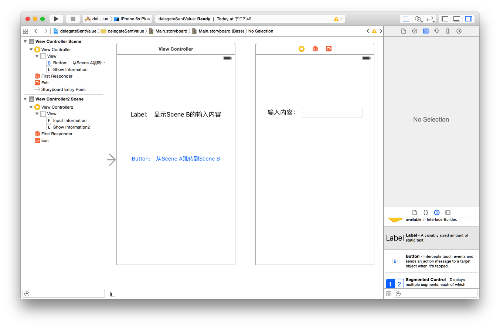
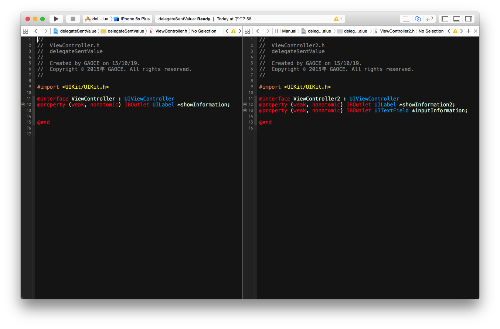
接著實現 Scene A 到 Scene B 的跳轉:按住 Ctrl 拖拽,把 Button 關聯到 Scene B,設置為 modal 模式,然後選中這個 segue,把 identifier 命名為 Segue_ID_AB。
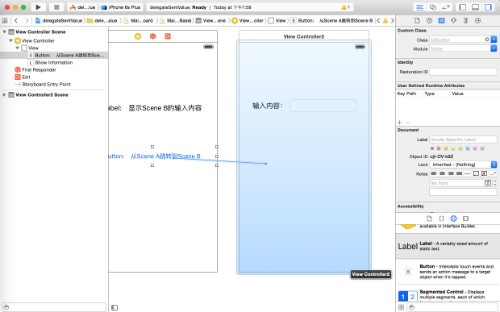
此時已經可以運行:點擊按鈕完成正向跳轉,點擊輸入框可以彈出鍵盤並接受輸入。
Delegate 的五步應用
剩下的任務是:輸入內容後單擊鍵盤「完成」,返回 Scene A 並把內容顯示出來。一個完整的 Delegate 應用需要五步:
- 委托者聲明一個 Delegate 協議
- 委托者調用 Delegate 中的方法
- 關聯委托者與被委托者
- 被委托者遵循 Delegate 協議
- 被委托者實現 Delegate 中的方法
第一步:聲明協議。在 ViewController2 中,於 @interface 之前添加:
@protocol ViewController2Delegate

- (void)viewController2:(ViewController2 *)sceneBVC didInputed:(NSString *)string;

@end
並在 @interface 中聲明 delegate 屬性:
@property (weak, nonatomic) id <ViewController2Delegate> delegate;
這裡有個容易踩的坑:如果照著上面的順序寫,會出現「Expected a type」錯誤。原因是我們引用了 ViewController2 這個類型,而它在協議聲明處尚未定義;可要是把 @protocol 挪到 @property 之後,ViewController2Delegate 又成了未定義類型。解法是先做前向聲明,再聲明屬性,最後在 @interface 之後定義協議方法。完整的 ViewController2.h 如下:
#import <UIKit/UIKit.h>

@protocol ViewController2Delegate;

@interface ViewController2 : UIViewController

@property (weak, nonatomic) IBOutlet UILabel *showInformation2;
@property (weak, nonatomic) IBOutlet UITextField *inputInformation;
@property (weak, nonatomic) id <ViewController2Delegate> delegate;

@end

@protocol ViewController2Delegate

- (void)viewController:(ViewController2 *)sceneBVC didInputed:(NSString *)string;

@end
第二步:委托者調用協議方法。在 textFieldShouldReturn: 中把內容回傳,並關閉當前頁面與鍵盤:
- (BOOL)textFieldShouldReturn:(UITextField *)textField {
    if (self.delegate) {
        // 將輸入內容傳遞給 delegate
        [self.delegate viewController:self didInputed:self.inputInformation.text];

        // 讓當前呈現的 Scene B 消失
        [self.presentingViewController dismissViewControllerAnimated:YES completion:nil];
    }

    // 收起鍵盤
    [textField resignFirstResponder];

    return YES;
}
僅寫代碼還不夠,還要關聯:在 Storyboard 中選中 ViewController2 的 TextFiled,按住 Ctrl 拖拽到 ViewController2,在 Outlets 中選擇 delegate。
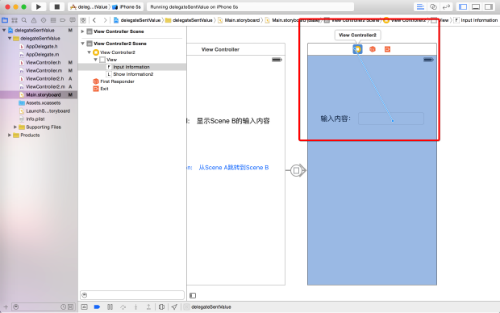
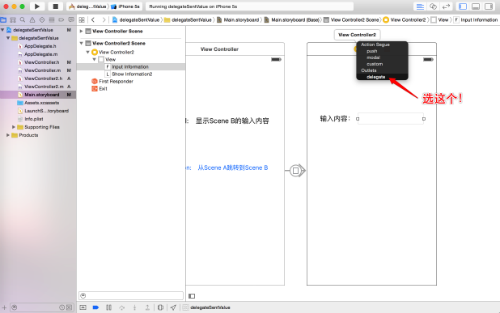
第三步:關聯委托者與被委托者。在 ViewController.m 中實現:
- (void)prepareForSegue:(UIStoryboardSegue *)segue sender:(id)sender {
    if ([segue.identifier isEqualToString:@"Segue_ID_AB"]) {
        ViewController2 *sceneBVC = segue.destinationViewController;
        sceneBVC.delegate = self;
    }
}
寫完可能會收到編譯器報錯,別擔心,等後面的步驟補齊就沒問題了。
這裡最重要的是 prepareForSegue:sender: 方法,完整簽名是:
- (void)prepareForSegue:(UIStoryboardSegue *)segue sender:(id)sender
segue 描述了這次跳轉的相關信息。若 A 跳轉到 B,我們可以通過它拿到 A 與 B 的實例對象。注意調用這個方法的時刻,跳轉行為尚未真正發生,所以可以在方法內部取得 B 的實例並傳入參數。
sender 表示是誰觸發了這次跳轉。因為方向是 A → B,sender 可能是 A 裡面的任意對象,我們可以用它區分同一頁面上不同的跳轉行為。
舉個例子:A 頁面上有 x、y 兩個按鈕,點 x 跳 B,點 y 跳 C。點 x 時觸發跳轉,Storyboard 運行時會調用 A 的這個方法,此時 sender 就是 x 按鈕;點 y 則類似。於是我們就能判斷:如果 sender 是 x,就給 B 傳數據;如果是 y,就給 C 傳數據。
第四步:被委托者遵循協議。在 ViewController.h 中引入 ViewController2.h 並聲明遵循:
#import <UIKit/UIKit.h>
#import "ViewController2.h"

@interface ViewController : UIViewController <ViewController2Delegate>

@property (weak, nonatomic) IBOutlet UILabel *showInformation;

@end
第五步:實現協議方法。在 ViewController.m 中:
- (void)viewController:(ViewController2 *)sceneBVC didInputed:(NSString *)string {
    self.showInformation.text = string;
}
測試與總結
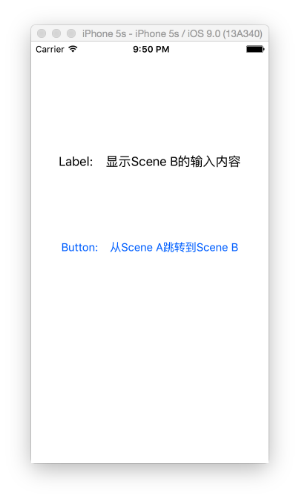
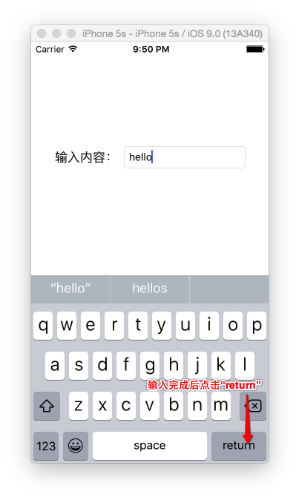
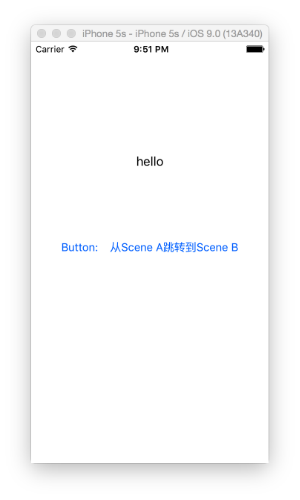
至此,這道看似簡單實則暗藏玄機的題目就完整解決了。
Delegate 實現了不同場景之間的雙向數據交互,屬於事件驅動的範疇——只有當某個事件被觸發時,Delegate 才會被調用。本文用到的還只是 Delegate 的很小一部分,要真正熟練並深入理解,仍需更多實踐。