
用 UITableView 打造格瓦拉風格的飛天投票動效
說到格瓦拉的動效設計,整體水準確實值得稱道。它不追求浮誇炫技,卻在細節處處透著精緻,這一點尤其體現在投票模塊上。這次我就以它為靈感,復刻了投票的交互效果。
其實實現這類效果的方法有很多種,反復權衡之後,我選擇了最樸素也最可靠的一條路——直接使用蘋果原生的 UITableView,用最簡單的方式把效果做出來,也算是再次體會了一把這個老組件的強大之處。
Github 地址:https://github.com/ZFbaby/ZFVoteViewDemo(歡迎 star~謝謝)
先來看看最終效果:
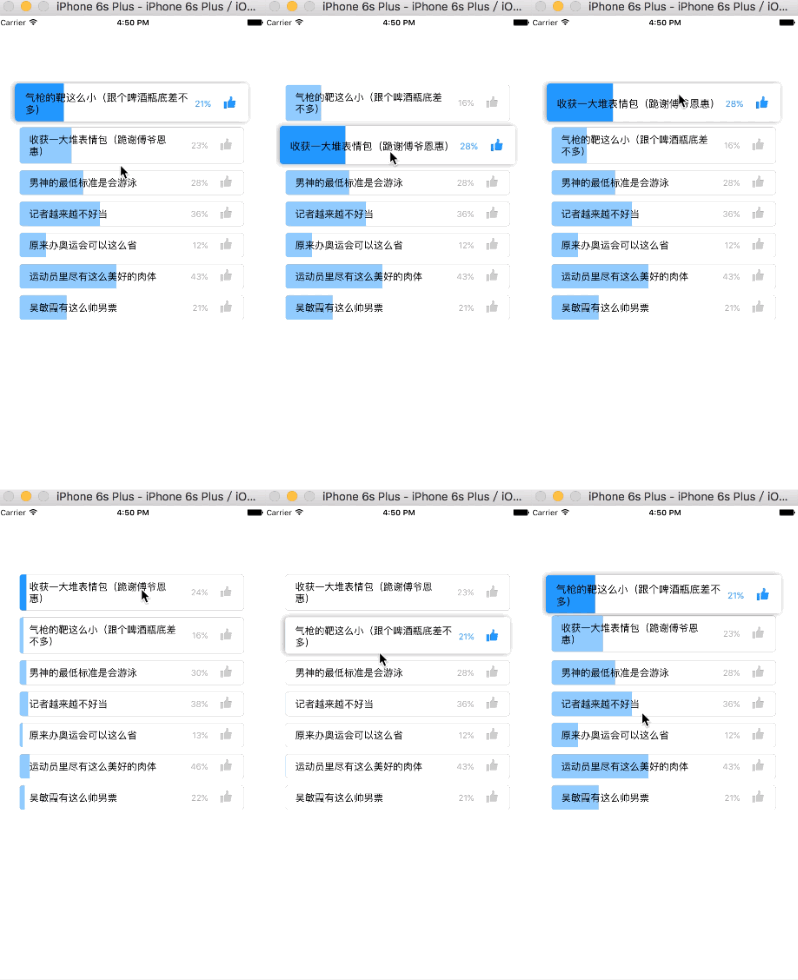
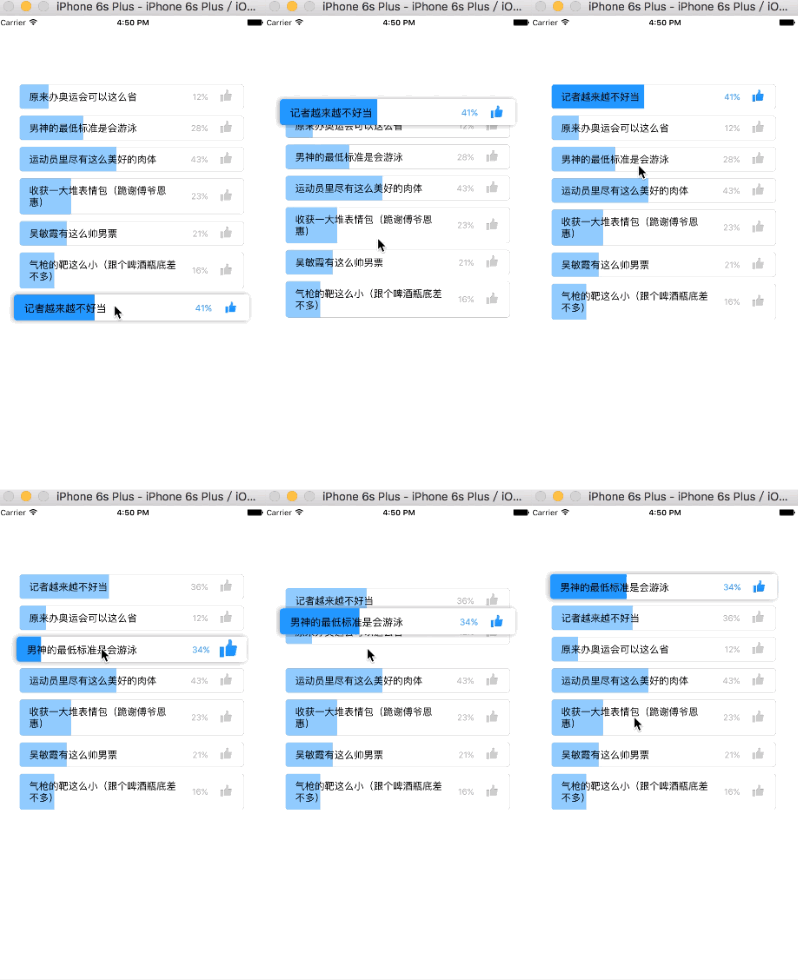
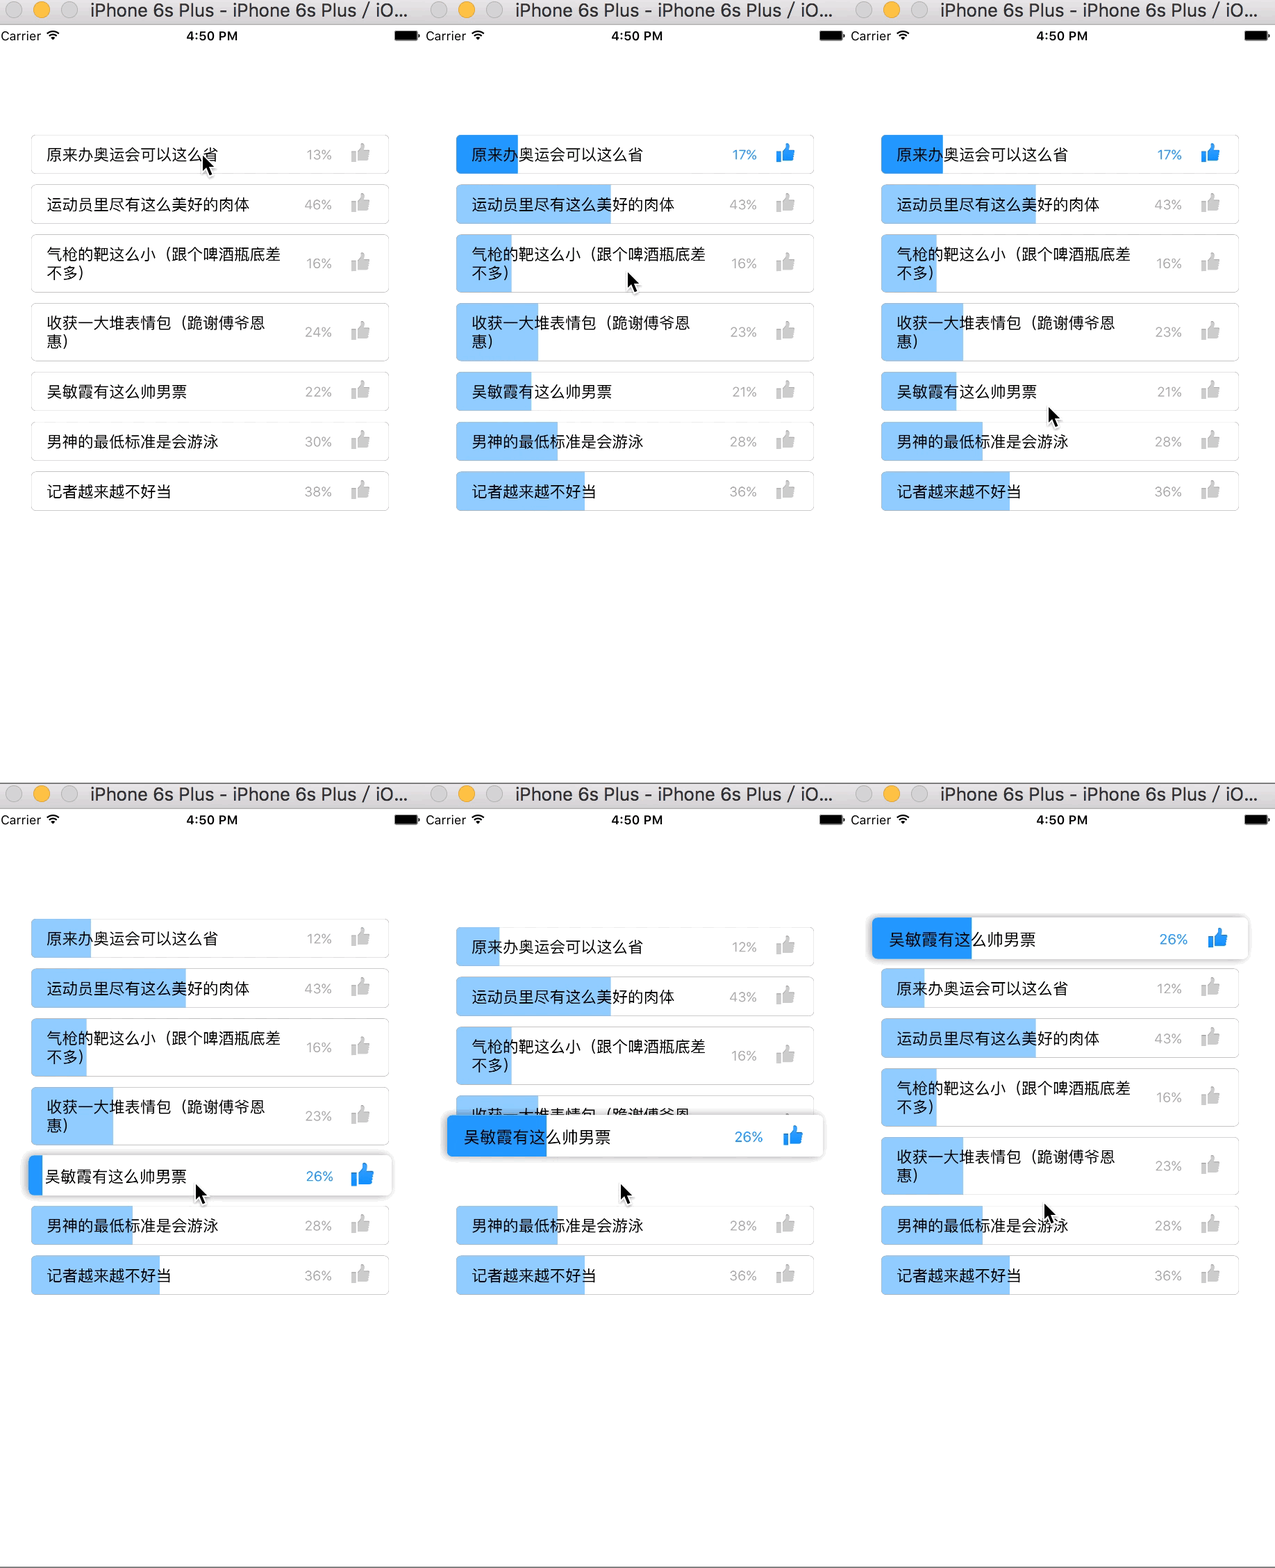
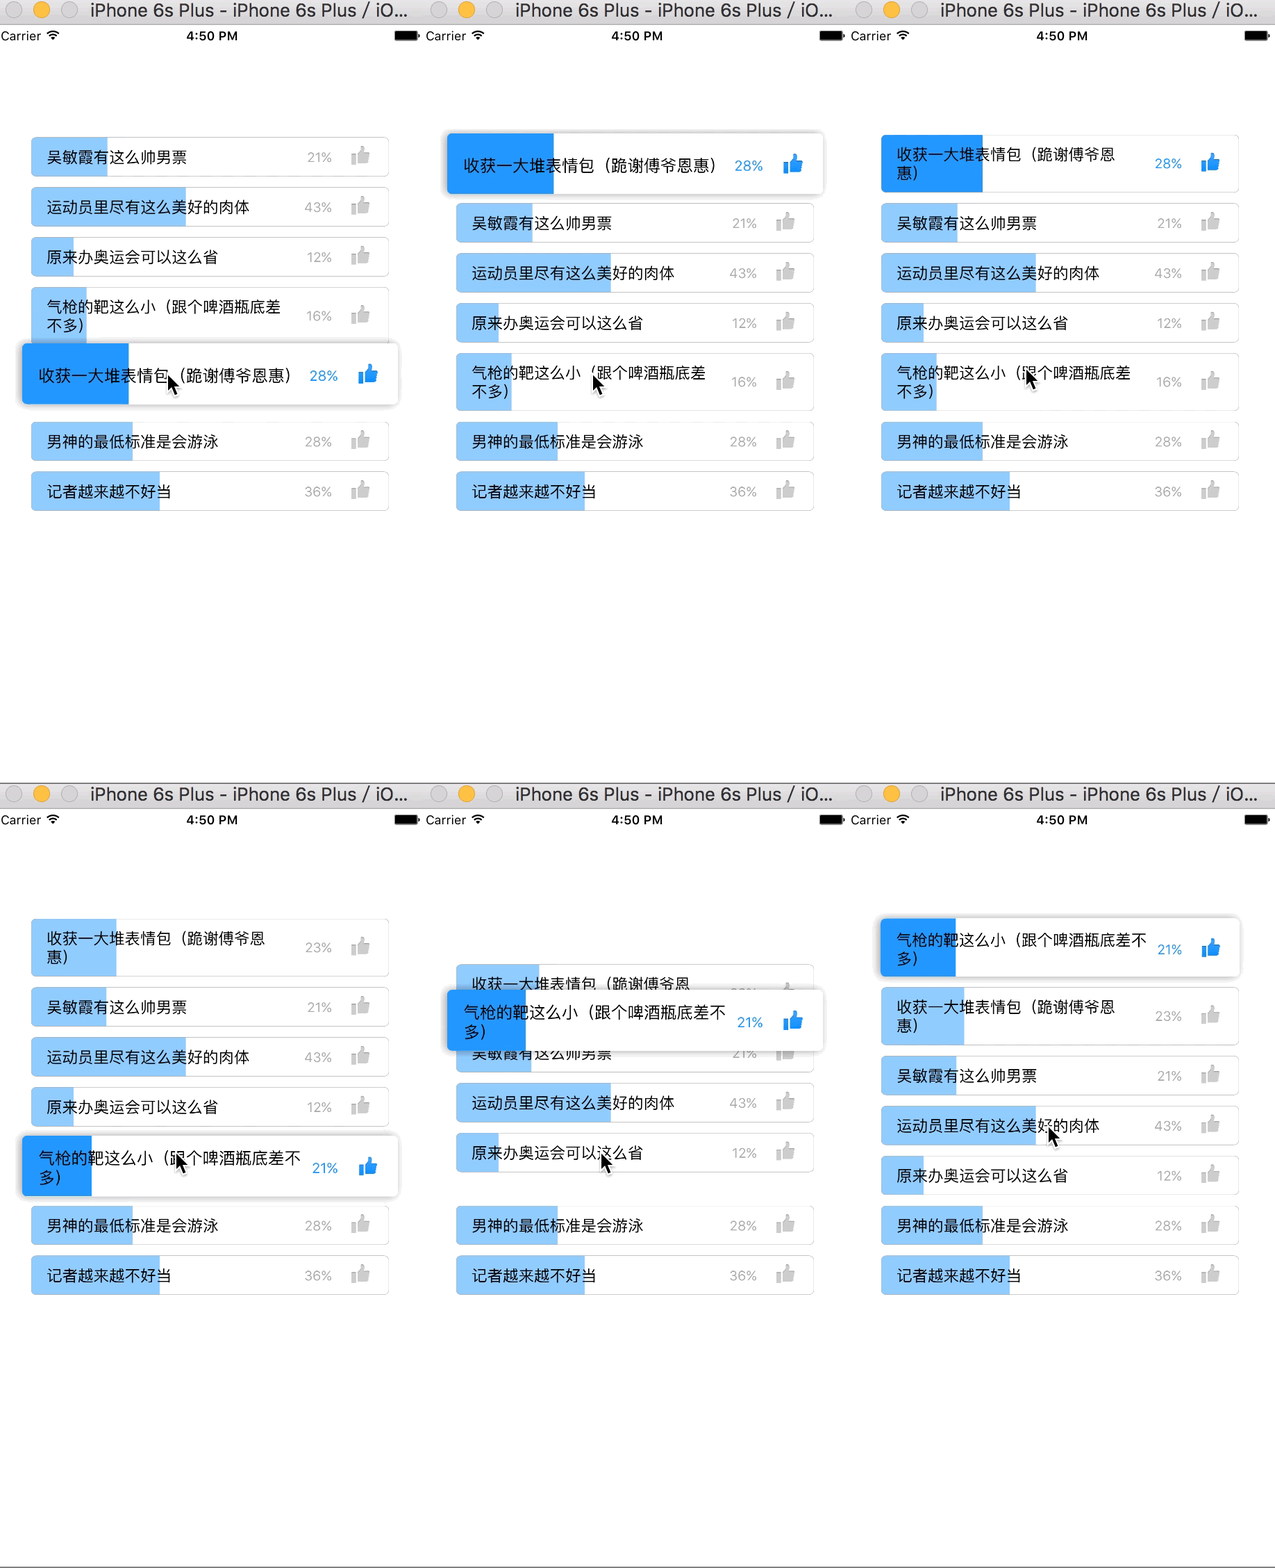
實現步驟:
第一步,數據返回後先根據內容計算出每一行的高度,再累加得到總高度,而這個總高度正好就是 tableview 的高度。
-(void)setTitle:(NSString *)title { //根據數據算出每行cell的實際高度 _title = title; CGFloat title_H = [title boundingRectWithSize:CGSizeMake(ZFVoteTableViewMax_W - percentLable_W - thumbUpView_WH - 85, 100) options:NSStringDrawingUsesFontLeading|NSStringDrawingUsesLineFragmentOrigin attributes:@{NSFontAttributeName:[UIFont systemFontOfSize:15.0]} context:nil].size.height; self.voteCell_H = title_H + 30; }第二步,設置 cell 的內邊距與 x 座標。這裡通過重寫 setFrame: 方法,改動父類計算好的 frame,讓每個 cell 都留出內邊距,從而使相鄰兩條 cell 不會緊貼在一起。
-(void)setFrame:(CGRect)frame{ if (frame.size.width == ZFVoteTableViewMax_W) {//初始化就設置cell的內邊距 frame = UIEdgeInsetsInsetRect(frame, UIEdgeInsetsMake(ZFVoteCellTopBottomInset, ZFVoteCellLeftRightInset, ZFVoteCellTopBottomInset, ZFVoteCellLeftRightInset)); }else{//重復利用的時候改變它的x值 frame.origin.x += ZFVoteCellLeftRightInset; } [super setFrame:frame]; }第三步,創建投票主控件並添加到 cell 上。所謂投票主控件,其實就是所有承載動畫效果的控件集合。既然已經有了 cell,為何還要它?說白了它只是個「打醬油」的角色,充當呈現動畫的載體,看完下一條你就明白了。
-(void)initSubviews{ ZFPercentBar *bar = [[ZFPercentBar alloc]initWithFrame:self.bounds]; self.bar = bar; [self addSubview:bar]; UIImageView *thumbUpView = [[UIImageView alloc]init]; self.thumbUpView = thumbUpView; [self addSubview:thumbUpView]; UILabel *percentLable = [UILabel labelWithFont:[UIFont systemFontOfSize:13.0] textColor:[UIColor lightGrayColor] textAlignment:NSTextAlignmentRight numberOfLines:1]; self.percentLable = percentLable; [self addSubview:percentLable]; UILabel *voteLabel = [UILabel labelWithFont:[UIFont systemFontOfSize:15.0] textColor:[UIColor blackColor] textAlignment:NSTextAlignmentLeft numberOfLines:0]; self.voteLabel = voteLabel; [self addSubview:voteLabel]; }第四步,也是整個效果的核心:每當點擊選中某個 cell 時,就創建一個投票主控件,同時把被選中的 cell 隱藏起來;接著改變主控件的形變並加上陰影,讓它看起來像是浮了起來;然後把主控件的座標移動到 tableview 第一行 cell 的位置,最後借助 tableview 本身提供的交換行功能,就能實現 cell 之間的位置調換效果。
ZFVoteView *voteView = [[ZFVoteView alloc]initWithFrame:selectedCell.frame voteView:voteModel]; voteView.layer.masksToBounds = NO; [self.tableView addSubview:voteView]; self.tableView.userInteractionEnabled = NO; [UIView animateWithDuration:0.4 animations:^{ voteView.transform = CGAffineTransformMakeScale(1.05, 1.05); } completion:^(BOOL finished) { [UIView animateWithDuration:0.7 animations:^{ [self.list removeObject:voteModel]; [self.list insertObject:voteModel atIndex:0]; [self.tableView moveRowAtIndexPath:indexPath toIndexPath:[NSIndexPath indexPathForRow:0 inSection:0]]; voteView.centerY = selectedCell.centerY; voteView.centerX = selectedCell.centerX; }completion:^(BOOL finished) { [UIView animateWithDuration:0.4 animations:^{ voteView.transform = CGAffineTransformIdentity; }completion:^(BOOL finished) { [voteView removeFromSuperview]; self.tableView.userInteractionEnabled = YES; }]; }]; }]; }];講到這裡,核心思路基本就齊了。當然,其中還藏著不少細節,也有許多值得繼續打磨的地方。
以上僅是我按照自己的想法和思路對該模塊的實現方式,最後還要感謝 GraphKit 的作者,demo 中的部分繪圖動畫功能引用了它的方法並做了少量修改。
Github 地址:https://github.com/ZFbaby/ZFVoteViewDemo
覺得不錯的話,歡迎點個 star 支持一下~
- 上一篇文章: 高仿京東收貨地址選擇器實作解析
- 下一篇文章: iOS 富文本常用封裝:NSAttributedString 深入淺出