
iOS 圖表繪製:三種值得借鑑的曲線動畫效果
編輯:iOS 開發基礎
金融類專案裡經常需要繪製各類曲線,而一條線「怎麼出現」,往往決定了整個頁面看起來廉價還是精緻。這裡整理了三種常見且實用的曲線展示動畫,重點在思路,程式碼可直接取用調整。
效果一:曲線自中軸向兩側拉伸展開
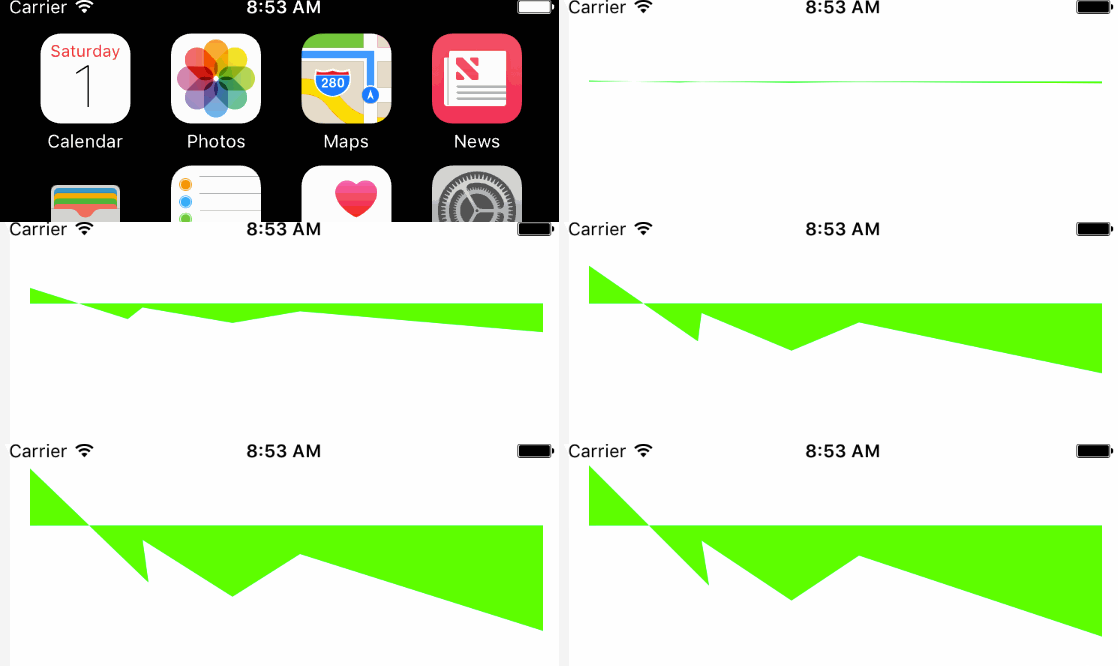
核心思路是準備兩條路徑:一條是形狀完整的目標路徑,另一條是「壓扁」在中軸線上的起始路徑,然後對 path 屬性做動畫,讓它從起始形狀過渡到目標形狀,視覺上就變成了向兩側拉伸。
// 中軸線(動畫起始形狀)
UIBezierPath *Nopath = [UIBezierPath bezierPath];
[Nopath moveToPoint:CGPointMake(0, 40)];

// 封閉圖形(動畫目標形狀)
UIBezierPath *fillpath = [UIBezierPath bezierPath];
[fillpath moveToPoint:CGPointMake(0, 0)];
for (int i = 0; i < 20; i++) {
    // ...依需求追加各段折線座標...
    if (i == 19) {
        // 這幾個點很關鍵:補上收尾與封閉路徑
        [fillpath addLineToPoint:CGPointMake(18*i, 6*i)];
        [fillpath addLineToPoint:CGPointMake(18*i, 40)];
        [Nopath  addLineToPoint:CGPointMake(18*i, 40)];
    }
}
// 這幾個點同樣關鍵:讓兩條路徑的首尾結構保持一致
[Nopath addLineToPoint:CGPointMake(0, 40)];
[fillpath addLineToPoint:CGPointMake(0, 40)];
[fillpath addLineToPoint:CGPointMake(0, 0)];

CAShapeLayer *layer = [CAShapeLayer layer];
layer.frame = CGRectMake(20, 20, 200, 200);
layer.bounds = CGRectMake(0, 0, 200, 200);
layer.path = fillpath.CGPath;
layer.fillColor = [UIColor greenColor].CGColor;
layer.lineJoin = kCALineCapRound;
[self.view.layer addSublayer:layer];

CABasicAnimation *fillAnimation = [CABasicAnimation animationWithKeyPath:@"path"];
fillAnimation.duration = 4.0f;
fillAnimation.timingFunction = [CAMediaTimingFunction functionWithName:kCAMediaTimingFunctionEaseInEaseOut];
fillAnimation.fillMode = kCAFillModeForwards;
fillAnimation.fromValue = (id)Nopath.CGPath;   // 從中軸出發
fillAnimation.toValue   = (id)fillpath.CGPath; // 向兩側拉伸
[layer addAnimation:fillAnimation forKey:@"stretchingKey"];
實作時最容易踩的坑是兩條路徑的「點數與結構不一致」,那樣過渡會出現扭曲。上面的程式碼之所以刻意補了幾個重複座標,就是為了對齊兩邊的段落結構。
效果二:曲線漸進顯現,同時圖層顏色漸變
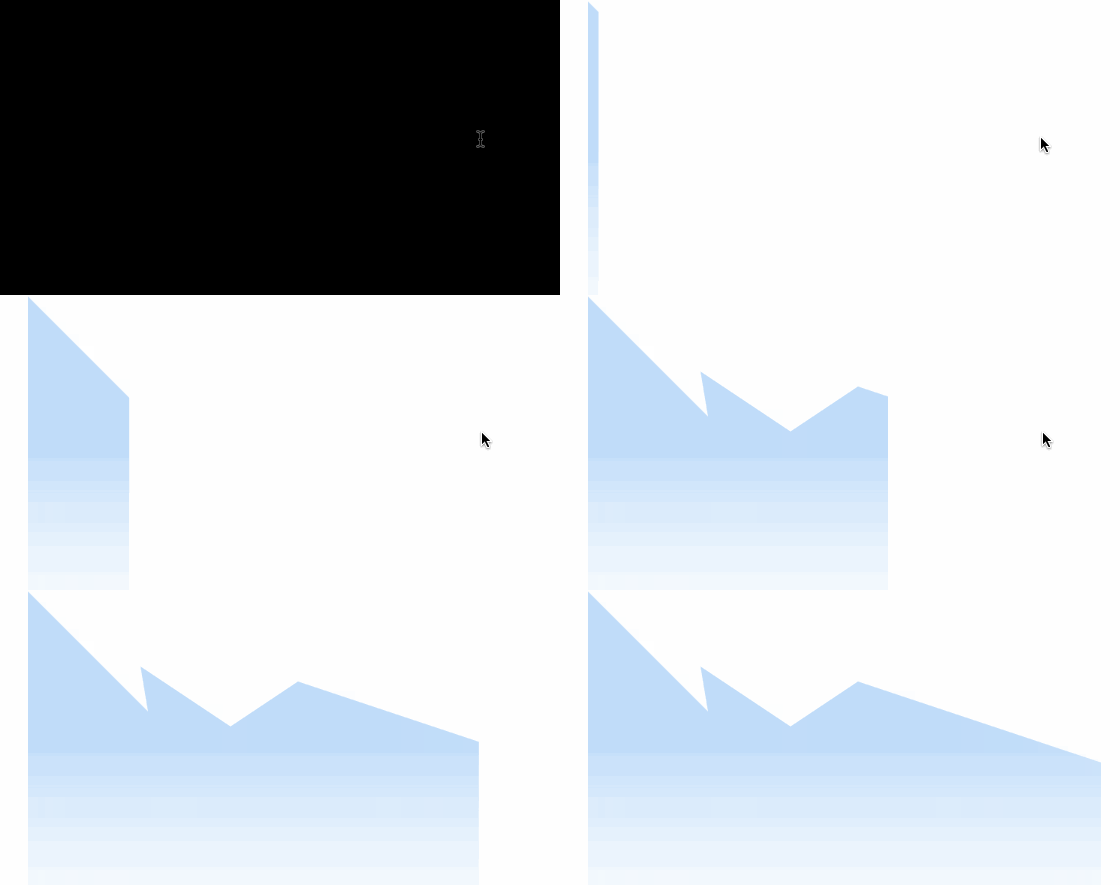
做法是雙層組合:漸變圖層負責顏色,遮罩圖層負責形狀,再對漸變圖層的 bounds 做動畫,讓它自左向右「長」出來。
// 1. 建立遮罩路徑並封閉
UIBezierPath *maskpath = [UIBezierPath bezierPath];
[maskpath moveToPoint:CGPointMake(0, 0)];
for (int i = 0; i < 20; i++) {
    // ...追加折線...
    if (i == 19) [maskpath addLineToPoint:CGPointMake(18*i, 200)];
}
[maskpath addLineToPoint:CGPointMake(0, 200)];
[maskpath addLineToPoint:CGPointMake(0, 0)];

// 2. 遮罩圖層
CAShapeLayer *shadeLayer = [CAShapeLayer layer];
shadeLayer.path = maskpath.CGPath;
shadeLayer.fillColor = [UIColor greenColor].CGColor;

// 3. 漸變圖層
CAGradientLayer *gradientLayer = [CAGradientLayer layer];
gradientLayer.frame = CGRectMake(0, 0, 0, 200);
gradientLayer.startPoint = CGPointMake(0, 0);
gradientLayer.endPoint = CGPointMake(0, 1);
gradientLayer.colors = @[(__bridge id)[UIColor colorWithRed:166/255.0 green:206/255.0 blue:247/255.0 alpha:0.7].CGColor,
                         (__bridge id)[UIColor colorWithRed:237/255.0 green:246/255.0 blue:253/255.0 alpha:0.5].CGColor];
gradientLayer.locations = @[@(0.5f)];

// 4. 組裝
CALayer *baseLayer = [CALayer layer];
baseLayer.frame = CGRectMake(20, 300, 18*19, 200);
[baseLayer addSublayer:gradientLayer];
[baseLayer setMask:shadeLayer];
[self.view.layer addSublayer:baseLayer];

// 5. 動畫:讓漸變層寬度展開
CABasicAnimation *anmi1 = [CABasicAnimation animation];
anmi1.keyPath = @"bounds";
anmi1.duration = 5.0f;
anmi1.toValue = [NSValue valueWithCGRect:CGRectMake(0, 0, 2*18*19, 200)];
anmi1.timingFunction = [CAMediaTimingFunction functionWithName:kCAMediaTimingFunctionEaseInEaseOut];
anmi1.fillMode = kCAFillModeForwards;
anmi1.removedOnCompletion = NO;
[gradientLayer addAnimation:anmi1 forKey:@"bounds"];
效果三:沿路徑逐段描繪
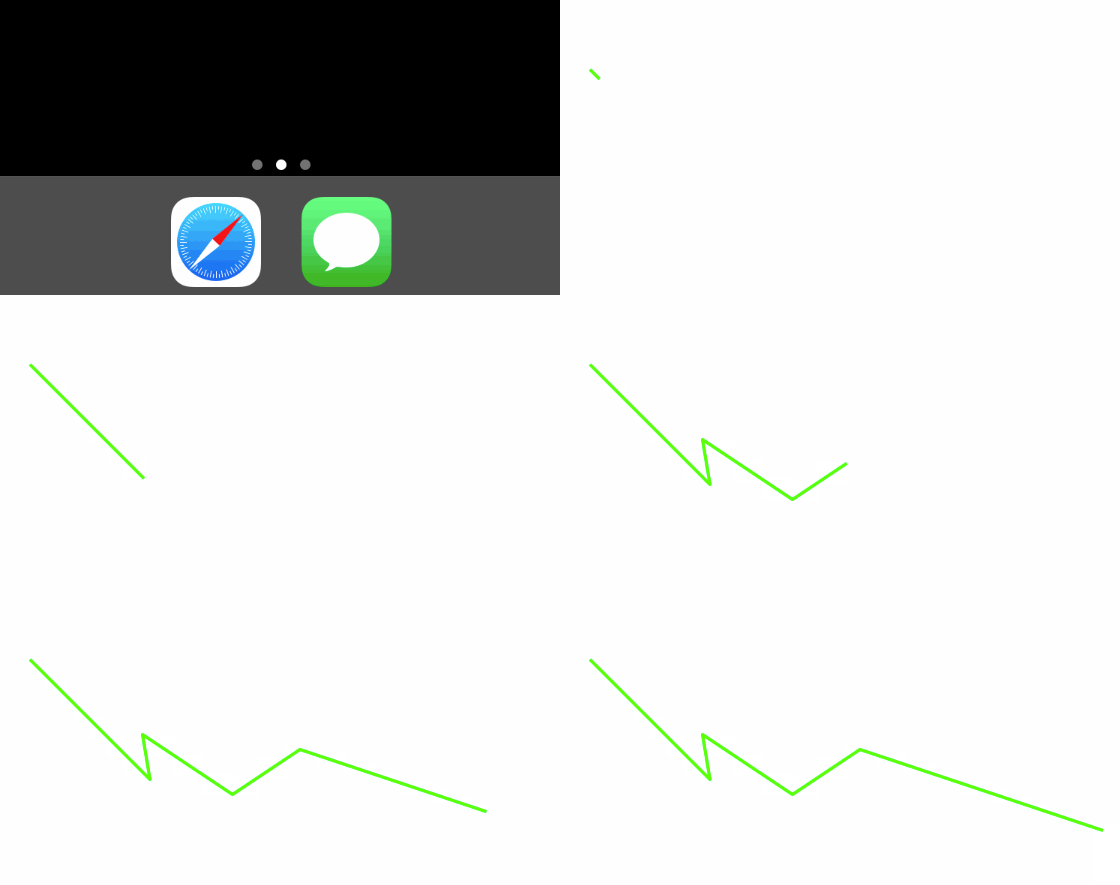
這是三種裡最簡單的一種,只靠 strokeEnd 從 0 動到 1 就能實現「一筆一筆畫出來」的效果。
UIBezierPath *strokepath = [UIBezierPath bezierPath];
[strokepath moveToPoint:CGPointMake(0, 0)];
for (int i = 0; i < 20; i++) {
    // ...追加折線座標...
}

CAShapeLayer *layer2 = [CAShapeLayer layer];
layer2.frame = CGRectMake(20, 500, 18*19, 200);
layer2.path = strokepath.CGPath;
layer2.strokeColor = [UIColor greenColor].CGColor;
layer2.lineWidth = 2.0f;
layer2.fillColor = nil;
layer2.lineJoin = kCALineCapRound;
[self.view.layer addSublayer:layer2];

CABasicAnimation *animation = [CABasicAnimation animationWithKeyPath:@"strokeEnd"];
animation.duration = 5.0f;
animation.timingFunction = [CAMediaTimingFunction functionWithName:kCAMediaTimingFunctionEaseInEaseOut];
animation.fromValue = @(0.0);
animation.toValue = @(1.0);
[layer2 addAnimation:animation forKey:@"path"];
選型建議
如果只想強調趨勢與輪廓,第三種描繪動畫成本最低、最不容易出錯;想突出「數據撐開」的張力,用第一種拉伸;需要兼顧面積感與視覺層次,第二種漸變加遮罩最耐看。三種都建立在 CAShapeLayer 與 CABasicAnimation 之上,替換成自己的座標生成邏輯即可套進真實報表。
本文整理自 JimmyLaw 的簡書。
- 上一篇文章: 深入淺出:iOS 觸摸事件的處理機制
- 下一篇文章: FlyImage:融合三大經典方案的高效 iOS 圖片加載框架