MBProcessHUD
前言
閱讀優秀的開源項目是提高開發人員技術水平的最佳方法,我們能夠從中開拓思維、拓寬視野,學習到很多設計思想以及最佳實踐。如果再動手仿寫、練習這些項目,進一步加深對項目的理解,將這些東西內化為自己的知識和能力。然而真正做起來卻很不容易,開源項目閱讀起來還是比較困難,需要一些技術基礎和耐心。
本系列將對一些著名的iOS開源類庫進行深入閱讀及分析,並練習仿寫這些類庫的基本實現,提升我們iOS開發的編程技能。
MBProcessHUD
MBProcessHUD是一個iOS上的提示框庫,支持加載提示、進度框、文字提示等,使用簡單,功能強大,還能夠自定義顯示內容,廣泛應用於iOS app中。這是它的地址:https://github.com/jdg/MBProgressHUD
簡單看一下界面效果:

實現原理
MBProcessHUD繼承自UIView,實際上是一個覆蓋全屏的半透明指示器組件。它由以下幾個部分構成,分別是:Loading加載動畫,標題欄,背景欄以及其它欄(如詳情欄、按鈕)。我們把MBProcessHUD添加到頁面上,顯示任務進度及提示信息,同時屏蔽用戶交互操作。
MBProcessHUD的Loading加載動畫來自系統類UIActivityIndicatorView,在頁面加載時,開啟轉圈動畫,頁面銷毀時取消轉圈動畫。
MBProcessHUD根據加載內容動態布局,它通過計算需要顯示的內容,動態調整頁面元素的位置大小,放置到屏幕的中央,顯示的內容可以由使用者指定。MBProcessHUD v1.0版之前是通過frame計算各個元素的位置,最新的版本采用了約束布局。
MBProcessHUD使用KVO監聽一些屬性值的變化,如labelText,model。這些屬性被修改時,MBProcessHUD視圖相應更新,傳入新值。
仿寫MBProcessHUD
我們模仿MBProcessHUD寫一個簡單的彈出框組件,以加深對它的理解。在這個demo中,我們不完全重寫MBProcessHUD,只實現基本功能。
首先在demo中創建ZCJHUD,繼承UIView。

在ZCJHUD頭文件中,定義幾種顯示模式
typedef NS_ENUM(NSInteger, ZCJHUDMode) {    /** 轉圈動畫模式,默認值 */
    ZCJHUDModeIndeterminate,    /** 只顯示標題 */
    ZCJHUDModeText
};
定義對外的接口,顯示模式mode,標題內容labelText
@interface ZCJHUD : UIView
@property (nonatomic, assign) ZCJHUDMode mode;@property (nonatomic, strong) NSString *labelText;

- (instancetype)initWithView:(UIView *)view;

- (void)show;

- (void)hide;@end
自身初始化,設置組件默認屬性,更新布局,注冊kvo監視屬性變化。
- (instancetype)initWithFrame:(CGRect)frame {
    self = [super initWithFrame:frame];
    if (self) {
        _mode = ZCJHUDModeIndeterminate;
        _labelText = nil;
        _size = CGSizeZero;
        self.opaque = NO;
        self.backgroundColor = [UIColor clearColor];
        self.alpha = 0;

        [self setupView];
        [self updateIndicators];
        [self registerForKVO];
    }
    return self;
}
初始化轉圈動畫,並添加到hud上,ZCJHUDModeIndeterminate模式才有這個動畫
- (void)updateIndicators {
    BOOL isActivityIndicator = [_indicator isKindOfClass:[UIActivityIndicatorView class]];

    if (_mode == ZCJHUDModeIndeterminate) {
        if (!isActivityIndicator) {
            // Update to indeterminate indicator
            [_indicator removeFromSuperview];
            self.indicator = ([[UIActivityIndicatorView alloc]
                                             initWithActivityIndicatorStyle:UIActivityIndicatorViewStyleWhiteLarge]);
            [(UIActivityIndicatorView *)_indicator startAnimating];
            [self addSubview:_indicator];
        }
    } else if (_mode == ZCJHUDModeText) {
        [_indicator removeFromSuperview];
        self.indicator = nil;
    }
}
兩個主要方法,顯示和隱藏hud
-(void)show {
    self.alpha = 1;
}

-(void)hide {
    self.alpha = 0;
    [self removeFromSuperview];
}
這裡使用了frame動態布局
- (void)layoutSubviews {
    [super layoutSubviews];

    // 覆蓋整個視圖,屏蔽交互操作
    UIView *parent = self.superview;
    if (parent) {
        self.frame = parent.bounds;
    }
    CGRect bounds = self.bounds;


    CGFloat maxWidth = bounds.size.width - 4 * kMargin;
    CGSize totalSize = CGSizeZero;

    CGRect indicatorF = _indicator.bounds;
    indicatorF.size.width = MIN(indicatorF.size.width, maxWidth);
    totalSize.width = MAX(totalSize.width, indicatorF.size.width);
    totalSize.height += indicatorF.size.height;

    CGSize labelSize = MB_TEXTSIZE(_label.text, _label.font);
    labelSize.width = MIN(labelSize.width, maxWidth);
    totalSize.width = MAX(totalSize.width, labelSize.width);
    totalSize.height += labelSize.height;
    if (labelSize.height > 0.f && indicatorF.size.height > 0.f) {
        totalSize.height += kPadding;
    }

    totalSize.width += 2 * kMargin;
    totalSize.height += 2 * kMargin;

    // Position elements
    CGFloat yPos = round(((bounds.size.height - totalSize.height) / 2)) + kMargin;
    CGFloat xPos = 0;
    indicatorF.origin.y = yPos;
    indicatorF.origin.x = round((bounds.size.width - indicatorF.size.width) / 2) + xPos;
    _indicator.frame = indicatorF;
    yPos += indicatorF.size.height;

    if (labelSize.height > 0.f && indicatorF.size.height > 0.f) {
        yPos += kPadding;
    }
    CGRect labelF;
    labelF.origin.y = yPos;
    labelF.origin.x = round((bounds.size.width - labelSize.width) / 2) + xPos;
    labelF.size = labelSize;
    _label.frame = labelF;

    _size = totalSize;
}
繪制背景框
- (void)drawRect:(CGRect)rect {

    CGContextRef context = UIGraphicsGetCurrentContext();
    UIGraphicsPushContext(context);


    CGContextSetGrayFillColor(context, 0.0f, 0.8);

    // Center HUD
    CGRect allRect = self.bounds;
    // Draw rounded HUD backgroud rect
    CGRect boxRect = CGRectMake(round((allRect.size.width - _size.width) / 2),
                                round((allRect.size.height - _size.height) / 2) , _size.width, _size.height);
    float radius = 10;
    CGContextBeginPath(context);
    CGContextMoveToPoint(context, CGRectGetMinX(boxRect) + radius, CGRectGetMinY(boxRect));
    CGContextAddArc(context, CGRectGetMaxX(boxRect) - radius, CGRectGetMinY(boxRect) + radius, radius, 3 * (float)M_PI / 2, 0, 0);
    CGContextAddArc(context, CGRectGetMaxX(boxRect) - radius, CGRectGetMaxY(boxRect) - radius, radius, 0, (float)M_PI / 2, 0);
    CGContextAddArc(context, CGRectGetMinX(boxRect) + radius, CGRectGetMaxY(boxRect) - radius, radius, (float)M_PI / 2, (float)M_PI, 0);
    CGContextAddArc(context, CGRectGetMinX(boxRect) + radius, CGRectGetMinY(boxRect) + radius, radius, (float)M_PI, 3 * (float)M_PI / 2, 0);
    CGContextClosePath(context);
    CGContextFillPath(context);

    UIGraphicsPopContext();
}
kvo監控屬性變化,使用者在修改屬性時,觸發頁面刷新,賦上新值。注意在頁面銷毀時要取消kvo監控,否則程序會崩潰
#pragma mark - KVO
- (void)registerForKVO {
for (NSString *keyPath in [self observableKeypaths]) {
[self addObserver:self forKeyPath:keyPath options:NSKeyValueObservingOptionNew context:NULL];
}
}
- (void)unregisterFromKVO {
for (NSString *keyPath in [self observableKeypaths]) {
[self removeObserver:self forKeyPath:keyPath];
}
}
- (NSArray *)observableKeypaths {
return [NSArray arrayWithObjects:@"mode", @"labelText", nil];
}
- (void)observeValueForKeyPath:(NSString *)keyPath ofObject:(id)object change:(NSDictionary *)change context:(void *)context {
if (![NSThread isMainThread]) {
[self performSelectorOnMainThread:@selector(updateUIForKeypath:) withObject:keyPath waitUntilDone:NO];
} else {
[self updateUIForKeypath:keyPath];
}
}
- (void)updateUIForKeypath:(NSString *)keyPath {
if ([keyPath isEqualToString:@"mode"]) {
[self updateIndicators];
} else if ([keyPath isEqualToString:@"labelText"]) {
_label.text = self.labelText;
}
}
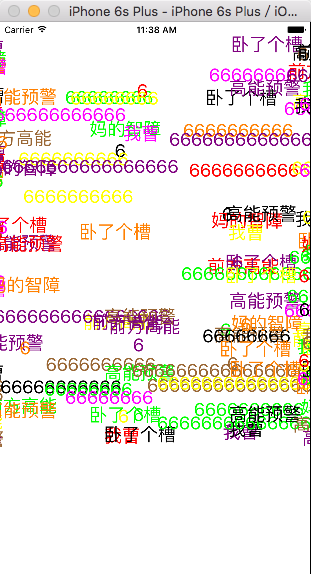
- (void)dealloc {
[self unregisterFromKVO];
}最終效果如下圖:

最後附上 demo的地址:https://github.com/superzcj/ZCJHUD
總結
MBProcessHUD還是比較簡單的,都是一些常用的東西。
希望借助這篇文章,動手仿寫一遍MBProcessHUD,能更深刻地理解和認識MBProcessHUD。
文章轉自 潇潇潇的簡
- 上一頁:iOS 音頻拼接
- 下一頁:CocoaPods的安裝以及遇到的坑

- IOS 開辟自界說條形ProgressView的實例
- IOS 波紋進度(waveProgress)動畫完成
- iOS開辟之UIKeyboardTypeNumberPad數字鍵盤自界說按鍵
- iOS基本常識之@property 和 Ivar 的差別
- iOS App設計形式開辟中對interpreter說明器形式的應用
- 舉例講授Objective-C中@property屬性的用法
- IOS框架Spring經常使用的動畫後果
- iOS中json解析湧現的null,nil,NSNumber的處理方法
- iOS之ProtocolBuffer搭建和示例demo
- swift 中關於open ,public ,fileprivate,private ,internal,修飾的闡明
- Xcode 下刪除Provisioning Profiles文件詳細引見
- AFNetworking報錯_UTTypeCopyPreferredTagWithClass, referenced from: _AFContentTypeForPathEx
- iOS正向傳值之:結構辦法和property的區別
- NSDecimalNumber學習記載
- iOS開發-OC言語 (六)點語法和@property