
iOS 多線程實戰:NSThread、NSOperationQueue 與 GCD 對照比較
編輯:iOS 技巧大全
用第三方套件發非同步請求很輕鬆,但底層的多線程機制還是值得自己跑一遍。本文做了一個小 Demo,把 iOS 三套主要的多線程方案放在同一個畫面上比較——每個按鈕背後對應一種實作方式,按下後同時觀察 UI 是否卡住、log 中的執行緒名稱是什麼。
最終成果如下圖,朋友們可以從圖中推測各項功能:
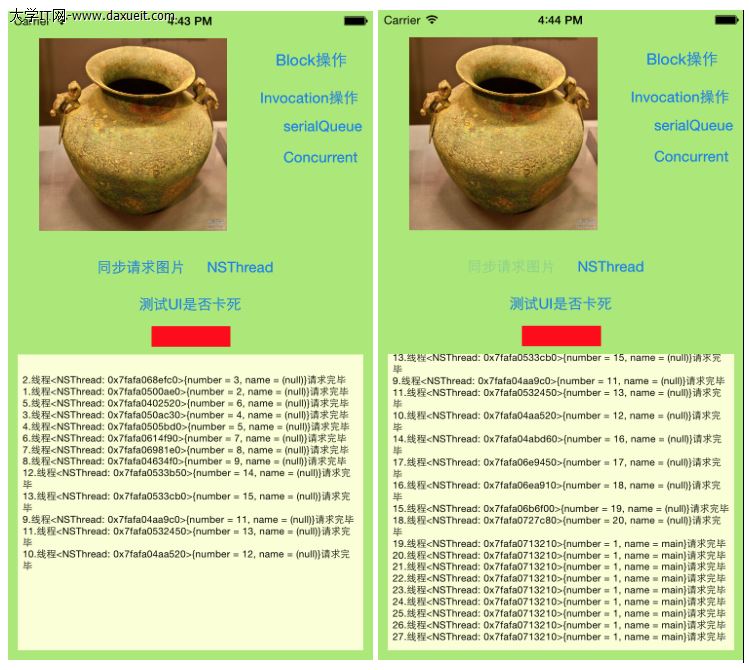
功能說明
- 同步請求:觀察整個 UI 的變化,並點擊測試按鈕看紅色是否會變綠色——這是為了驗證主線程是否被阻塞。
- NSThread:以 NSThread 方式建立執行緒並執行操作。
- Block / Invocation 操作:以 NSBlockOperation 或 NSInvocationOperation 建立操作,放入 NSOperationQueue 執行。
- serial / concurrent:GCD 中的序列佇列與並行佇列。
一、準備階段
1. 測試按鈕:用來觀察 UI 是否可回應,在紅綠之間切換。
- (IBAction)tapTestButton:(id)sender {
    static int i = 1;
    if (i == 1) {
        _testLabel.backgroundColor = [UIColor redColor];
        i = 0;
    } else {
        _testLabel.backgroundColor = [UIColor greenColor];
        i = 1;
    }
}
2. 取得圖片資料:關鍵是最後那段——請求在其他執行緒進行,因此 UI 更新必須拋回主線程。
- (NSData *)getImageData {
    _count++;
    int count = _count;
    NSData *data;

    [NSThread sleepForTimeInterval:0.5];
    data = [NSData dataWithContentsOfURL:[NSURL URLWithString:IMAGEURL]];

    NSString *str = [NSString stringWithFormat:@"%d. 線程 %@ 完畢", count, [NSThread currentThread]];
    // 只有主線程能更新 UI
    [self performSelectorOnMainThread:@selector(updateTextViewWithString:)
                          withObject:str waitUntilDone:YES];
    return data;
}
3. 更新 log 文字:
- (void)updateTextViewWithString:(NSString *)str {
    _logTextView.text = [NSString stringWithFormat:@"%@\n%@", _logTextView.text, str];
    [self tapTestButton:nil];   // 順便改變 Label 顏色,便於觀察
}
4. 更新圖片與包裝方法:
- (void)updateImageWithData:(NSData *)data {
    [_testImage setImage:[UIImage imageWithData:data]];
}

- (void)loadImageWithThreadName:(NSString *)threadName {
    [[NSThread currentThread] setName:threadName];
    NSData *data = [self getImageData];
    [self performSelectorOnMainThread:@selector(updateImageWithData:)
                          withObject:data waitUntilDone:YES];
}
二、六種實作方式
1. 同步請求(會卡住 UI)
- (IBAction)tapButton:(id)sender {
    NSData *data = [self getImageData];   // 主線程被佔用
    [self updateImageWithData:data];
}
2. NSThread:detachNewThreadSelector: 會建立並「自動啟動」執行緒,不必再呼叫 start。
- (IBAction)tapButton2:(id)sender {
    [NSThread detachNewThreadSelector:@selector(loadImageWithThreadName:)
                            toTarget:self withObject:@"NSThread"];
}
3. NSInvocationOperation
- (IBAction)tapInvocationOperation:(id)sender {
    NSInvocationOperation *invocationOperation =
        [[NSInvocationOperation alloc] initWithTarget:self
                                            selector:@selector(loadImageWithThreadName:)
                                              object:@"Invocation"];
    NSOperationQueue *operationQueue = [[NSOperationQueue alloc] init];
    [operationQueue addOperation:invocationOperation];   // 入列後佇列會自動開線程執行
}
4. NSBlockOperation
- (IBAction)tapBlockOperation:(id)sender {
    __weak __block ViewController *copy_self = self;
    NSBlockOperation *blockOperation = [NSBlockOperation blockOperationWithBlock:^{
        [copy_self loadImageWithThreadName:@"Block"];
    }];
    NSOperationQueue *operationQueue = [[NSOperationQueue alloc] init];
    [operationQueue addOperation:blockOperation];

    // 更簡潔的寫法
    [operationQueue addOperationWithBlock:^{
        [copy_self loadImageWithThreadName:@"Block"];
    }];
}
5. GCD 序列佇列
- (IBAction)tapGCDserialQueue:(id)sender {
    dispatch_queue_t serialQueue = dispatch_queue_create("mySerialQueue", DISPATCH_QUEUE_SERIAL);
    __weak __block ViewController *copy_self = self;
    dispatch_async(serialQueue, ^{
        [copy_self loadImageWithThreadName:@"Serial"];
    });
}
6. GCD 並行佇列
- (IBAction)tapGCDConcurrentQueue:(id)sender {
    dispatch_queue_t concurrentQueue = dispatch_queue_create("myConcurrentQueue", DISPATCH_QUEUE_CONCURRENT);
    __weak __block ViewController *copy_self = self;
    dispatch_async(concurrentQueue, ^{
        [copy_self loadImageWithThreadName:@"Concurrent"];
    });
}
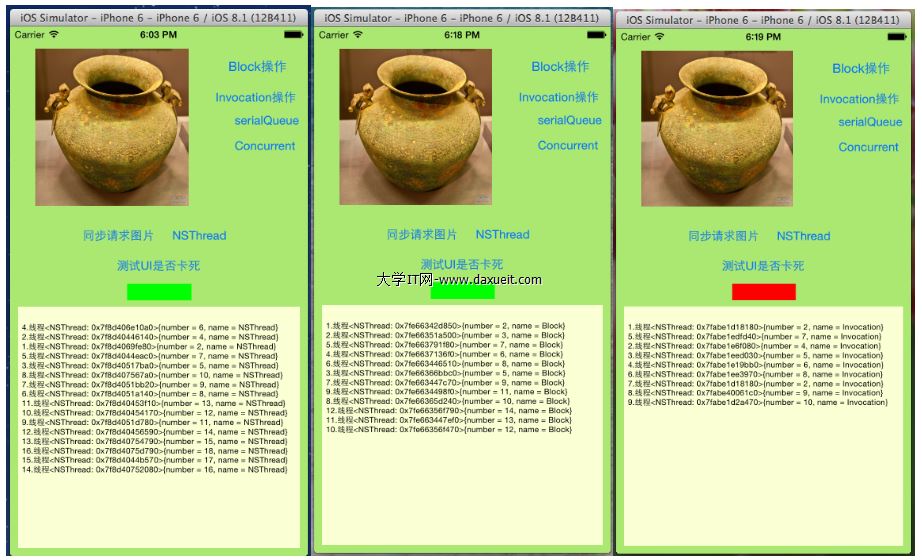
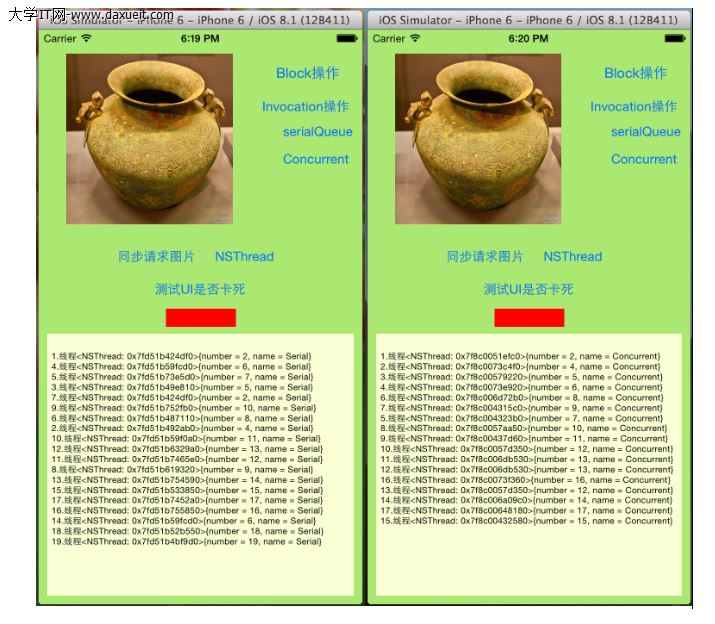
執行結果:
三、資料競爭與同步鎖
作業系統課本裡的「髒資料」,指的就是多個執行緒同時存取同一塊資源造成的問題。原本這兩行:
_count++;
int count = _count;
若在它們之間插入一段延遲,讓另一個執行緒有機會插入:
_count++;
[NSThread sleepForTimeInterval:1];
int count = _count;
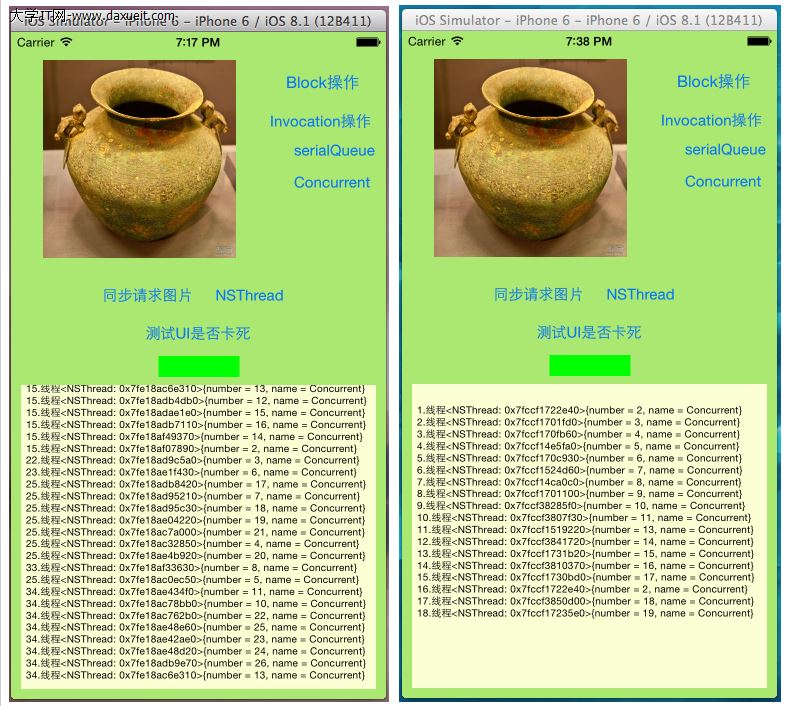
執行後就會看到大量重複的編號——因為 _count 是成員變數,多個執行緒同時讀寫導致取到的值不一致。加上同步鎖即可解決:
寫法一,NSLock:
[_lock lock];
_count++;
[NSThread sleepForTimeInterval:1];
int count = _count;
[_lock unlock];
寫法二,@synchronized:
int count;
@synchronized (self) {
    _count++;
    [NSThread sleepForTimeInterval:1];
    count = _count;
}
加鎖前後的對比:
四、怎麼選
- NSThread:最貼近作業系統的抽象,需要精細控制執行緒(例如指定優先級、名稱)時用,但管理成本高。
- NSOperationQueue:物件導向、可取消、可設定
maxConcurrentOperationCount與相依性(addDependency:),適合有明確任務邊界的場景。 - GCD:最輕量,佇列由系統調度到執行緒池,效能最佳。日常開發的首選。
另外提醒:block 中若強引用 self 會造成循環引用,範例中刻意用 __weak __block 就是為了避免這個問題;實作時請養成習慣。