
iOS 頁面間傳值的五種方式:屬性、Block、代理、單例、通知
頁面之間要傳資料,方向不同適用的方式也不同。
B 頁面要把資料給 A(下一頁 → 上一頁):屬性傳值、Block 傳值、單例、通知
A 頁面要把資料給 B(上一頁 → 下一頁):屬性傳值最直觀
A 要知道 B 做了什麼(回呼):代理傳值
下面用一個具體例子把五種方式各跑一遍:讓 B 頁面的 label 顯示 A 頁面 textField 輸入的字串,以及反過來讓 A 的 label 顯示 B 輸入的字串。
(一)屬性傳值
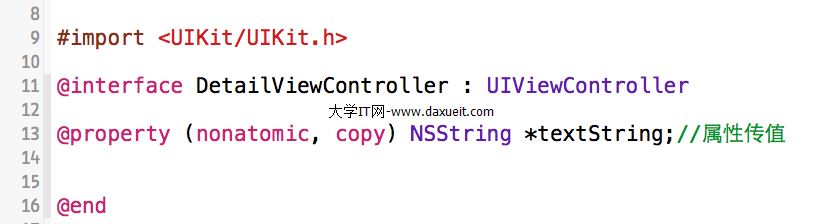
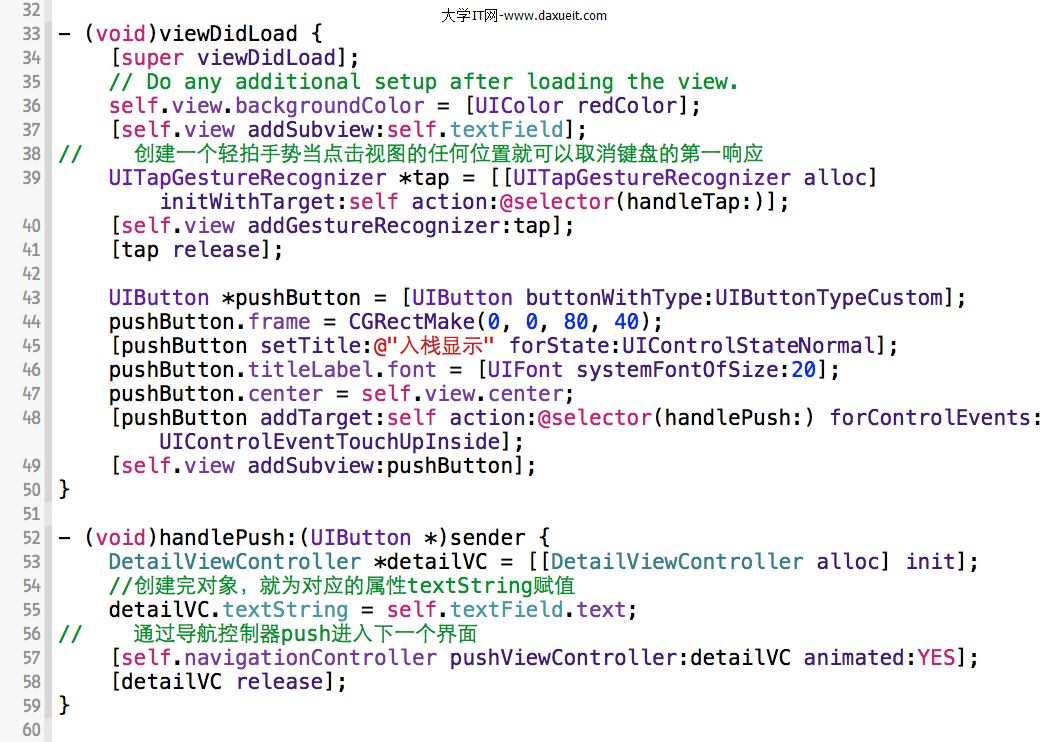
用在 A → B。在 B 宣告一個屬性接收字串,A 在 push 之前指派即可。
先在 DetailViewController 宣告屬性:
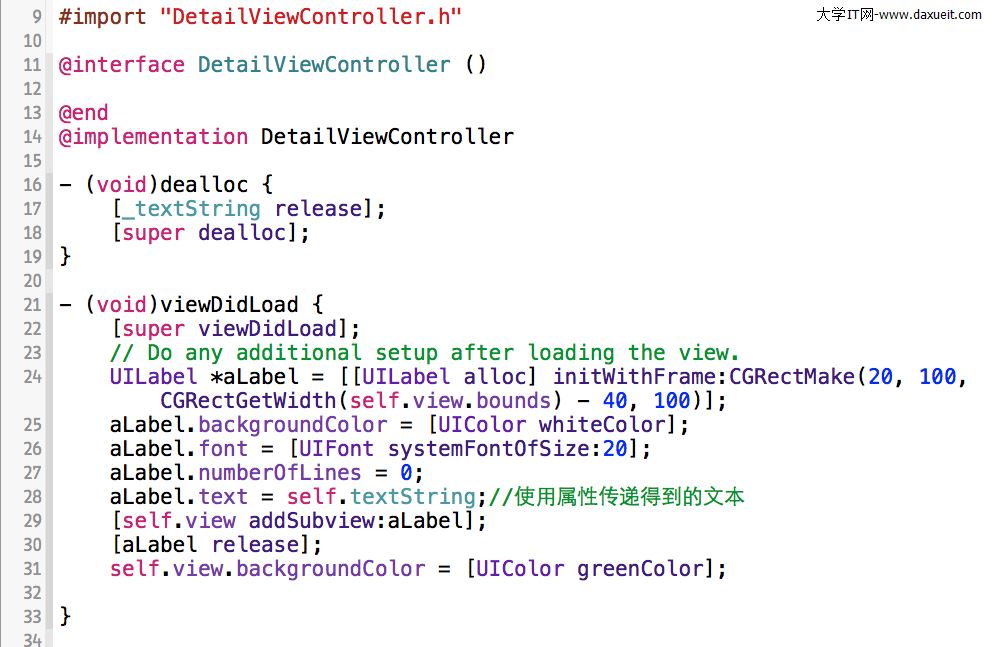
同時建立一個 label 用來顯示:
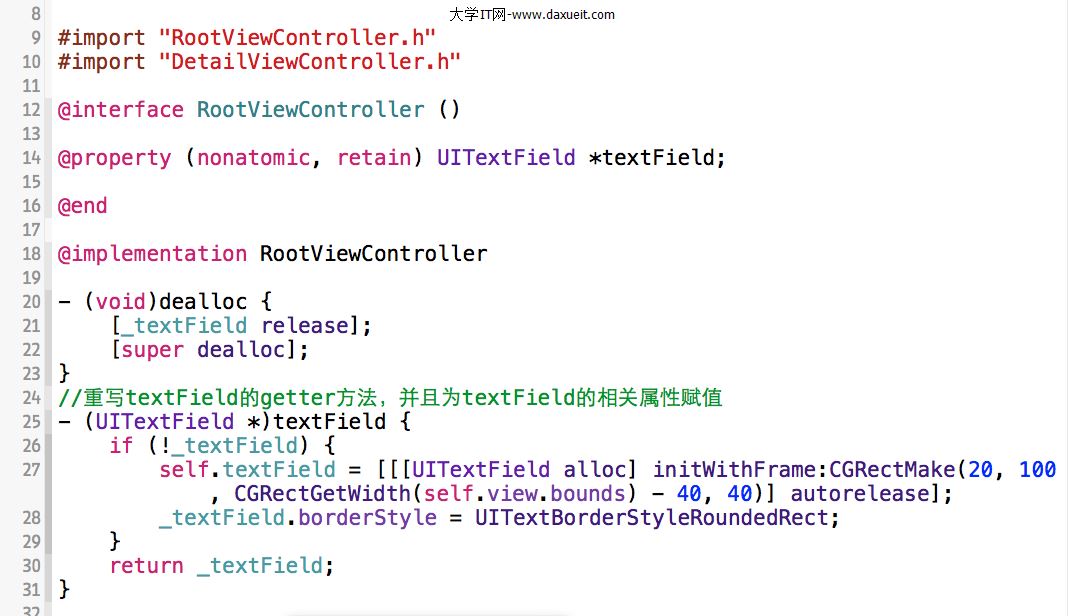
在 RootViewController 引入 B 並宣告 textField:
建立 button,點擊時切換視圖並完成傳值:
(二)Block 傳值
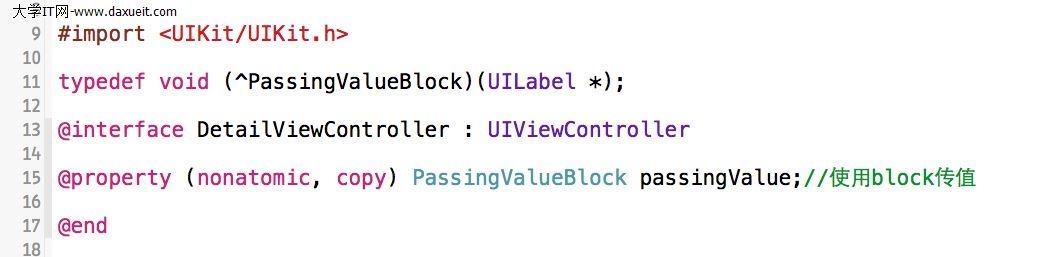
用在 B → A。在 B 的 .h 宣告一個 block 屬性:
在 A 的 .m 中,button 的響應方法裡替這個 block 賦值:
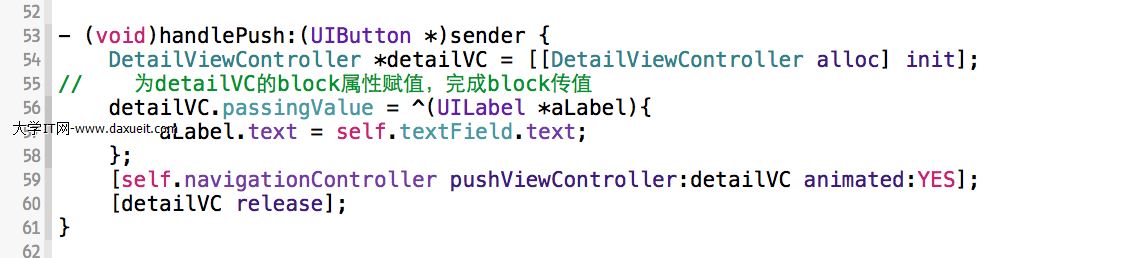
Block 的好處是「回呼邏輯寫在觸發處」,可讀性高;缺點是巢狀太多層時整段邏輯會很難追。
(三)代理傳值
用在 B → A,且 A 需要對 B 的行為做出多種反應時特別合適。B 定義協議並宣告 delegate,A 遵循並實作。
B 的 .h 建立協議:
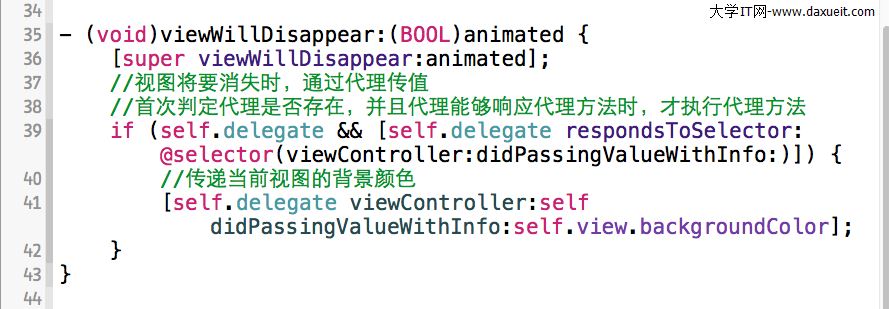
B 的 .m 中,在代理存在時呼叫:
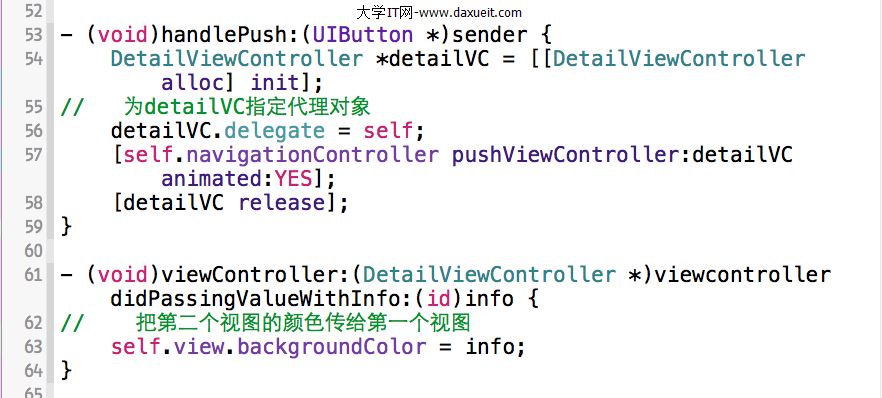
A 的 .m 中設定代理並實作方法:
(四)單例傳值
適合「到處都要用」的全域狀態,例如登入後的使用者資訊。
AppStatus.h

#import <Foundation/Foundation.h>

@interface AppStatus : NSObject {
    NSString *_contextStr;
}

@property (nonatomic, retain) NSString *contextStr;

+ (AppStatus *)shareInstance;

@end
AppStatus.m
#import "AppStatus.h"

@implementation AppStatus

@synthesize contextStr = _contextStr;

static AppStatus *_instance = nil;

+ (AppStatus *)shareInstance {
    if (_instance == nil) {
        _instance = [[super alloc] init];
    }
    return _instance;
}

- (id)init {
    if (self = [super init]) {
    }
    return self;
}

@end
RootViewController.m(寫入)
#import "RootViewController.h"
#import "DetailViewController.h"
#import "AppStatus.h"

@implementation RootViewController

- (void)loadView {
    UIButton *btn = [UIButton buttonWithType:UIButtonTypeRoundedRect];
    btn.frame = CGRectMake(0, 0, 100, 30);
    [btn setTitle:@"Push" forState:UIControlStateNormal];
    [btn addTarget:self action:@selector(pushAction:) forControlEvents:UIControlEventTouchUpInside];
    [self.view addSubview:btn];
}

- (void)pushAction:(id)sender {
    UITextField *tf = (UITextField *)[self.view viewWithTag:1000];

    // 寫入單例。以下兩種寫法等價
    // [[AppStatus shareInstance] setContextStr:tf.text];
    [AppStatus shareInstance].contextStr = tf.text;

    DetailViewController *detailViewController = [[DetailViewController alloc] init];
    [self.navigationController pushViewController:detailViewController animated:YES];
    [detailViewController release];
}

@end
DetailViewController.m(讀取與回寫)
#import "DetailViewController.h"
#import "AppStatus.h"

@implementation DetailViewController

- (void)loadView {
    self.view = [[[UIView alloc] initWithFrame:CGRectMake(0, 0, 320, 480)] autorelease];

    // 從單例讀取
    self.title = [AppStatus shareInstance].contextStr;

    textField = [[UITextField alloc] initWithFrame:CGRectMake(100, 100, 150, 30)];
    textField.borderStyle = UITextBorderStyleLine;
    [self.view addSubview:textField];
    [textField release];

    UIBarButtonItem *doneItem = [[UIBarButtonItem alloc]
        initWithBarButtonSystemItem:UIBarButtonSystemItemDone
                             target:self action:@selector(doneAction:)];
    self.navigationItem.rightBarButtonItem = doneItem;
    [doneItem release];
}

// viewWillAppear 會被呼叫多次,等於幫 view 做刷新
- (void)viewWillAppear:(BOOL)animated {
    [super viewWillAppear:animated];
    UITextField *tf = (UITextField *)[self.view viewWithTag:1000];
    tf.text = [AppStatus shareInstance].contextStr;
}

- (void)doneAction:(id)sender {
    // 回寫單例後返回
    [AppStatus shareInstance].contextStr = textField.text;
    [self.navigationController popToRootViewControllerAnimated:YES];
}

@end
單例的注意事項:它本質上是全域變數,用過頭會讓資料流向難以追蹤,測試時也難以隔離。建議只放真正的全域狀態(登入 token、主題設定),不要拿來當頁面傳值的萬用解。
(五)通知傳值
誰關心值的變化,誰就去註冊通知。前提是接收者必須存在——若接收者已釋放,通知就不會被處理。
A 頁面 RootViewController.h
#import <UIKit/UIKit.h>
#import "DetailViewController.h"

@interface RootViewController : UIViewController
{
    UITextField *tf;
}
@end
A 頁面 RootViewController.m
#import "RootViewController.h"
#import "DetailViewController.h"

@implementation RootViewController

- (void)dealloc {
    // 記得移除,否則接收者釋放後送通知會崩潰
    [[NSNotificationCenter defaultCenter] removeObserver:self
                                                   name:@"CHANGE_TITLE"
                                                 object:nil];
    [super dealloc];
}

- (id)init {
    if (self = [super init]) {
        [[NSNotificationCenter defaultCenter] addObserver:self
                                                selector:@selector(change:)
                                                    name:@"CHANGE_TITLE"
                                                  object:nil];
    }
    return self;
}

- (void)change:(NSNotification *)aNoti {
    NSDictionary *dic = [aNoti userInfo];
    NSString *str = [dic valueForKey:@"Info"];

    UITextField *tf = (UITextField *)[self.view viewWithTag:1000];
    tf.text = str;
}

@end
B 頁面 DetailViewController.m(發送)
#import "DetailViewController.h"

@implementation DetailViewController

- (void)loadView {
    UIBarButtonItem *doneItem = [[UIBarButtonItem alloc]
        initWithBarButtonSystemItem:UIBarButtonSystemItemDone
                             target:self action:@selector(doneAction:)];
    self.navigationItem.rightBarButtonItem = doneItem;
    [doneItem release];
}

- (void)doneAction:(id)sender {
    NSDictionary *dic = [NSDictionary dictionaryWithObject:textField.text forKey:@"Info"];

    [[NSNotificationCenter defaultCenter] postNotificationName:@"CHANGE_TITLE"
                                                       object:nil
                                                     userInfo:dic];

    [self.navigationController popViewControllerAnimated:YES];
}

@end
怎麼選
A → B(一對一、資料明確):屬性傳值。最簡單,首選。
B → A(單一回呼):Block。邏輯寫在觸發處,好讀。
B → A(多種回呼、責任分工明確):代理。可擴充性最好。
跨越多層、到處都要用的狀態:單例。但別濫用。
一對多廣播、發送方不关心誰在聽:通知。耦合最低,也最難追。
通知因為沒有編譯期的依賴檢查,是這幾種方式裡最容易出問題的:接收者忘了 removeObserver 會 crash,通知名稱打錯也不會報錯。實務上建議把通知名稱定義成常數集中管理。
- 上一篇文章: UITableView 捲動卡頓的四個真正原因與解法
- 下一篇文章: Swift 開源了,對開發者有什麼實際好處