
自定義 Segue:讓 iOS 場景切換有個性化過場動畫
編輯:iOS 技巧大全
StoryBoard 加上 segue 讓頁面跳轉變得直觀,但系統預置的過場樣式有限。想要自定義,只需要新建一個類繼承自 UISEgue 並重寫 perform 方法,再在 storyboard 中把 segue 的 style 設為 custom 並指定這個類。
步驟一:搭建界面
新建 Single View Application 模板項目,命名為 MyCustomSegue。用 storyboard 拖出第二個 UIViewController,分別設置兩個控制器視圖的背景色以便區分。
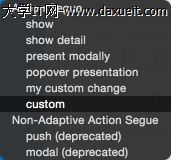
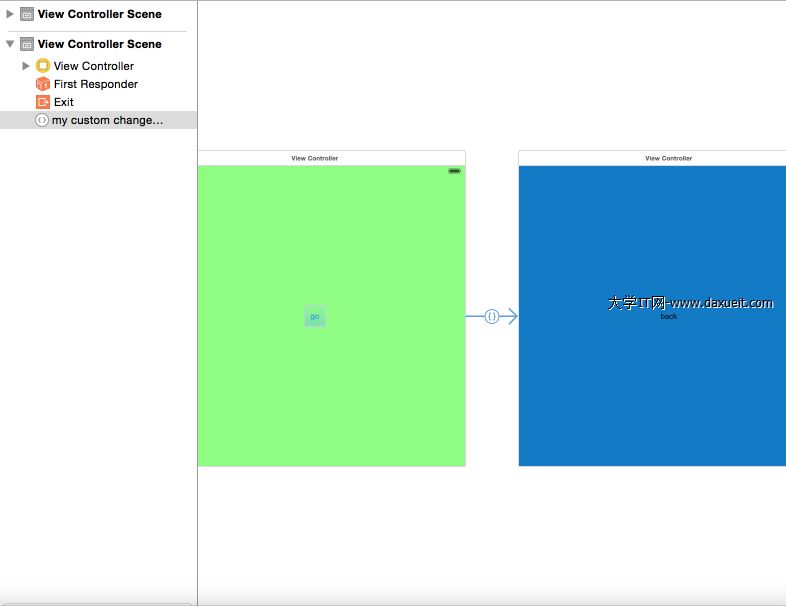
步驟二:設置 segue
把跳轉頁面的 segue 樣式設為 custom,並在右側屬性面板中指定自定義類名:
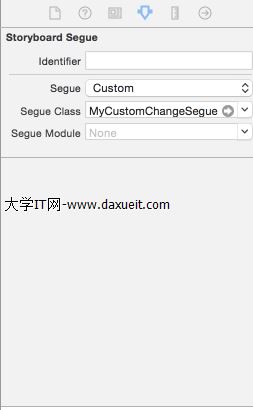
步驟三:重寫 perform
新建 MyCustomChangeSegue 文件並重寫 perform 方法。示例實現了一種「源視圖縮小到消失、目標視圖從小放大出現」的過場:

@implementation MyCustomChangeSegue

- (void)perform {
    UIViewController *sourceViewController = self.sourceViewController;
    UIViewController *destViewController = self.destinationViewController;

    // 第一步:源視圖縮小到零並淡出
    [UIView animateWithDuration:1 animations:^{
        CGPoint centerPoint = sourceViewController.view.center;
        sourceViewController.view.frame = CGRectMake(centerPoint.x, centerPoint.y, 0, 0);
        sourceViewController.view.alpha = 0;
    } completion:^(BOOL success){
        UIView *destView = destViewController.view;
        sourceViewController.view.hidden = YES;
        [[sourceViewController.view superview] addSubview:destView];

        // 第二步:目標視圖從零放大到原始尺寸並淡入
        CGRect destRect = destView.frame;
        CGPoint centerPoint = destView.center;
        destView.frame = CGRectMake(centerPoint.x, centerPoint.y, 0, 0);
        destView.alpha = 0;

        [UIView animateWithDuration:0.3 animations:^{
            destView.frame = destRect;
            destView.alpha = 1;
        } completion:^(BOOL success){
            destView.alpha = 1;
            destView.frame = destRect;
            sourceViewController.view.hidden = NO;
            [sourceViewController presentViewController:destViewController animated:NO completion:nil];
        }];
    }];
}

@end
運行後點擊 go 按鈕,就能看到效果了。
要點提醒
自定義 segue 有幾個細節容易忽略:動畫的最後一定要調用 presentViewController:animated:completion:,否則跳轉邏輯不閉合;操作 sourceViewController.view 的 frame 前先保存原始值,動畫結束後必須還原,不然返回時界面會錯亂;如果目標是 push 而非 present,最後一步應改為讓 sourceViewController.navigationController 執行 push。返回動畫可以通過定製 unwind segue 實現。