
Swift 為 UITextView 加入自訂連結與點擊響應教學
編輯:iOS 7 技巧
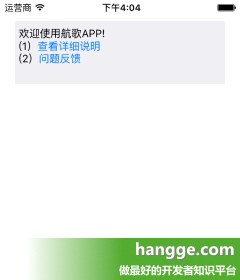
UITextView 自帶 URL 偵測功能,開啟後會把內容中的網址高亮顯示,點擊則由 Safari 開啟。但有時候我們想要的不只是開啟瀏覽器——例如點擊「查看詳細說明」跳到 App 內的說明頁,點擊「問題反饋」則進入反饋流程。本文示範如何做到這件事。

一、要達成的效果
讓同一段文字裡的不同片段各自觸發不同行為,而不僅是開啟網頁。
二、實作原理
- 為特殊行為自訂 URL scheme,例如
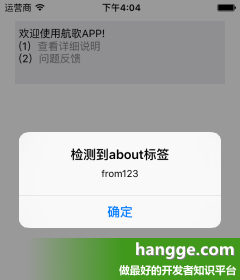
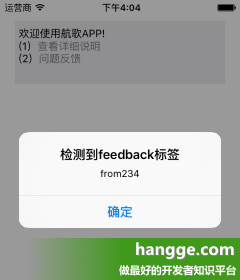
about:代表詳細說明、feedback:代表問題反饋。 - 用 NSMutableAttributedString 把「帶連結屬性」與「不帶連結屬性」的文字片段拼接起來,再賦值給 textView。
- 在
UITextViewDelegate的shouldInteractWithURL方法中攔截點擊事件,依URL.scheme分派不同操作。
三、實作步驟
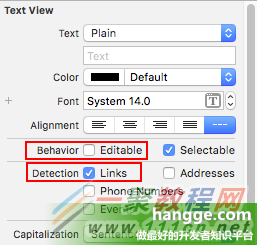
用來顯示的 textView 需勾選 Detection Links(鏈結偵測),並取消 Editable(設為不可編輯)。
1. 擴充 UITextView
extension UITextView {
    // 添加連結文字(withURLString 為空時代表普通文字)
    func appendLinkString(string: String, withURLString: String = "") {
        // 原有的文字內容
        let attrString = NSMutableAttributedString()
        attrString.appendAttributedString(self.attributedText)

        // 新增的文字內容(沿用預設字型樣式)
        let attrs = [NSFontAttributeName: self.font!]
        let appendString = NSMutableAttributedString(string: string, attributes: attrs)

        // 判斷是否為連結文字
        if withURLString != "" {
            let range = NSMakeRange(0, appendString.length)
            appendString.beginEditing()
            appendString.addAttribute(NSLinkAttributeName, value: withURLString, range: range)
            appendString.endEditing()
        }

        // 合併並重新賦值
        attrString.appendAttributedString(appendString)
        self.attributedText = attrString
    }
}
2. 使用範例
import UIKit

class ViewController: UIViewController, UITextViewDelegate {

    @IBOutlet weak var textView: UITextView!

    override func viewDidLoad() {
        super.viewDidLoad()

        textView.delegate = self
        textView.text = ""

        textView.appendLinkString("歡迎使用航歌 APP!\n")
        textView.appendLinkString("(1)")
        textView.appendLinkString("查看詳細說明", withURLString: "about:from123")
        textView.appendLinkString("\n(2)")
        textView.appendLinkString("問題反饋", withURLString: "feedback:from234")
    }

    // 連結點擊響應
    func textView(textView: UITextView, shouldInteractWithURL URL: NSURL,
                  inRange characterRange: NSRange) -> Bool {
        switch URL.scheme {
        case "about":
            showAlert("about", payload: URL.resourceSpecifier.stringByRemovingPercentEncoding!)
        case "feedback":
            showAlert("feedback", payload: URL.resourceSpecifier.stringByRemovingPercentEncoding!)
        default:
            print("這個是普通的 url")
        }
        return true
    }

    // 顯示訊息
    func showAlert(tagType: String, payload: String) {
        let alertController = UIAlertController(title: "檢測到\(tagType)標簽",
                                                message: payload, preferredStyle: .Alert)
        let cancelAction = UIAlertAction(title: "確定", style: .Cancel, handler: nil)
        alertController.addAction(cancelAction)
        self.presentViewController(alertController, animated: true, completion: nil)
    }
}
小結
這套做法的價值在於「用同一個 textView 承載多種互動」。除了跳轉頁面,你還可以在 scheme 後面帶上參數(如範例中的 from123),在回呼時解析並據以決定後續行為,靈活度相當高。
原文出自:www.hangge.com
- 上一篇文章: Swift 實作導航控制器全螢幕側滑返回手勢
- 下一篇文章: 解決 UITableViewCell 復用導致多選狀態遺失的問題