
iOS沙盒機制完全解析:目錄結構與文件讀寫操作大全
iOS沙盒機制
iOS應用程序只能讀寫為自己創建的文件系統,無法越界訪問其他區域,這個受限的空間就被稱為「沙盒」。因此,所有非代碼文件——圖像、圖標、聲音、映像、屬性列表、文本文件等——都必須保存在其中。它有兩個基本特點:
- 每個應用程序都擁有獨立的存儲空間;
- 應用無法翻越自己的「圍牆」去訪問其他存儲空間的內容。
打開模擬器沙盒目錄
方法一:設置顯示隱藏文件後在Finder中直接打開。顯示Mac隱藏文件的命令是:
defaults write com.apple.finder AppleShowAllFiles -bool true
隱藏Mac隱藏文件的命令則是:
defaults write com.apple.finder AppleShowAllFiles -bool false
執行後即可看到「資源庫」文件夾,進入後找到/Application Support/iPhone Simulator/,這裡就是模擬器中各個程序的沙盒目錄。
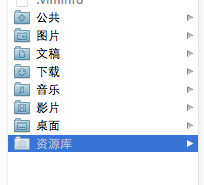
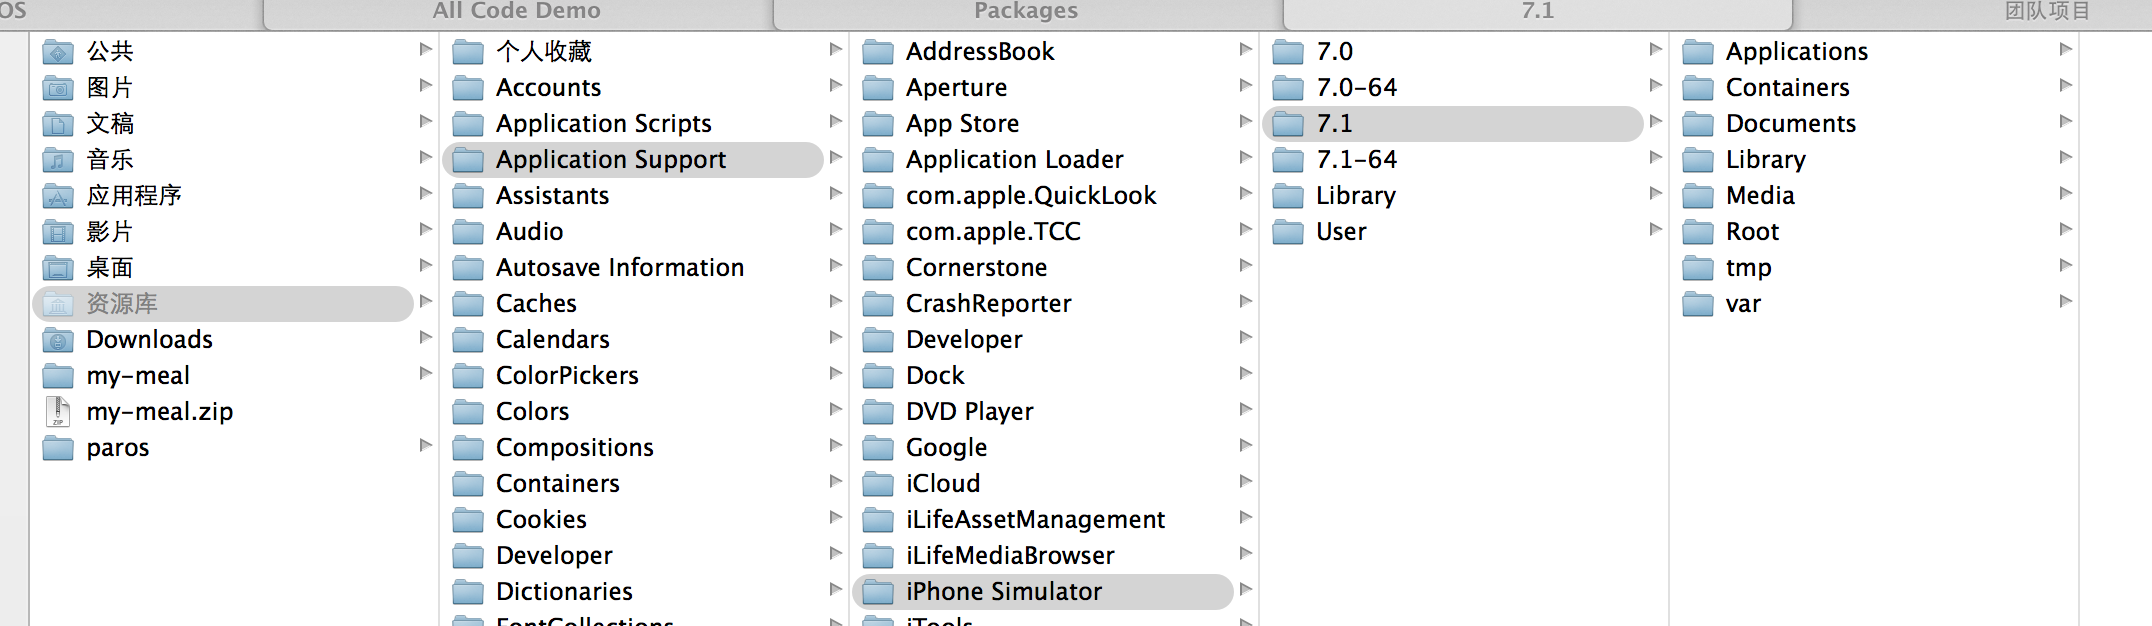
方法二:更方便,在Finder菜單中點「前往」,然後按住「option」鍵,就會出現「資源庫」選項,其餘步驟同上。
目錄結構
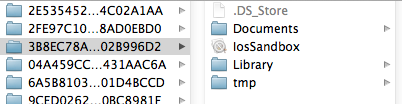
默認情況下,每個沙盒包含三個文件夾:Documents、Library和tmp。由於沙盒機制,應用只能在這幾個目錄下讀寫文件:
Documents:蘋果建議將程序中建立或浏覽到的文件數據保存在此,iTunes備份和恢復時會包含該目錄;
Library:存儲程序的默認設置或其他狀態信息;
Library/Caches:存放緩存文件,iTunes不會備份此目錄,其中的文件也不會在應用退出時刪除;
tmp:提供一個即時創建臨時文件的地方。
補充幾點規律:iTunes與iPhone同步時會備份所有Documents和Library文件;iPhone重啟時則會丟棄所有tmp文件。
這是上述三個目錄的示意:
常用代碼示例
1、獲取程序的Home目錄:
NSString *homeDirectory = NSHomeDirectory();
NSLog(@"path:%@", homeDirectory);
2、獲取Documents目錄:
NSArray *paths = NSSearchPathForDirectoriesInDomains(NSDocumentDirectory, NSUserDomainMask, YES);
NSString *path = [paths objectAtIndex:0];
3、獲取Cache目錄:
NSArray *paths = NSSearchPathForDirectoriesInDomains(NSCachesDirectory, NSUserDomainMask, YES);
NSString *path = [paths objectAtIndex:0];
4、獲取Library目錄:
NSArray *paths = NSSearchPathForDirectoriesInDomains(NSLibraryDirectory, NSUserDomainMask, YES);
NSString *path = [paths objectAtIndex:0];
5、獲取Tmp目錄:
NSString *tmpDir = NSTemporaryDirectory();
NSLog(@"%@", tmpDir);
6、寫入文件:
NSArray *paths = NSSearchPathForDirectoriesInDomains(NSDocumentDirectory, NSUserDomainMask, YES);
NSString *docDir = [paths objectAtIndex:0];
NSArray *array = [[NSArray alloc] initWithObjects:@"內容",@"content",nil];
NSString *filePath = [docDir stringByAppendingPathComponent:@"testFile.txt"];
[array writeToFile:filePath atomically:YES];
7、讀取文件:
NSString *filePath = [docDir stringByAppendingPathComponent:@"testFile.txt"];
NSArray *array = [[NSArray alloc]initWithContentsOfFile:filePath];
NSLog(@"%@", array);
8、判斷文件是否存在(fileExistsAtPath傳入全路徑):
NSFileManager * fileManager = [NSFileManager defaultManager];
NSString * documents = [NSSearchPathForDirectoriesInDomains(NSDocumentDirectory, NSUserDomainMask, YES)lastObject];
NSString * filePath = [documents stringByAppendingPathComponent:@"test"];
if ([fileManager fileExistsAtPath:filePath]) {
NSLog(@"文件存在");
}
9、在Documents中創建目錄:
NSFileManager *fileManager = [NSFileManager defaultManager];
NSString *testDirectory = [documentsDirectory stringByAppendingPathComponent:@"test"];
[fileManager createDirectoryAtPath:testDirectory withIntermediateDirectories:YES attributes:nil error:nil];
10、在目錄下創建文件:
NSString *testPath = [testDirectory stringByAppendingPathComponent:@"test00.txt"];
NSString *string = @"寫入內容,write String";
[fileManager createFileAtPath:testPath contents:[string dataUsingEncoding:NSUTF8StringEncoding] attributes:nil];
11、獲取目錄下所有文件名(兩種方法:subpathsOfDirectoryAtPath與subpathsAtPath):
NSArray *file = [fileManage subpathsOfDirectoryAtPath: myDirectory error:nil];
NSArray *files = [fileManage subpathsAtPath: myDirectory ];
12、fileManager操作當前目錄:
NSFileManager *fileManager = [NSFileManager defaultManager];
//更改到待操作的目錄
[fileManager changeCurrentDirectoryPath:[documentsDirectory stringByExpandingTildeInPath]];
NSString * fileName = @"testFileNSFileManager.txt";
NSArray *array = [[NSArray alloc] initWithObjects:@"hello world",@"hello world1", @"hello world2",nil];
[fileManager createFileAtPath:fileName contents:array attributes:nil];
13、刪除文件:
[fileManager removeItemAtPath:fileName error:nil];
掌握以上沙盒目錄結構與NSFileManager的常用操作,就能從容應對iOS開發中絕大多數的文件讀寫需求。