
iOS 瀑布流實作:自定義 UICollectionViewLayout
編輯:iOS 相關教學
UICollectionView 比 tableView 靈活,功能也強大得多。系統雖然提供了流式布局,但實際用途還有很多限制。
想實現更靈活的布局,就得重寫 UICollectionViewLayout。先看實現效果:
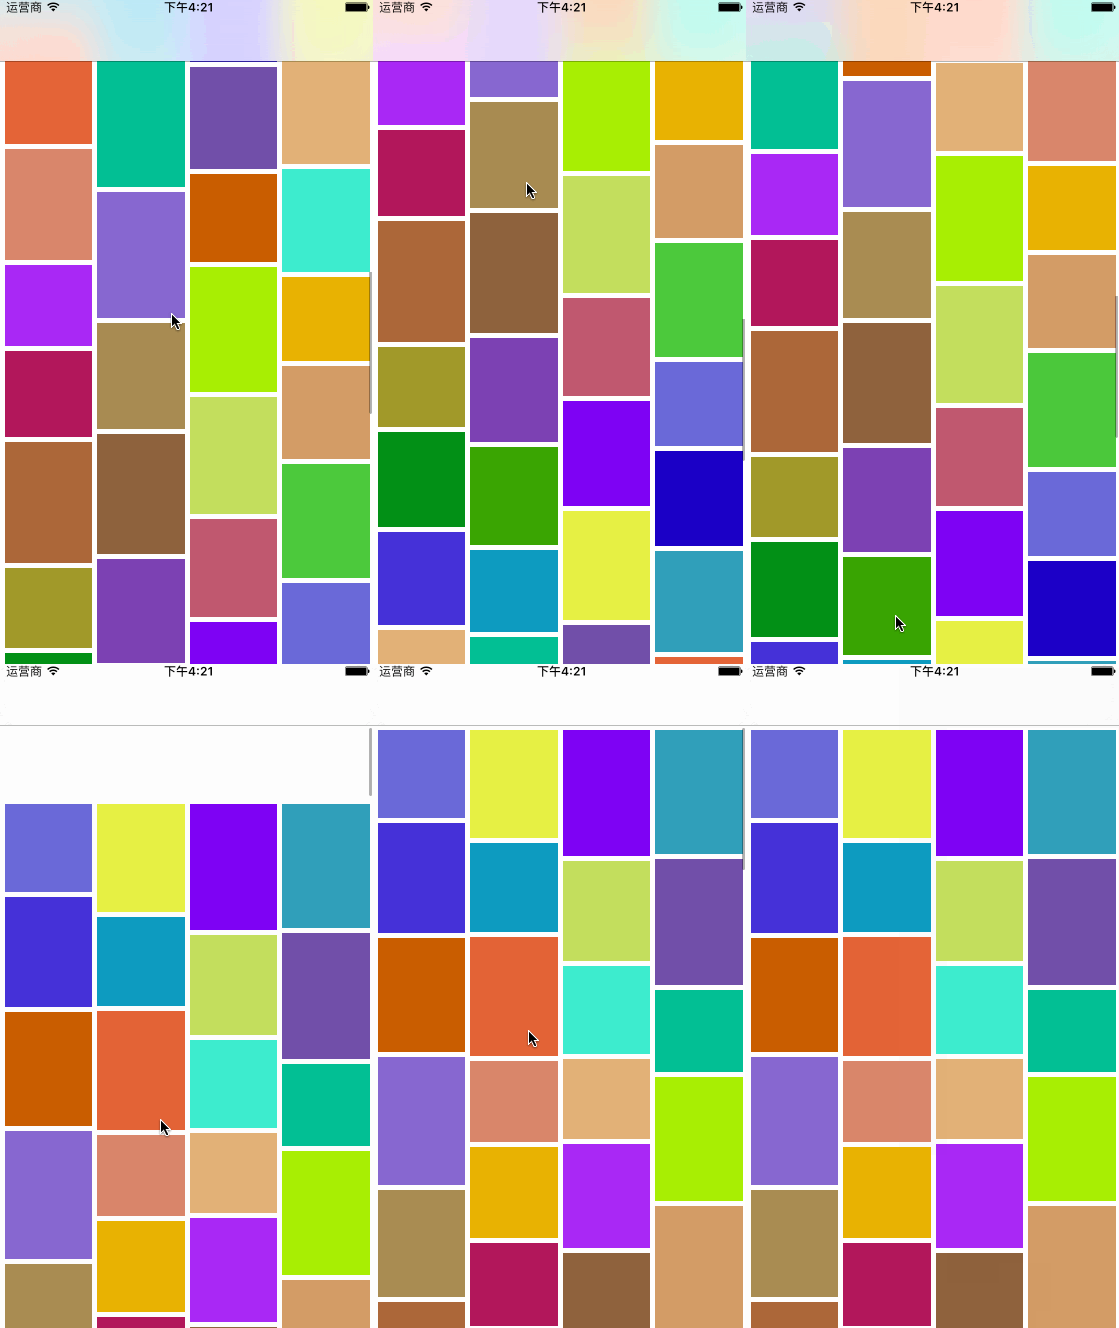
直接上代碼。先看 WaterfallCollectionLayout.h:
#import <UIKit/UIKit.h>

#define colMargin 5
#define colCount  4
#define rolMargin 5

@interface WaterfallCollectionLayout ()

// 數組存放每列的總高度
@property(nonatomic, strong) NSMutableArray * colsHeight;

// 單元格寬度
@property(nonatomic, assign) CGFloat colWidth;

@end
這個類需要重寫以下方法:
// 完成布局前的初始工作
-(void)prepareLayout;

// collectionView 的內容尺寸
-(CGSize)collectionViewContentSize;

// 為每個 item 設置屬性
-(UICollectionViewLayoutAttributes *)layoutAttributesForItemAtIndexPath:(NSIndexPath *)indexPath;

// 獲取指定範圍內所有 item 的屬性
-(NSArray<UICollectionViewLayoutAttributes *> *)layoutAttributesForElementsInRect:(CGRect)rect;

-(BOOL)shouldInvalidateLayoutForBoundsChange:(CGRect)newBounds;
prepareLayout:每次調用會先清空 colsHeight 裡的信息,並重新計算列寬。
// 完成布局前的初始工作
-(void)prepareLayout{
    [super prepareLayout];

    self.colWidth = (self.collectionView.frame.size.width - (colCount + 1) * colMargin) / colCount;

    // 讓它重新加載
    self.colsHeight = nil;
}
collectionViewContentSize:遍歷所有列,找出最長的那一列,作為內容高度。
// collectionView 的內容尺寸
-(CGSize)collectionViewContentSize{
    NSNumber * longest = self.colsHeight[0];

    for (NSInteger i = 0; i < self.colsHeight.count; i++) {
        NSNumber * rolHeight = self.colsHeight[i];
        if (longest.floatValue < rolHeight.floatValue) {
            longest = rolHeight;
        }
    }

    return CGSizeMake(self.collectionView.frame.size.width, longest.floatValue);
}
layoutAttributesForItemAtIndexPath: 每個 cell 即將出現時都會調用,在此設置它的 frame。核心思路是:每次把新 cell 放到當前最矮的那一列,然後更新該列高度。
注意 heightBlock 是外部控制器傳進來的 block,用於計算每個 cell 的高度。這裡為了演示用的是隨機數;若沒有傳 block 進來,這裡會直接崩潰。
// 為每個 item 設置屬性
-(UICollectionViewLayoutAttributes *)layoutAttributesForItemAtIndexPath:(NSIndexPath *)indexPath{
    UICollectionViewLayoutAttributes * attr =
        [UICollectionViewLayoutAttributes layoutAttributesForCellWithIndexPath:indexPath];

    // 找出當前最矮的那一列
    NSNumber * shortest = self.colsHeight[0];
    NSInteger shortCol = 0;

    for (NSInteger i = 0; i < self.colsHeight.count; i++) {
        NSNumber * rolHeight = self.colsHeight[i];
        if (shortest.floatValue > rolHeight.floatValue) {
            shortest = rolHeight;
            shortCol = i;
        }
    }

    CGFloat x = (shortCol + 1) * colMargin + shortCol * self.colWidth;
    CGFloat y = shortest.floatValue + colMargin;

    // 獲取 cell 高度
    CGFloat height = 0;
    NSAssert(self.heightBlock != nil, @"未實現計算高度的 block");
    if (self.heightBlock) {
        height = self.heightBlock(indexPath);
    }

    attr.frame = CGRectMake(x, y, self.colWidth, height);

    // 更新該列的累積高度
    self.colsHeight[shortCol] = @(shortest.floatValue + colMargin + height);

    return attr;
}
layoutAttributesForElementsInRect:
// 獲取所有 item 的屬性
-(NSArray<UICollectionViewLayoutAttributes *> *)layoutAttributesForElementsInRect:(CGRect)rect{
    NSMutableArray * array = [NSMutableArray array];
    NSInteger items = [self.collectionView numberOfItemsInSection:0];

    for (int i = 0; i < items; i++) {
        UICollectionViewLayoutAttributes * attr =
            [self layoutAttributesForItemAtIndexPath:[NSIndexPath indexPathForItem:i inSection:0]];
        [array addObject:attr];
    }

    return array;
}
實現下面這個方法,會在出現新 cell 時觸發重新布局並調用 prepareLayout:
-(BOOL)shouldInvalidateLayoutForBoundsChange:(CGRect)newBounds{
    return YES;
}
每列高度的初始化,初始值這裡設為 0:
-(NSMutableArray *)colsHeight{
    if(!_colsHeight){
        NSMutableArray * array = [NSMutableArray array];
        for(int i = 0; i < colCount; i++){
            // 這裡可以設置初始高度
            [array addObject:@(0)];
        }
        _colsHeight = [array mutableCopy];
    }
    return _colsHeight;
}
控制器裡的用法就簡單多了:
#pragma mark getter-setter

-(UICollectionView *)collectionView{
    if(!_collectionView){
        _collectionView = [[UICollectionView alloc] initWithFrame:self.view.frame
                                            collectionViewLayout:self.layout];
        _collectionView.backgroundColor = [UIColor whiteColor];
        _collectionView.delegate   = self;
        _collectionView.dataSource = self;
        [_collectionView registerClass:[CollectionViewCell class]
          forCellWithReuseIdentifier:identifer];
    }
    return _collectionView;
}

-(UICollectionViewLayout *)layout{
    if(!_layout){
        _layout = [[WaterfallCollectionLayout alloc] initWithItemsHeightBlock:^CGFloat(NSIndexPath *index) {
            return [self.heightArr[index.item] floatValue];
        }];
    }
    return _layout;
}

-(NSArray *)heightArr{
    if(!_heightArr){
        // 隨機生成高度
        NSMutableArray *arr = [NSMutableArray array];
        for (int i = 0; i < 100; i++) {
            [arr addObject:@(arc4random() % 50 + 80)];
        }
        _heightArr = [arr copy];
    }
    return _heightArr;
}
關於瀑布流的文章特別多,本文分享的是 iOS 中用自定義 UICollectionViewLayout 實現瀑布流的方法,希望對大家的學習有所幫助。