
詳解 iOS 中 UITabBarController 元件的基本用法
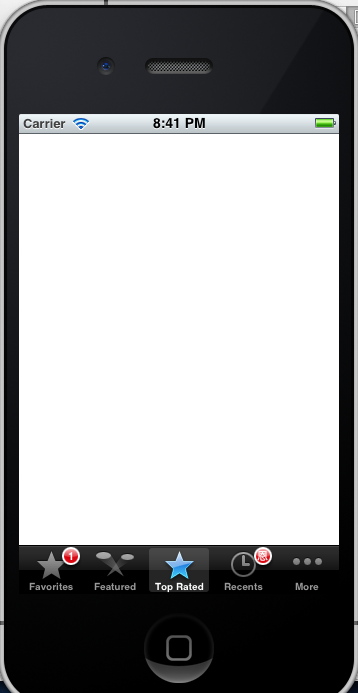
UITabBarController 絕對是專案架構時最常用到的容器型控制元件之一。看過它的效果圖,就能理解為什麼它如此普遍。
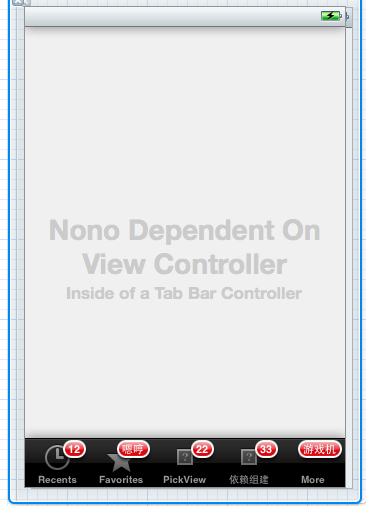
這是最簡單的雛形,而目前大約七成以上的應用界面結構都是這種樣子。在 Android 中以 ActivityGroup 或 Fragment 來實現「一個容器裝多個子頁面」,iOS 則直接由 UITabBarController 承擔。
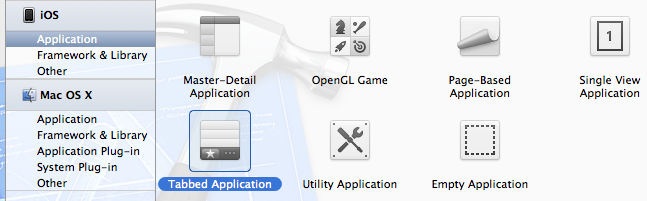
Xcode 雖然提供了現成模板,但模板會直接在程式碼中完成子界面的組裝,對 item、tabbar 的圖片文字要如何自定義反而不好找。改用 xib 手動搭建,結構會清楚很多。下面從最基礎的 Empty Application 開始,一步步做出整體布局。
一、建立 MainWindow.xib 並綁定 AppDelegate
先建立一個 Empty Application,然後新增一個 MainWindow.xib(名稱可自訂,但依慣例保留這個名字),作為應用啟動時載入的首個 nib 文件。新建時選擇 window 模板即可。
接著把 AppDelegate 與這個 xib 連接起來,將 .h 定義為:
#import <UIKit/UIKit.h>

@interface NonoAppDelegate : UIResponder <UIApplicationDelegate>
{
    UIWindow *window;
    UITabBarController *tabTarController;
}

// 該控件模板生成時不帶 IBOutlet,為了與 xib 布局保持一致,這裡也加上並連線
@property (retain, nonatomic) IBOutlet UIWindow *window;
@property (retain, nonatomic) IBOutlet UITabBarController *tabTarController;

@end
二、在 xib 中完成連線
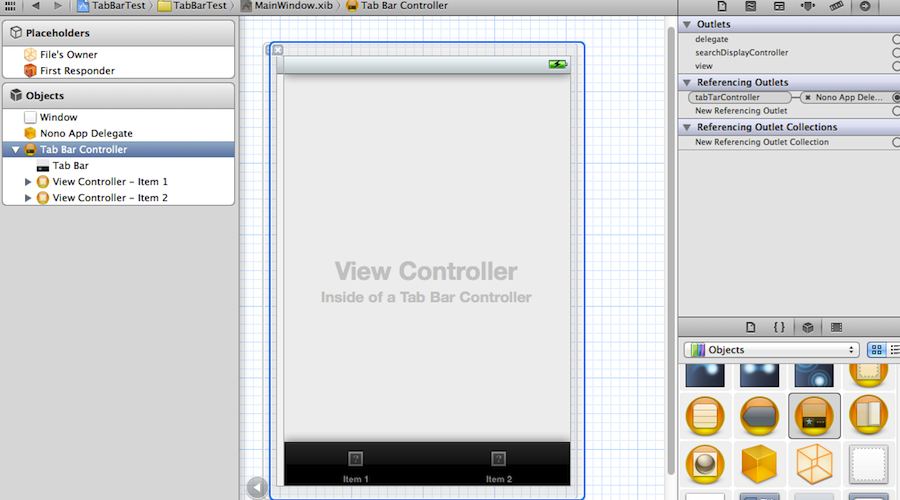
打開 MainWindow.xib,會看到 File's Owner、First Responder 以及 Objects 下的 window。操作步驟如下:
- 選中 File's Owner,在右側 Identity Inspector 中把 Custom Class 從
NSObject改成UIApplication,此時 File's Owner 會多出一個 delegate 輸出口。 - 從右側元件庫拖一個 Object 到 Objects 標籤下,把它的 Custom Class 設為
NonoAppDelegate。 - 點擊 File's Owner,把 delegate 輸出口連到剛才的 NonoAppDelegate 物件。
- 選中 NonoAppDelegate,此時右側 Outlets 會列出 .h 中宣告的兩個輸出口。window 已經存在,再從元件庫拖一個
UITabBarController進來,分別把兩個輸出口連到對應物件。
做到這裡,最基本的 tab bar 框架就完成了。
三、在 AppDelegate 中啟動
#import "NonoAppDelegate.h"

@implementation NonoAppDelegate

@synthesize window;
@synthesize tabTarController;

- (void)dealloc {
    [self.window release];
    [self.tabTarController release];
    [super dealloc];
}

- (BOOL)application:(UIApplication *)application didFinishLaunchingWithOptions:(NSDictionary *)launchOptions {
    self.window.backgroundColor = [UIColor whiteColor];
    self.window.rootViewController = self.tabTarController;
    [self.window makeKeyAndVisible];
    return YES;
}
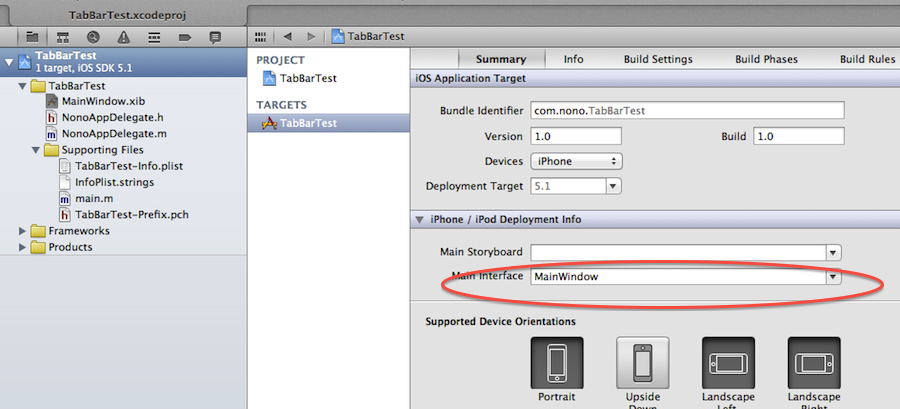
理論上此時啟動模擬器應該就能看到界面,但實際跑起來卻是一片空白。原因出在 main.m:
int main(int argc, char *argv[]) {
    @autoreleasepool {
        return UIApplicationMain(argc, argv, nil, NSStringFromClass([NonoAppDelegate class]));
    }
}
第四個參數指定了 AppDelegate,但 xib 在反序列化時已經會實例化一個 delegate 物件並連到 AppDelegate 類別,等於同一個類被實例化了兩次,MainWindow.xib 自然沒有被載入。把第四個參數改回 nil,讓系統依照 xib 中的設定自行建立即可:
int main(int argc, char *argv[]) {
    @autoreleasepool {
        return UIApplicationMain(argc, argv, nil, nil);
    }
}
四、UITabBarController 的結構
從界面上就能推測出這個元件大致包含:一組子控制器的管理清單、底部的切換條 tabBar,以及一個 delegate 代理物件。在 xib 中會看得很直觀:
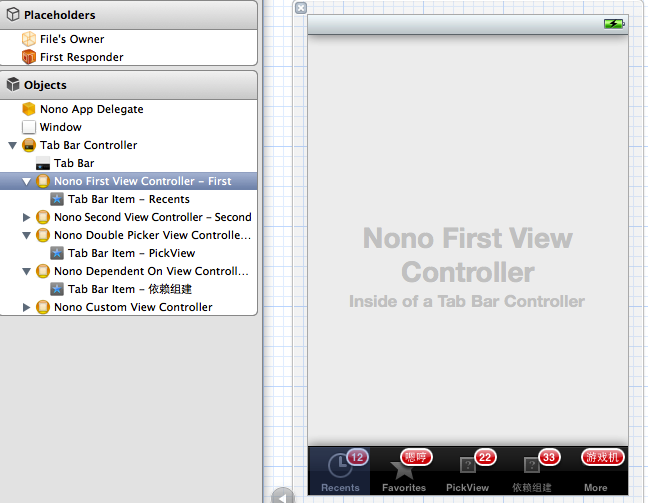
- Tab Bar 裡放的是一個或多個
UITabBarItem組成的陣列,每個 item 對應一個 ViewController。 - 下面的 First、Second 等就是各個 item 對應的 Controller。拖入一個 TabBarItem 後,通常要指定對應的
XXXController.xib。
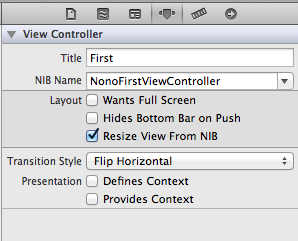
接著別忘了把 Custom Class 改成對應的 XXXXController,因為預設類別是 UIViewController,不改的話啟動後會報錯。
- 每個 tabBarItem 都可以設定 title、系統預設圖示、自定義圖示,以及 badgeValue(標籤上的紅色數字角標)。
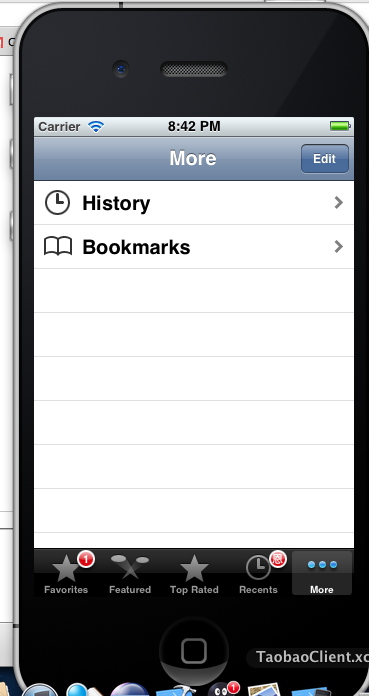
- 當底部按鈕超過 5 個時,系統會自動多出一個 More 按鈕,點擊後顯示其餘項目。
五、加上左右滑動切換標籤頁
建議把下面的手勢程式碼寫進所有分頁共用的基底類別中:
// ViewDidLoad
UISwipeGestureRecognizer *swipeLeft = [[UISwipeGestureRecognizer alloc] initWithTarget:self
                                                                                 action:@selector(tappedRightButton:)];
[swipeLeft setDirection:UISwipeGestureRecognizerDirectionLeft];
[self.view addGestureRecognizer:swipeLeft];

UISwipeGestureRecognizer *swipeRight = [[UISwipeGestureRecognizer alloc] initWithTarget:self
                                                                                  action:@selector(tappedLeftButton:)];
[swipeRight setDirection:UISwipeGestureRecognizerDirectionRight];
[self.view addGestureRecognizer:swipeRight];
再補上兩個帶翻轉動畫的處理方法:
- (IBAction)tappedRightButton:(id)sender {
    NSUInteger selectedIndex = [self.tabBarController selectedIndex];
    NSArray *aryViewController = self.tabBarController.viewControllers;

    if (selectedIndex < aryViewController.count - 1) {
        UIView *fromView = [self.tabBarController.selectedViewController view];
        UIView *toView = [[self.tabBarController.viewControllers objectAtIndex:selectedIndex + 1] view];
        [UIView transitionFromView:fromView
                           toView:toView
                         duration:0.5f
                          options:UIViewAnimationOptionTransitionFlipFromRight
                       completion:^(BOOL finished) {
                           if (finished) {
                               [self.tabBarController setSelectedIndex:selectedIndex + 1];
                           }
                       }];
    }
}

- (IBAction)tappedLeftButton:(id)sender {
    NSUInteger selectedIndex = [self.tabBarController selectedIndex];

    if (selectedIndex > 0) {
        UIView *fromView = [self.tabBarController.selectedViewController view];
        UIView *toView = [[self.tabBarController.viewControllers objectAtIndex:selectedIndex - 1] view];
        [UIView transitionFromView:fromView
                           toView:toView
                         duration:0.5f
                          options:UIViewAnimationOptionTransitionFlipFromLeft
                       completion:^(BOOL finished) {
                           if (finished) {
                               [self.tabBarController setSelectedIndex:selectedIndex - 1];
                           }
                       }];
    }
}
如此一來,使用者既能點擊底部 tab 切換,也能用左右滑動搭配翻頁動畫切換,操作體驗會更完整。